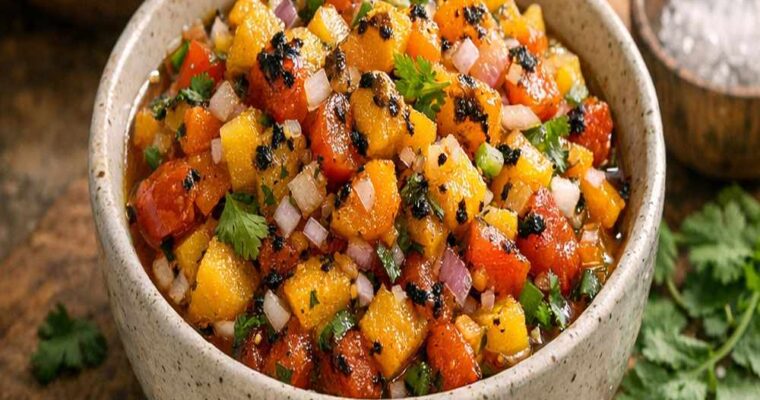
Roasted Habanero Mango Salsa Recipe
Learn how to make Roasted Habanero Mango Salsa Recipe
When summer arrives, the grill starts getting a workout. I can’t help but whip up my favorite grilled chicken, especially when it’s paired with my Fresh Pineapple Salsa. Its bright flavors and zesty kick make it the ideal companion to grilled meats. Each bite feels …
When I think about dishes that pair beautifully with a hearty main course, French fried parsnips are right up there on the list. Whether you’re serving up grilled chicken, a savory roast, or simply a generous veggie platter, these golden, crispy delights steal the show.
They’re not just a side; they bring a delightful twist that your guests will rave about. I can’t tell you how many times I’ve served these alongside my famous herb-roasted chicken and watched everyone reach for seconds.

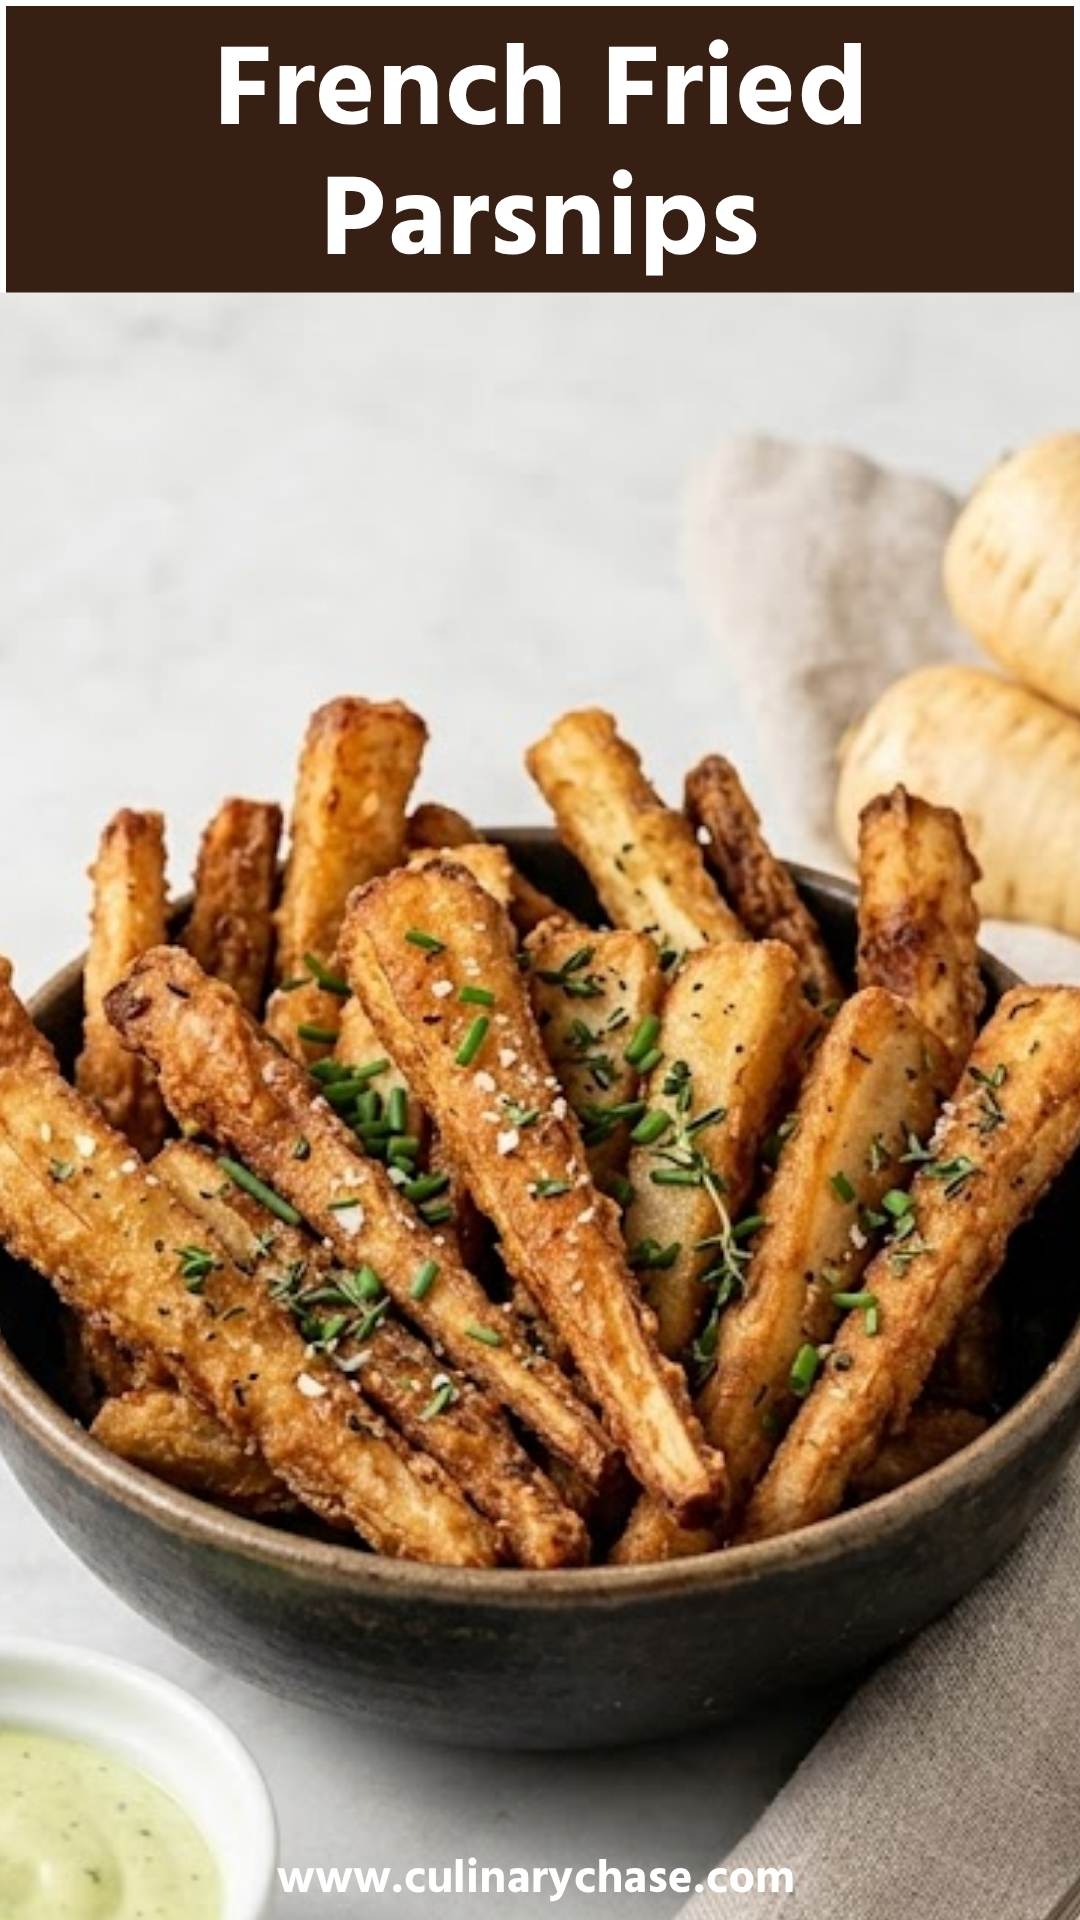
French fried parsnips might just be the hidden gem in your kitchen repertoire. They are delightfully crispy on the outside yet tender on the inside, transforming this earthy root vegetable into a tasty side that complements a variety of dishes.
I first stumbled upon this recipe while trying to incorporate more veggies into my meals. I had some parsnips in my fridge, and after a few experiments, I found the perfect way to fry ’em up. Trust me, you’ll want to add this to your rotation!
French Fried Mashed Potatoes Recipe
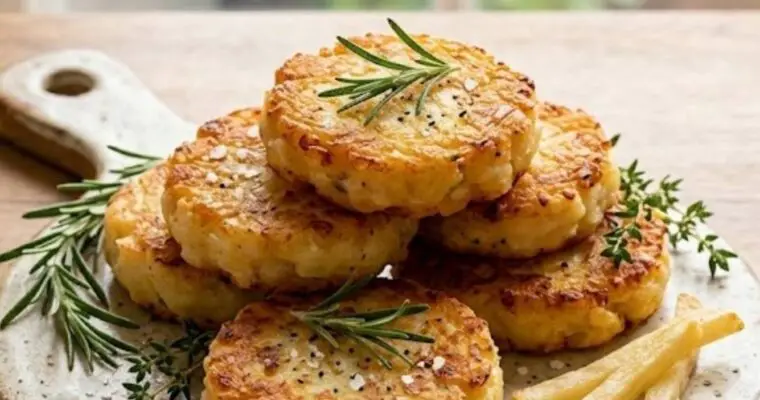
French fried parsnips are essentially parsnip slices, seasoned and roasted until they achieve a crispy golden exterior. The technique is simple but effective: they provide a crunch reminiscent of fries, while delivering the unique, sweet, and nutty flavor that parsnips offer. Whether you’re trying to impress guests or just want a tasty snack, this dish is a fantastic option.
What sets my version of French fried parsnips apart is the blend of fresh spices and the generous sprinkle of Parmesan cheese. While many recipes stick to basic salt and pepper, this one incorporates garlic powder and turmeric for an added flavor punch. Plus, the use of high-quality olive oil brings depth to every bite. Not to mention, I’ll share my secret to achieving that perfect crunch without deep frying, making this dish both healthier and equally satisfying.
Picture biting into a golden parsnip fry—the crunch resonates as you taste the warm, slightly sweet root mingling with savory garlic and cheese. The subtle earthy notes from the turmeric peek through, enhancing the overall flavor without overpowering it. They’re not just fries; they offer a complex profile that keeps you coming back for more.

Here’s what you’ll need to whip up these crispy delights:
– 3-4 large parsnips
– ¼ cup olive oil or avocado oil
– 1 tsp garlic powder
– 1 tsp minced garlic
– ½ tsp turmeric
– Sea salt, to taste
– 2 tbsp grated Parmesan cheese
– 1 tsp paprika (a delightful addition for extra warmth)
– Fresh parsley for garnish (adds color and fresh flavor)
Ingredients From : bucketlisttummy.com
Making French fried parsnips is simple and quick. Follow along as I break it down step-by-step to ensure your fries come out perfectly crispy and full of flavor.

Before anything else, preheat your oven to 400°F (200°C). This temperature is key for achieving that crunch you want. A hot oven will help the fries crisp up nicely.

Begin by washing and peeling the parsnips under cool running water. Once they’re clean and peeled, slice them into even sticks; around half an inch thick works well. You want them to cook evenly, so keeping them uniform is essential.

In a mixing bowl, add the parsnip sticks. Drizzle in the olive oil and toss them to coat thoroughly. Next, sprinkle in the garlic powder, minced garlic, turmeric, paprika, and sea salt. Mix until all the parsnips are evenly seasoned. The colors in the bowl will be beautiful, promising deliciousness!

Spread the seasoned parsnips out in a single layer on a baking sheet lined with parchment paper. Avoid overcrowding; letting them breathe helps them get crispy.

Pop the baking sheet into the oven and set a timer for 15 minutes. When the time’s up, take out the sheet and carefully flip the parsnips using a spatula. Now, sprinkle Parmesan cheese on top—it will melt and create a lovely savory crust.

Return the baking sheet to the oven and bake for an additional 15 minutes. Keep an eye on them toward the end to ensure they turn a gorgeous golden brown. When they’re perfectly crispy, take them out and let them cool for a few minutes before serving.
– Uniform Slices: Ensure your parsnip slices are even for consistent cooking.
– Use Parchment Paper: Line your baking sheet for easy cleanup and to prevent sticking.
– Crispier Finish: If you want extra crispiness, broil them for a couple of minutes at the end, but keep an eye to prevent burning.
– Flavor Variations: Experiment with different spices like smoked paprika or dried rosemary for varied taste profiles.
– Batch Cooking: Feel free to double the recipe; they keep well for reheating and are perfect for meal prep!
If you happen to have leftovers (which I doubt, because they’re that good!), simply store them in an airtight container in the fridge for up to three days. Reheat in an oven or air fryer to regain crispiness. Microwaving them will make them soggy, and nobody wants that!
Here are five delightful ways to serve your French fried parsnips:
– With Dips: Pair them with a zesty garlic aioli or a classic ranch dressing for a satisfying snack.
– As a Side Dish: They complement grilled proteins like chicken or fish beautifully.
– On Salads: Top a fresh green salad with crispy parsnips for added crunch and flavor.
– In Wraps: Slice them up and toss into a wrap with greens, hummus, and your favorite protein.
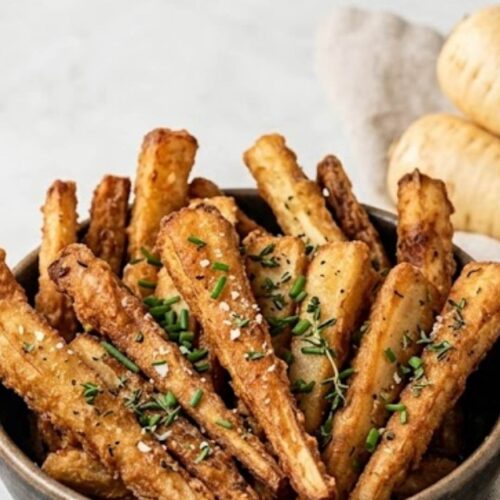
– Garnished: Sprinkle with fresh herbs, such as parsley or chives, to add that pop of color and flavor.
If you want to switch things up, consider these alternatives:
– Sweet Potatoes – Swap parsnips for sweet potatoes for a sweeter flavor.
– Carrots – Carrots can provide a similar texture and flavor profile.
– Zucchini – Use zucchini for a lighter option; just adjust cooking time as it cooks faster.
– Cauliflower – Cut cauliflower into florets for a low-carb alternative; bake until golden.
– Eggplant – Sliced eggplant can also work beautifully with the same seasonings.
1. Can I use frozen parsnips?
Yes, but they might not get as crispy. It’s best to use fresh ones for optimal texture.
2. What if I don’t have Parmesan cheese?
You can omit it or substitute with nutritional yeast for a dairy-free option.
3. Can I air fry these parsnips instead?
Absolutely! Air frying works great. Cook at 375°F for about 15-20 minutes, shaking halfway through.
4. Are parsnips healthy?
Yes! They are rich in fiber and vitamins while being lower in calories compared to potatoes.
5. How can I make this dish vegan?
Simply skip the Parmesan cheese or use a vegan parmesan alternative.
French fried parsnips bring a delightful twist to your usual vegetable side dish lineup. Their crispy texture, combined with savory spices and cheese, creates a dish that pleases everyone at the table.
So next time you’re in the mood for something a little different, grab a few parsnips and give this recipe a whirl. You might just find your new favorite way to enjoy this underrated veggie! Happy cooking!
Picture this: it’s a sunny Saturday afternoon, and you’re gathering with friends and family for a cozy barbecue in your backyard. As the grills sizzle and laughter floats through the air, the last thing you want is just another boring side dish. Enter the French …
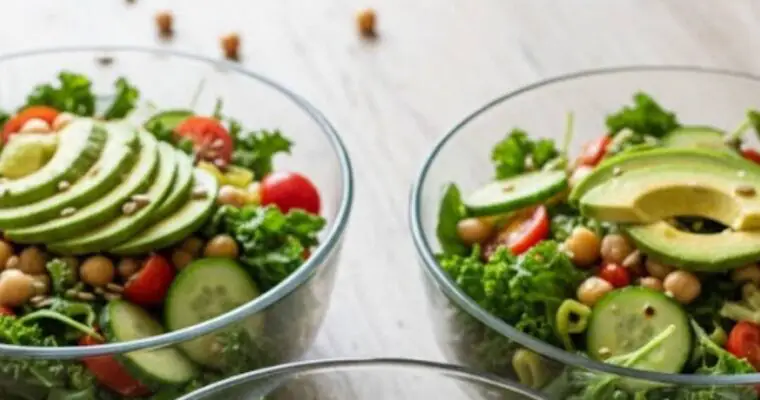
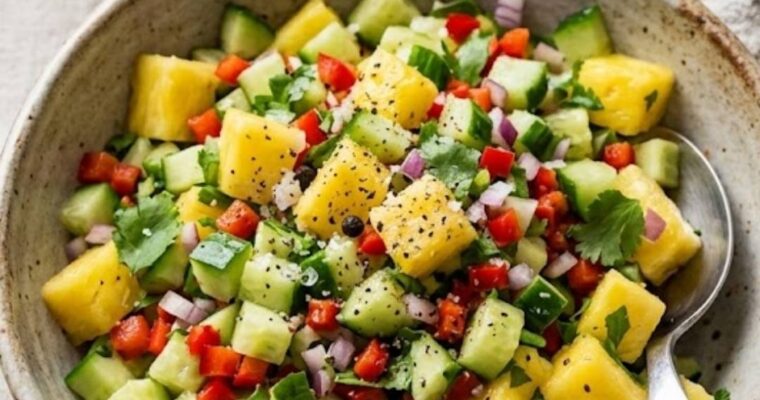
When it’s summertime, there’s nothing I enjoy more than firing up the grill and unfurling picnic blankets in the great outdoors. What pairs beautifully with grilled chicken or fish, or even a spread of fresh cheeses and charcuterie? A colorful, refreshing salad. Picture this: my …
Picture this: you’re hosting a family barbecue, and there’s a delightful aroma wafting from the grill. Juicy burgers sizzle beside skewered vegetables, and your friends are mingling, drinks in hand. What completes this outdoor feast?
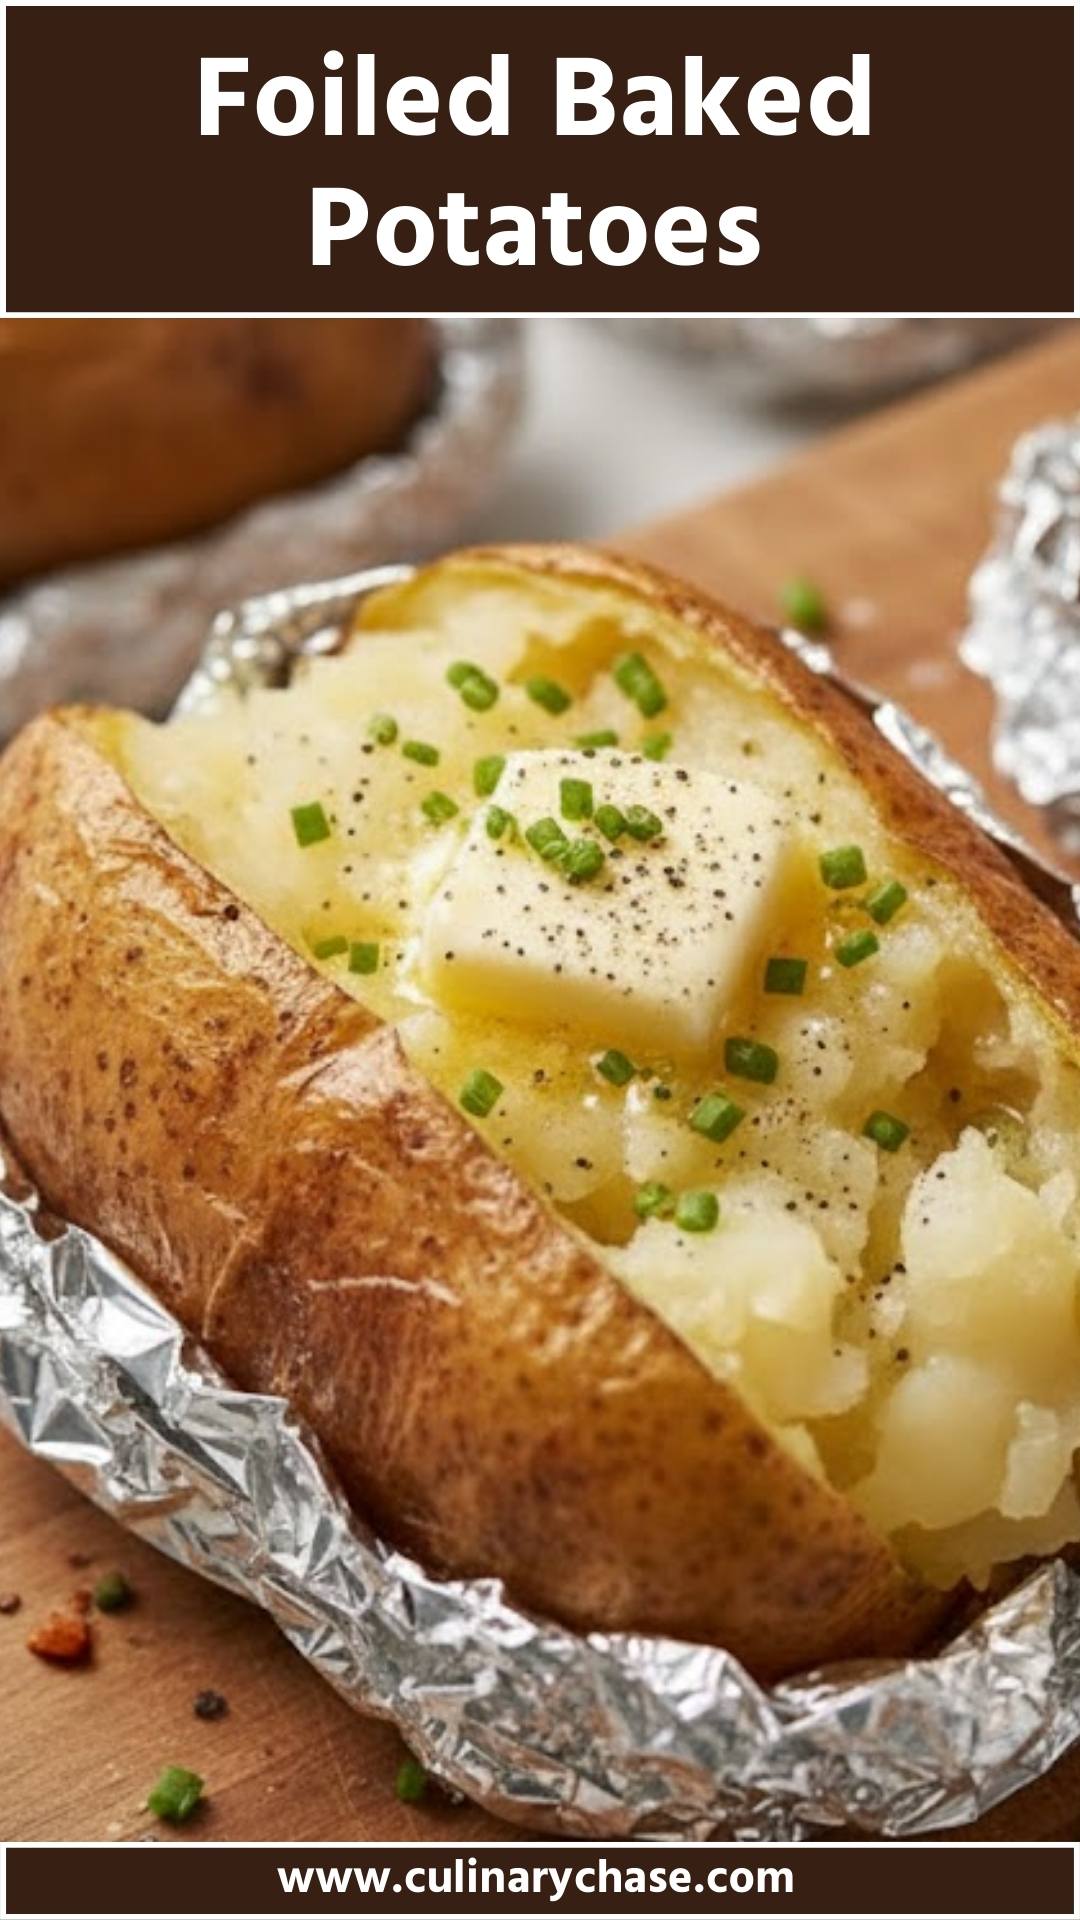
Foiled baked potatoes. Trust me, they hold their own when paired with grilled meats, vibrant salads, or that creamy coleslaw you’ve been dying to make. Everyone loves a baked potato, right? Here, you can create your own flavor masterpiece on a simple potato canvas.

Foiled baked potatoes are a classic American side dish that everyone can agree on. They’re soft on the inside and can be seasoned however you like. What’s not to love? With their versatility and delicious simplicity, they are a perfect option for anyone looking to elevate their cooking game.
Whether you’re serving them alongside grilled meats, or just making them for a cozy night in, these potatoes shine bright.
Flowerchild Cauliflower Risotto Recipe
Foiled baked potatoes are medium-sized potatoes wrapped in aluminum foil and baked until they are tender and fluffy. The foil traps steam and moisture inside, ensuring the potatoes cook evenly while keeping them flavorful. I love baking them because you get that warm, comforting bite with virtually no fuss. You just toss them in the oven and let them do their thing!
You’ll love foiled baked potatoes because they are not only incredibly simple to prepare but also delightfully customizable. You can pile on toppings—think sour cream, cheddar cheese, bacon bits, or even chili—creating a new dish each time. Plus, if you have kids in the house, they can help out with the assembly. They’ll appreciate transforming plain potatoes into little bundles of joy.

Here’s what you need to prepare these mouthwatering foiled baked potatoes:
– 4 medium-sized baking potatoes, thoroughly scrubbed
– 4 tablespoons of butter
– 2 teaspoons of salt
– 4 teaspoons of garlic powder
– 1 teaspoon of fresh cracked pepper
– 4 strips of crispy bacon, crumbled (optional)
– 4 squares of aluminum foil, about 12×12 inches each
Those few additional ingredients take the flavor up a notch without overpowering the potatoes themselves.
Ingredients From : allrecipes.com
Making foiled baked potatoes is easy and requires just a few simple steps. Let’s break it down so you can get to enjoying those fluffy spuds in no time.

First things first, gather all your ingredients. It always helps to have everything on hand to make the cooking experience smoother. Grab your baking potatoes, butter, seasonings, and that aluminum foil.

Go ahead and preheat your oven to 400 degrees F (200 degrees C). A warm oven is crucial for cooking those potato beauties to perfection.

Take each potato and cut it in half lengthwise. This provides a nice surface area for seasoning. Set them aside after making those beautiful cuts!

Now, you need to bring life to those potato halves. Place 1 tablespoon of butter on the cut side of each half. Next, sprinkle with garlic powder, salt, and fresh cracked pepper. If you’re feeling adventurous, toss in some crumbled bacon for an extra crunch. This combination brings so much flavor and heartiness!

Once seasoned, close the potato halves back together and wrap each tightly in a square of aluminum foil. Make sure they are fully sealed. You don’t want any steam escaping while they bake, so take a moment to really crimp that foil down.

Finally, place the foil-wrapped potatoes directly on the oven rack. Bake for 40 to 60 minutes, depending on the size of the potatoes. You’ll know they’re done when a fork slides in effortlessly.
– Pick the Right Potatoes: For consistent cooking, choose potatoes of similar size.
– Seasoning Variations: Feel free to experiment with your favorite spices or seasoning blends!
– Don’t Rush It: The longer you bake, the fluffier your potatoes will be.
– Double Wrap Them: For extra moisture, you can wrap each potato in two layers of foil.
– Check Them: About 40 minutes into cooking, give them a little poke with a fork to gauge tenderness.
Absolutely! If you have any leftovers, let the potatoes cool down, then unwrap and store them in an airtight container in the fridge. They’ll keep fresh for 3 to 5 days. Reheat in the microwave or the oven when you’re ready to enjoy again.
Here are some delicious options to accompany your baked potatoes:
– Grilled Chicken: Tender and juicy pieces of grilled chicken create a wholesome pairing.
– Steak: A perfectly cooked steak pairs greatly with the fluffiness of the potato—talk about a match made in heaven.
– Veggie Burgers: For a vegetarian option, serve with hearty veggie burgers topped with all your favorite fixings.
– Barbecue Ribs: Sticky, finger-licking barbecue ribs add a delightful contrast in flavors.
– Chili: Serve a bowl of spicy chili alongside; it makes for a comforting combination that warms you right up!
If you want to switch things up a bit, consider these substitutes:
– Sweet Potatoes: For a nutritious alternative, use sweet potatoes instead. They add a lovely sweetness.
– Olive Oil: Swap out butter for olive oil. Drizzle it on the potatoes for a heart-healthy option.
– Seasoned Salt: Use seasoned salt in place of plain salt for an added flavor punch.
– Cheese: Top potatoes with cheese before wrapping for a cheesy surprise inside.
– Herbs: Fresh herbs can be included—try rosemary or thyme for a fragrant addition.

1. Can I make these in an air fryer?
Yes! Wrap your potatoes in foil and cook in the air fryer at 400 degrees F for about 35-40 minutes.
2. What kind of potatoes should I use?
Russet potatoes are a classic choice due to their fluffy texture when baked. You could also use Yukon Gold for a creamier bite.
3. Can I add toppings before baking?
It’s best to add toppings after they’re baked to maintain their texture and flavor.
4. Can I freeze foiled baked potatoes?
While you can freeze potatoes, it’s better to freeze baked ones without the foil. Wrap them tightly and store; they’ll keep for about a month.
5. How can I tell when my potatoes are done?
You can poke them with a fork; if it glides in effortlessly, they are done!
To wrap things up, foiled baked potatoes are one of those classic recipes that never disappoint. They’re easy to prepare, allow for creativity, and perfectly complement any meal. This is the kind of recipe that you can whip up without a second thought, and you’re guaranteed to enjoy every fluffy, buttery bite.
So, fire up the oven, gather your ingredients, and get ready for a delightful addition to your next meal!
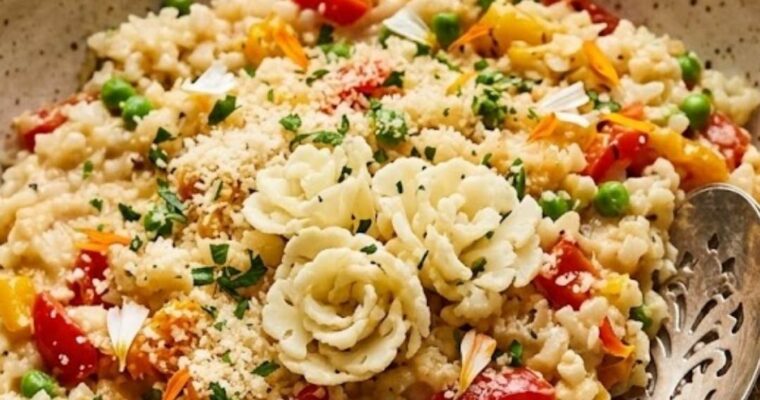
When I’m planning a cozy dinner with friends or family, I love to pair my dishes with something hearty yet delightful. Enter flowerchild cauliflower risotto—a dish that complements grilled chicken or fish beautifully. The creamy texture and rich flavor make it an ideal partner for …

There’s nothing quite like the aroma of hot, crispy fries to accompany a summer barbecue, right? Picture this: You’re grilling burgers, and the next thing you know, everyone’s asking, “Are the fries ready yet?” Let me tell you, these floured fries are the perfect side …
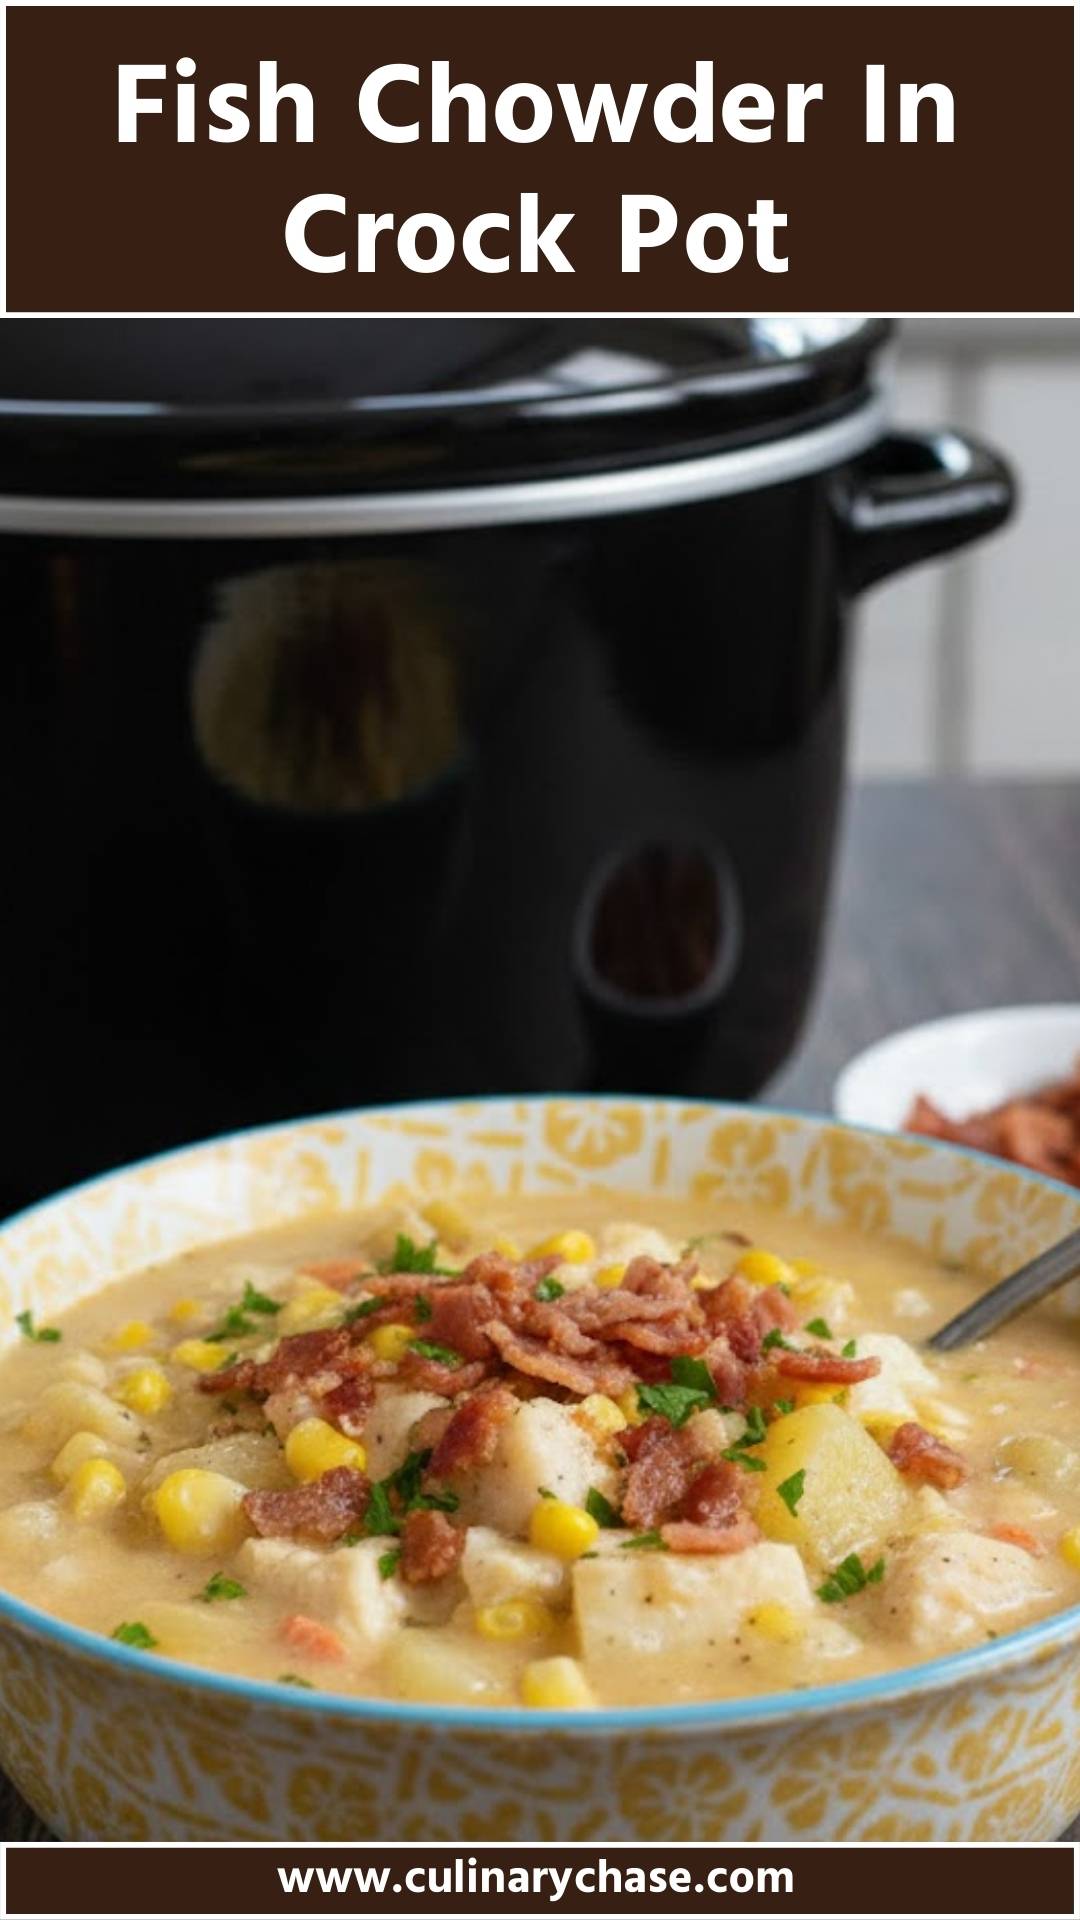
You know those days when you crave something warm and comforting but want minimal fuss in the kitchen? That’s when I turn to my trusty crock pot and whip up a comforting bowl of fish chowder. Pair it with some crusty bread or a fresh green salad, and you’ve got yourself a meal that will soon be a favorite in your household.
Picture this: rich, creamy chowder laden with tender pieces of crabmeat, potatoes, and a hint of seasoning. It’s a bowl of warmth that reminds you of seaside picnics, even if it’s just a Tuesday night at home.

Let me introduce you to my version of fish chowder made conveniently in a crock pot. This dish is not just a meal; it’s a warm hug in a bowl. You throw in some wholesome ingredients, set the timer, and off you go! Whether you’re looking to impress guests or provide a hearty meal for your family, this recipe is straightforward and forgiving.
Plus, it offers the versatility to be served any time of the year.
Fish chowder is a creamy soup that combines the richness of seafood with classic ingredients like potatoes and corn. It’s hearty and satisfying, perfect for chilly evenings or whenever you need a comforting bowl of goodness. By using a crock pot, you not only save time but also allow the flavors to meld beautifully, creating a dish that’s as simple as it is delicious.

Here’s what you’ll need for a delightful fish chowder in a crock pot:
– 1 ½ pounds potatoes, peeled and diced into bite-sized pieces
– 8 ounces frozen corn (about 1.5 cups)
– 4 cups chicken or seafood broth
– 1 ½ pounds crab meat (fresh or canned)
– ½ cup all-purpose flour
– 1 teaspoon Cajun seasoning
– ½ teaspoon smoked paprika
– 12 ounces evaporated milk (1 can)
– 1 small onion, finely chopped
– 1 tablespoon fresh dill, chopped (or 1 teaspoon dried)
– Salt and pepper, to taste
This list has everything you need to build layers of flavor while keeping it simple. The addition of fresh dill enhances the brininess of the crab, and don’t worry about being exact with your seasonings; this recipe is very forgiving!
Ingredients From : homemadeandyummy.com
Are you ready to dive into making the easiest and most satisfying chowder ever? Follow along with these simple steps to craft your masterpiece in no time.

Start by washing and peeling your potatoes. Then, dice them into bite-sized pieces. You want them to be about the same size so they cook evenly. Once they are all cubed, toss them into your slow cooker as a base for your chowder.

Next, grab that frozen corn and add it directly to the slow cooker. We’re using frozen corn here for convenience, but feel free to substitute with fresh corn in the summer months! Sprinkle the flour over the potatoes and corn, tossing everything to make sure the veggies are coated. This step will help thicken your chowder.

Now it’s time to jazz things up with the seasonings. Sprinkle the Cajun seasoning and smoked paprika over the mixture, then pour in your broth. This is where the magic starts to happen. Give everything a good stir to combine, cover the crock pot, and set it on HIGH for about 3 hours. If you have more time, you can also cook it on LOW for 6 hours.

After the initial cooking time, it’s time for the final touch. Switch the crock pot to LOW. Pour in the evaporated milk and gently fold in the crab meat. Cover and let it cook for an additional 60 minutes. Not only will this allow the flavors to mingle, but it will also give the chowder a wonderful creamy texture.

Once the cooking time is up, taste and adjust your seasonings with salt, pepper, or even a sprinkle more of Cajun seasoning if you like a little kick. The chowder should be thick, hearty, and richly flavored!
– Don’t rush adding the crab; adding it too early might lead to overcooked, rubbery meat.
– Feel free to replace the crab meat with shrimp or fish fillets for a different seafood experience.
– If you prefer a thicker chowder, add an extra tablespoon of flour when cooking.
– Fresh herbs elevate flavor; consider adding parsley or green onions before serving.
– This chowder is delightful with a squeeze of lemon juice before you dig in!
Store any leftover fish chowder in an airtight container in the refrigerator for up to 3 days. To reheat, warm it gently on the stove or in the microwave until warmed through. If you think you’ll have leftovers, consider omitting the crab meat and adding it fresh when reheating; this way, it maintains its delightful texture.
– Calories: 450
– Carbohydrates: 40g
– Fat: 20g
– Protein: 35g
– Serve with crusty bread: A slice of sourdough or a warm baguette is perfect for dipping!
– Pair with a fresh salad: Consider a spinach or garden salad drizzled with a light vinaigrette.
– Top with fresh herbs: Adding some extra dill or parsley brightens the dish visually and flavor-wise.
– Accompany with cheese: Grated sharp cheddar on top adds a delightful richness.
– Drizzle with lemon juice: A splash of lemon just before serving wakes up the dish!
– Swap crab with shrimp: Shrimp makes a fantastic alternative and cooks quickly in the slow cooker.
– Use coconut milk instead of evaporated milk: This makes it dairy-free and adds a slight sweetness.
– Replace potatoes with cauliflower: Cauliflower gives a similar texture and is a lower-carb option.
– Mixed seafood medley instead of crab or shrimp: This adds variety and bountiful flavors from the sea.
– Use vegetable or seafood broth: Switch chicken broth for a pescatarian-friendly version.
Absolutely! Fresh seafood works wonderfully; just adjust the cooking time as needed, ensuring it cooks through.
You can add more Cajun seasoning, or if you prefer, add some diced jalapeños or hot sauce for an extra kick.
Yes, but keep in mind that dairy-based soups can sometimes separate when thawed. For the best texture, you might consider freezing it without the milk and adding it in when reheating.
You can make this chowder on the stovetop! Just simmer everything in a large pot over low heat until the potatoes are tender.
Totally! It’s creamy and flavorful without being too spicy, making it perfect for little ones.
There you have it—an easy, delicious crock pot fish chowder recipe that’ll warm you right up on those chilly days. With simple ingredients and minimal preparation, it’s the perfect weeknight meal. Whether you’re hosting a gathering or simply enjoying a quiet evening at home, this dish is sure to be a hit.
So, gather your ingredients, set that slow cooker, and get ready to enjoy a delightful taste of the sea!

Whenever friends gather at my place, the atmosphere buzzes with laughter, chatter, and good food. Nothing complements a lively night better than a slice of crispy Filo Pizza paired with a fresh garden salad or even a pasta dish. Picture yourself munching on these golden, …