
French Buckwheat Crepe Recipe
I've always believed that the best meals are the ones that bridge cultures and memories. These French buckwheat crepes do exactly that—they're nutty, delicate, and endlessly versatile. Whether you top them with fresh pineapple salsa for a bright breakfast or fold them around sautéed vegetables for dinner, they're the kind of recipe that becomes part of your regular rotation. Let me walk you through how to make them with confidence.
Ingredients
- 240 ml sparkling or still water the liquid base for our batter
- 240 ml whole milk full-fat is essential for richness and better browning
- 3 tablespoon unsalted butter divided for cooking, plus extra for the pan
- 2 large eggs room temperature, they incorporate more smoothly
- 1 teaspoon fine sea salt for savory crepes; omit if making sweet
- 1 tablespoon caster sugar for sweet crepes; omit if making savory
- 250 gram buckwheat flour about 1⅔ cups, the foundation of our texture
Instructions
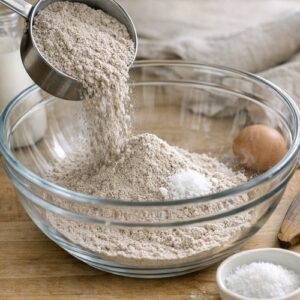
Step 1: Combine Your Dry Ingredients with Intention
- Pour your buckwheat flour into a large mixing bowl. If you're making savory crepes, add the teaspoon of salt now. If you're making sweet crepes, add the caster sugar instead. Whisk these together gently for about 30 seconds—this ensures the salt or sugar distributes evenly throughout the flour. Now, use a wooden spoon or spatula to create a well in the center of your flour mixture, almost like you're making a little nest. This well is where your wet ingredients will go, and it makes whisking the batter much easier than mixing everything at once.
Step 2: Whisk the Wet Ingredients Together First
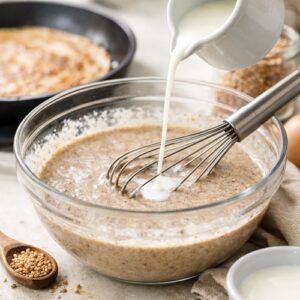
- In a separate bowl, crack your 2 eggs and whisk them for about 30 seconds until they're well combined and slightly frothy. Add your milk and water to the eggs, and whisk again for another minute until everything is fully incorporated. You want this mixture to be homogeneous—no streaks of egg white visible. Why whisk the wet ingredients separately? Because when you pour them into the flour all at once, you can control the mixing process better. If you dump everything together, you're more likely to overwork the batter, which can make crepes tough.

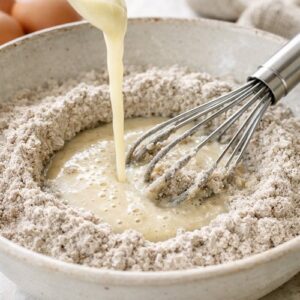
Step 3: Build Your Batter Gradually
- Pour about one-third of your whisked wet mixture into the well you created in the flour. Using a whisk, pull a little bit of the flour from the edges of your well toward the center, incorporating it gradually into the liquid. The key word here is gradually. You're not trying to mix everything at once. Once that first third is roughly combined (it's okay if it's a bit lumpy), add another third of your wet mixture and repeat. Finally, add the last third and whisk until you have a smooth, thin batter that resembles heavy cream or thin pancake batter. If you see a few small lumps, that's fine—they'll break down during resting.
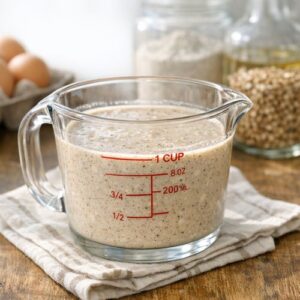
Step 4: Let Time Do the Work (The Most Important Step)
- This is where patience becomes technique. Pour your batter into a measuring cup or pitcher (easier for pouring later) and let it rest at room temperature for at least 30 minutes, ideally 45 minutes to 1 hour. If you want to make these ahead, you can even rest the batter for up to 2 hours. This resting period allows the buckwheat flour to fully absorb all the liquid, which develops the structure you need for tender crepes with crispy edges. During this time, the gluten-free starches in the buckwheat are hydrating and beginning to gelatinize. This isn't optional—it's what separates a great crepe from a mediocre one. I often prepare my batter in the evening and make crepes the next morning. It works beautifully.
Step 5: Heat Your Pan With Confidence
- Use a non-stick crepe pan (about 8 to 10 inches in diameter) or a non-stick skillet. Medium heat is your target—not too low, or your crepes won't brown; not too high, or the outside will burn before the inside cooks. Let your pan preheat for about 2 minutes until it feels warm when you hold your hand above it. Add a small piece of butter—about half a teaspoon—and let it melt and coat the pan evenly. You'll know the pan is ready when the butter foams and the foam begins to subside. This takes about 20 seconds. The butter is crucial; it seasons the crepe and helps with browning.

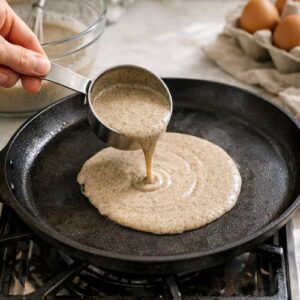
Step 6: Pour and Swirl With a Confident Hand
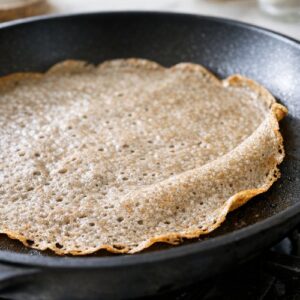
- This is the moment that feels intimidating but becomes second nature quickly. Pour about ¼ cup of batter (I use a small ladle or ¼ cup measuring cup) into the center of your hot pan. Immediately tilt and swirl the pan in a circular motion—I rotate my wrist smoothly, moving the pan around so the batter spreads into a thin, even circle. You want your crepe to be thin but not translucent. If you can see right through it, it's too thin and will tear. If it's thick and doughy, you used too much batter. This takes practice—by the third or fourth crepe, you'll find your rhythm. Any crepe that doesn't cooperate? It's a delicious breakfast for you while you practice. The entire swirling motion should take about 5 seconds. Once you've got your circle, leave the pan alone. Resist the urge to fiddle with it.
Step 7: Cook Until the Edges Begin to Curl
- Cook your crepe on the first side for about 1 to 1½ minutes. You'll know it's ready to flip when you can see the edges beginning to lift and curl slightly at the sides, and the crepe has set enough that you can slide a thin spatula underneath it. The bottom should have light golden-brown spots, but it doesn't need to be completely brown. Buckwheat crepes cook differently than white flour crepes—they set faster because buckwheat has a different starch composition. Watch for those curling edges; they're your signal that the structure is set.
Step 8: Flip and Finish
- Once you see those edges curling, use a thin, flat spatula to gently loosen the crepe from the pan, then flip it over confidently. I usually slide the spatula underneath and flip it with a quick flick of my wrist—it's satisfying, and it prevents the crepe from folding on itself. Cook the second side for about 30 to 45 seconds. You don't need as much color on the second side as the first; you're just setting the structure. The bottom should have a few light spots of color, but it will be paler than the first side. This is normal and exactly what you want. Transfer your crepe to a plate. If you're serving it immediately, you can fill it now. If you're stacking them for later (which I recommend for efficiency), stack them on a plate as they come off the pan—they'll stay warm and pliable for several minutes.

Step 9: Adjust Your Batter as You Go
- After your first couple of crepes, assess your batter. If it's too thick and doesn't spread easily across your pan, add a tablespoon of water or milk and whisk it in. If it's too runny and spreads too thin, add a tablespoon of buckwheat flour and whisk it in. These adjustments account for variations in humidity, your specific pan, and how thinly you like your crepes. Keep your pitcher of batter nearby so you can make small adjustments quickly. The batter will continue to thicken slightly as it sits, so you might need to add a splash of water toward the end of cooking.
Notes
- Temperature consistency matters - Once your pan reaches the right temperature, keep it there. If you're cooking a batch of crepes, I sometimes lower the heat slightly after the first two or three to prevent over-browning. Every stove is different, so pay attention to your specific heat source.
- Don't skip the resting period - I know it's tempting to start cooking immediately, but this 30-minute rest is non-negotiable. It's the difference between a crepe that tears and one that's supple and cooperative. If you're short on time, at least rest for 20 minutes.
- Use a smaller amount of butter between crepes - You don't need a fresh pat of butter for every single crepe. After the first crepe, a light wipe with butter on a paper towel is often enough. Too much butter and your crepes become greasy.
- Keep crepes warm and pliable - If you're making a large batch, stack them on a plate and cover them loosely with a clean kitchen towel as you cook. This keeps them warm and prevents them from drying out, so they're still easy to fold or fill when you're ready to serve.
- Master the pan temperature before adding filling - Your first few crepes are your practice round. Adjust your heat, get comfortable with the swirling motion, and nail your technique before you worry about fancy fillings. The crepe itself is the skill to develop first.
- Buckwheat flour can settle - If your batter sits for more than an hour, give it a gentle stir before using. The buckwheat flour may settle to the bottom, and a quick whisk ensures even consistency.
Nutrition
Calories: 97kcalCarbohydrates: 17gProtein: 4gFat: 2gSaturated Fat: 1gCholesterol: 29mgSodium: 220mgFiber: 2gSugar: 3g
Tried this recipe?Let us know how it was!