Red Bean Mochi – Culinary Chase
When I first bit into a piece of red bean mochi, it felt like tasting a piece of history. The chewy texture, the gentle sweetness of the red bean filling, and the slight dusting of rice flour—it was like exploring a hidden gem of tradition. There’s something so satisfying about pairing this delightful treat with other flavors.
Think about enjoying your mochi with a cup of matcha tea or serving it alongside fresh fruit like strawberries or mango. You could also have it with a drizzle of honey or syrup to enhance the sweetness. But let’s not get ahead of ourselves—let’s dive in.

What is Red Bean Mochi?
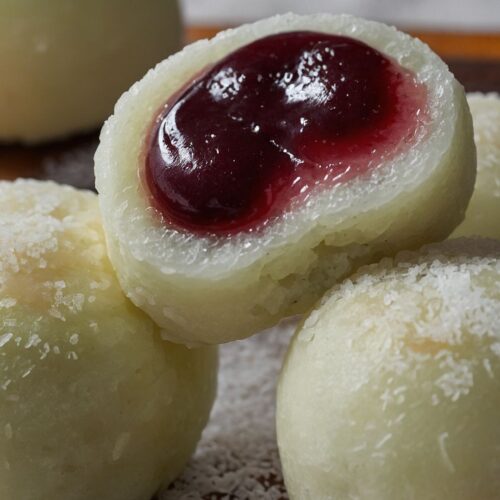
Red bean mochi is a traditional Japanese confection made from glutinous rice flour and filled with sweetened red bean paste. This treat is a favorite during festivals and celebrations, and for good reason.
The soft, chewy texture of the mochi contrasts beautifully with the smooth, sweet filling. Made with simple, wholesome ingredients, red bean mochi is not just a dessert; it’s a celebration of flavors and textures that brings joy to every bite.
Why This Recipe Works
This recipe works because it strikes a balance between texture and flavor. The chewy mochi provides a satisfying bite, while the sweet red bean filling offers a creamy, rich taste that isn’t overly sweet. The combination of glutenous rice flour and cornstarch gives the mochi its distinctive chewiness.
Adding coconut milk enriches the dough, making it even more delectable. This is a structure you can count on when creating a flavorful treat that everyone will enjoy.
You will also like the following Dessert recipes!
What You’ll Need to Make This Dish

To embark on this culinary adventure, gather the following ingredients:
For the Mochi Dough:
- 1 ½ cups sweet rice flour (glutinous rice flour)
- ¼ cup cornstarch for structure
- ¼ cup superfine sugar (caster sugar)
- 1 ½ cups coconut milk (you can choose sweetened or unsweetened)
- 2 tablespoons melted coconut oil
- ½ teaspoon vanilla extract (optional, adds a gentle note)
- Vegetable oil for brushing
For the Red Bean Paste Filling:
- 10–14 ounces red bean paste (store-bought or homemade)
- 1 teaspoon toasted sesame seeds (optional) for added nuttiness
To Coat the Mochi:
- ¼ cup sweet rice flour (also called glutinous rice flour)
Now that you have your ingredients ready, it’s time to make some mochi magic happen!
How to Make Red Bean Mochi
In the following sections, we’ll walk through making red bean mochi step by step. This recipe may take some time, but let me assure you, the process is straightforward and incredibly rewarding.
Step by Step Instructions
Step 1: Prepare the Filling

Start by getting your red bean paste ready. If you’re using store-bought, make sure it’s smooth and sweet to your liking. If you decide to go homemade, be sure to cook your red beans until soft, then mash them with sugar to taste. You should aim for about 10–14 ounces of paste.
Once done, scoop it into small balls, about one tablespoon each, and set them aside to cool.
Step 2: Make the Mochi Dough

Combine the sweet rice flour, cornstarch, and caster sugar in a bowl. Mix thoroughly. Gradually add the coconut milk and stir until you achieve a smooth, lump-free consistency. If you’re feeling adventurous, add the melted coconut oil and vanilla extract to introduce extra richness.
Step 3: Cook the Dough

Pour the mixture into a microwave-safe dish. Cover it with plastic wrap, leaving a small area open to release steam. Microwave on high for about 2-3 minutes, stirring halfway through. You want the dough to become thick and sticky. Once done, let it cool for a minute or two.
Step 4: Form the Mochi

Dust a clean surface with the sweet rice flour. Transfer the dough onto this surface and let it cool enough to handle. Divide the dough into portions, about the size of golf balls. Flatten each piece and place your red bean filling ball in the center. Pinch the dough around the filling and roll it into a smooth ball.
Step 5: Coat and Store

Roll your mochi balls in additional sweet rice flour to prevent sticking. Place them on a plate or in a container. If you’re not serving immediately, make sure they’re sealed in a container so they don’t dry out.
Step 6: Serve!

At this point, your red bean mochi is ready to enjoy! You can eat them fresh, or store them for a later satisfying snack.
Tips
- Use a Microwave-Safe Bowl: Ensure your bowl is suitable for microwave use to avoid mishaps!
- Keep Flour on Hand: It can get sticky. Having sweet rice flour nearby will help.
- Experiment with the Filling: Try other fillings like matcha, sesame paste, or fruit preserves for a twist.
- Maintain Moisture: If you find your mochi drying out, lightly brush them with vegetable oil.
- Personalize the Size: Feel free to make smaller or larger mochi; just adjust the cooking time if needed.
How to Store Leftovers
If you end up with leftover mochi (which is rare but possible), store it in an airtight container at room temperature for up to two days. If you need to keep it longer, consider freezing them. Just layer them with parchment paper to prevent sticking and place them in a freezer-safe container.
They can last up to a month this way. To enjoy, let them thaw at room temperature for a bit, or pop them in the microwave for a few seconds.
Nutrition Information
For a treat that is both flavorful and satisfying, here’s a breakdown of the nutrition in one piece of red bean mochi (approximate values):
- Calories: 150
- Total Fat: 4g
- Saturated Fat: 3g
- Cholesterol: 0mg
- Sodium: 10mg
- Total Carbohydrates: 26g
- Dietary Fiber: 1g
- Sugars: 10g
- Protein: 3g

How Would I Recommend Serving Red Bean Mochi?
- With Matcha Tea: This classic pairing enhances the mochi’s sweetness and offers a touch of bitterness that balances the flavors beautifully. It’s a match made in heaven.
- With Fresh Fruits: Slice strawberries or mangoes on the side. The freshness of the fruit complements the mochi perfectly. Plus, it looks great on a plate!
- Drizzled with Honey: For those who enjoy a sweeter touch, a light drizzle of honey over the mochi can amplify the flavors without overpowering them.
- Dusted with Powdered Sugar: If you want a touch of elegance, dust your mochi balls with powdered sugar for a delicate look and taste.
What Alternatives Can You Use for the Ingredients if Not Available?
- Sweet Rice Flour: Substitute with regular rice flour, but the texture will differ. You might miss that signature chewiness.
- Coconut Milk: You can use almond milk or soy milk, but they will alter the final flavor.
- Red Bean Paste: If you can’t find it, use mashed sweet potatoes or pumpkin puree mixed with sugar as an alternative filling.
- Superfine Sugar: Regular granulated sugar can work, but it may not dissolve as smoothly in your dough. Consider blending granulated sugar in a food processor for a finer texture.
Red Bean Mochi
Equipment
- Bowl
Ingredients
For the Mochi Dough:
- 1 ½ cups sweet rice flour glutinous rice flour
- ¼ cup cornstarch for structure
- ¼ cup superfine sugar caster sugar
- 1 ½ cups coconut milk you can choose sweetened or unsweetened
- 2 tablespoons melted coconut oil
- ½ teaspoon vanilla extract optional, adds a gentle note
- Vegetable oil for brushing
For the Red Bean Paste Filling:
- 10 –14 ounces red bean paste store-bought or homemade
- 1 teaspoon toasted sesame seeds optional for added nuttiness
To Coat the Mochi:
- ¼ cup sweet rice flour also called glutinous rice flour
Instructions
Step 1: Prepare the Filling
- Start by getting your red bean paste ready. If you’re using store-bought, make sure it’s smooth and sweet to your liking. If you decide to go homemade, be sure to cook your red beans until soft, then mash them with sugar to taste. You should aim for about 10–14 ounces of paste.
- Once done, scoop it into small balls, about one tablespoon each, and set them aside to cool.
Step 2: Make the Mochi Dough
- Combine the sweet rice flour, cornstarch, and caster sugar in a bowl. Mix thoroughly. Gradually add the coconut milk and stir until you achieve a smooth, lump-free consistency. If you’re feeling adventurous, add the melted coconut oil and vanilla extract to introduce extra richness.
Step 3: Cook the Dough
- Pour the mixture into a microwave-safe dish. Cover it with plastic wrap, leaving a small area open to release steam. Microwave on high for about 2-3 minutes, stirring halfway through. You want the dough to become thick and sticky. Once done, let it cool for a minute or two.
Step 4: Form the Mochi
- Dust a clean surface with the sweet rice flour. Transfer the dough onto this surface and let it cool enough to handle. Divide the dough into portions, about the size of golf balls. Flatten each piece and place your red bean filling ball in the center. Pinch the dough around the filling and roll it into a smooth ball.
Step 5: Coat and Store
- Roll your mochi balls in additional sweet rice flour to prevent sticking. Place them on a plate or in a container. If you’re not serving immediately, make sure they’re sealed in a container so they don’t dry out.
Step 6: Serve!
- At this point, your red bean mochi is ready to enjoy! You can eat them fresh, or store them for a later satisfying snack.
Notes
- Use a Microwave-Safe Bowl: Ensure your bowl is suitable for microwave use to avoid mishaps!
- Keep Flour on Hand: It can get sticky. Having sweet rice flour nearby will help.
- Experiment with the Filling: Try other fillings like matcha, sesame paste, or fruit preserves for a twist.
- Maintain Moisture: If you find your mochi drying out, lightly brush them with vegetable oil.
- Personalize the Size: Feel free to make smaller or larger mochi; just adjust the cooking time if needed.
Nutrition
Frequently Asked Questions
1. Can I use regular rice flour instead of sweet rice flour?
While you can use regular rice flour, the results will differ. Sweet rice flour provides that signature chewiness that defines mochi.
2. Is red bean mochi gluten-free?
Yes! As long as you use sweet rice flour, which is naturally gluten-free, your mochi will be safe for gluten-sensitive individuals.
3. How do I prevent the mochi from sticking?
Using a generous amount of sweet rice flour for dusting is crucial. You can also lightly brush the mochi with vegetable oil to help.
4. Can I make this recipe vegan?
Absolutely! Just ensure that the red bean paste you use is vegan and stick with plant-based ingredients, which this recipe already emphasizes.
5. How can I enhance the flavor of the mochi dough?
Consider adding flavorings like matcha powder, cocoa powder, or citrus zest to the dough to give it a unique twist.
6. What if I want to use fresh red beans instead of paste?
You can cook and puree fresh red beans, adding sugar to taste. Just ensure they’re smooth and not watery, so they can hold their shape inside the mochi.
Conclusion
Red bean mochi is more than just a treat; it’s a journey into the heart of Japanese culture and culinary tradition. With a few simple steps and ingredients, you can create these delightful morsels right in your kitchen. Whether you’re enjoying them for a casual snack, serving them at a gathering, or simply treating yourself, these chewy sweets are bound to impress.
So, grab your ingredients, gather some friends or family, and let’s create some memorable moments around this delicious Japanese delicacy. Trust me, once you start making red bean mochi, you won’t want to stop.