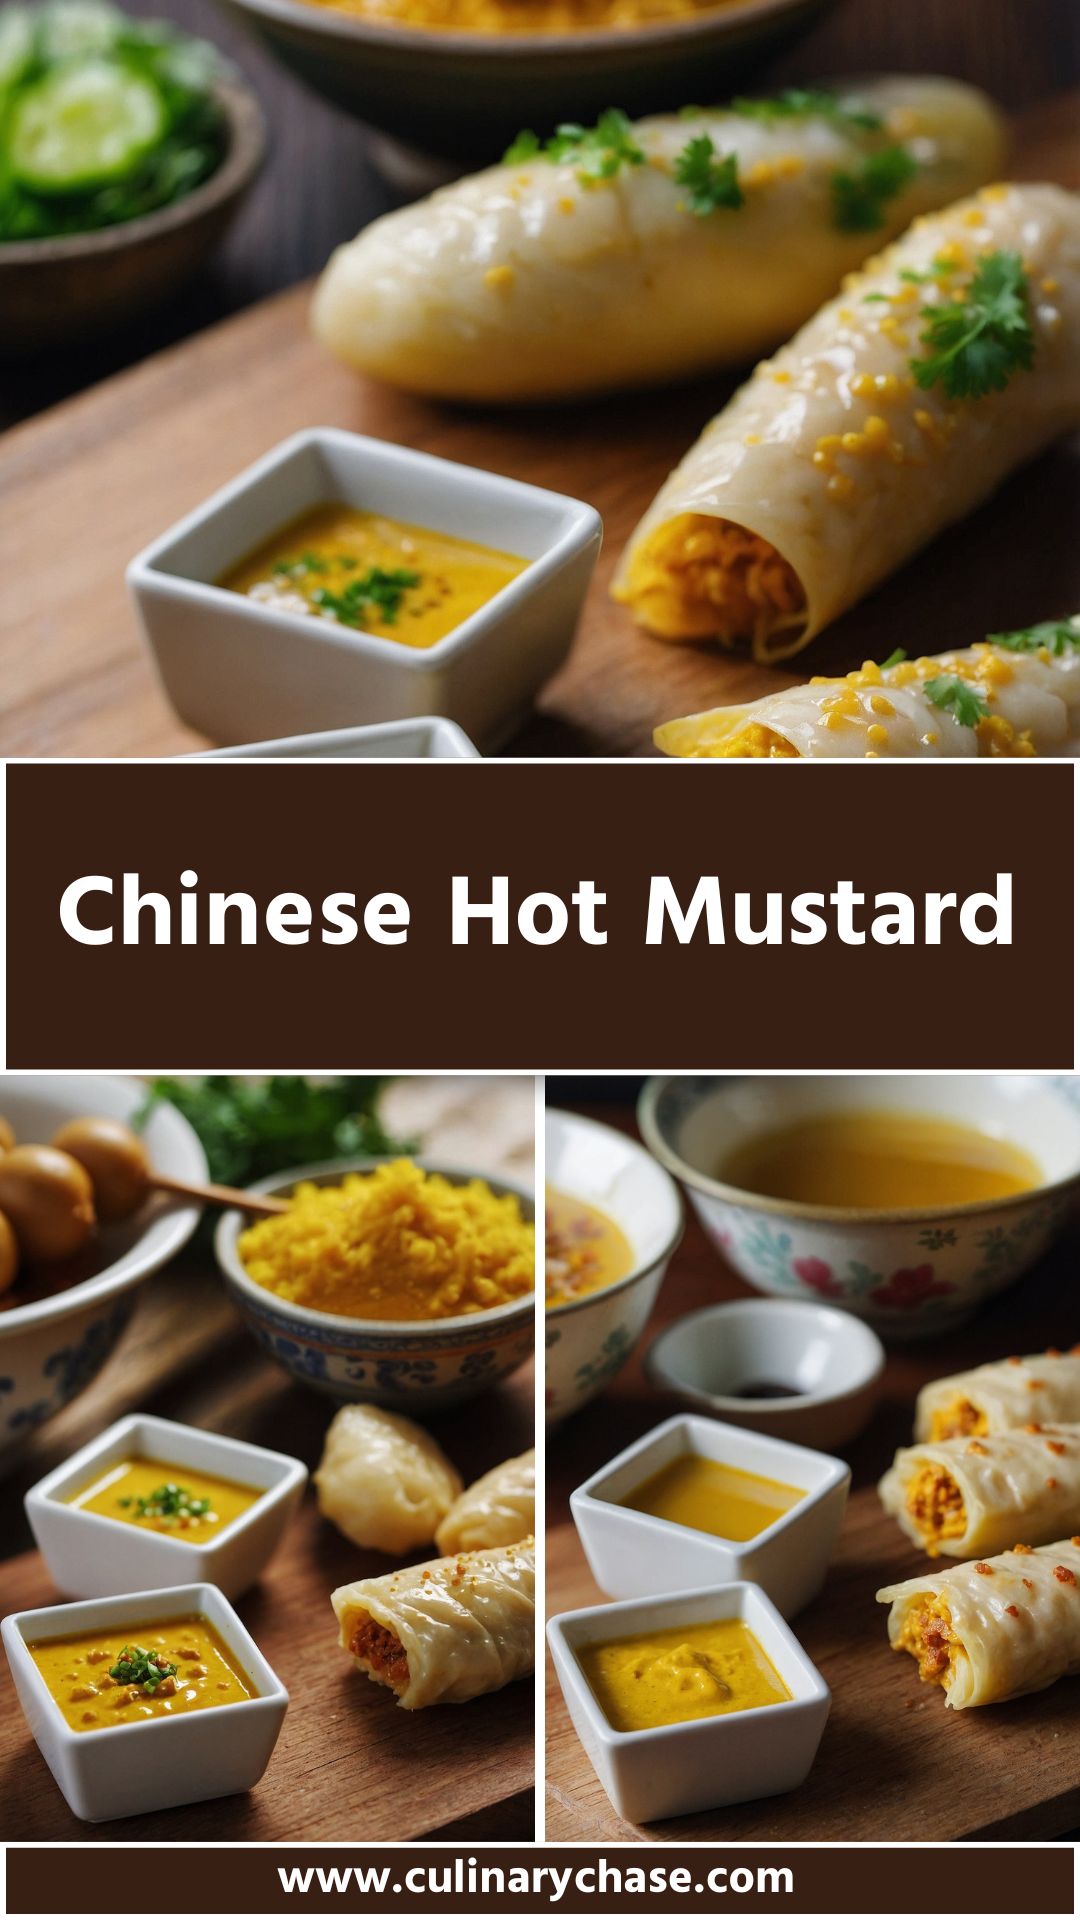
Recent Posts

Beef Chow Fun Noodles Recipe – Culinary Chase

Beef Chow Fun Noodles Recipe – Culinary Chase

Ah, beef chow fun noodles – a dish that conjures up images of bustling street markets where the sizzle of woks competes with the laughter of patrons. While I think about diving into this delightful meal, I can’t help but think of accompaniments. Consider pairing 

Homemade Chinese Egg Noodles Recipe – Culinary Chase

Homemade Chinese Egg Noodles Recipe – Culinary Chase

There’s something about homemade Chinese egg noodles that makes my heart flutter. Beyond their delightful chewiness and versatility, these noodles can pair with a variety of dishes. From stir-fries to soupy creations, they harmonize beautifully with flavors ranging from sweet to savory and everything in 

Nian Gao Recipe  – Culinary Chase

Nian Gao Recipe – Culinary Chase

Before diving into the delightful details of making nian gao, let’s take a moment to think about what pairs beautifully with this dish. Nian gao, with its chewy texture and subtle sweetness, goes well with savory dishes. 

Think about a stir-fried vegetable medley with garlic if you want something simple. A spicy Sichuan-style chicken would also offer a great contrast to the dish’s sweetness. If you want to keep it light, a refreshing cucumber salad can act as a palate cleanser. Whatever you choose, the balance of flavors will make your meal unforgettable.

Nian Gao recipe

Food has a way of connecting us to our roots, and for many, nian gao represents a link to cultural traditions and familial gatherings. The moment I first tasted nian gao, I felt enveloped in a warm hug of flavors, textures, and memories. 

This unique Chinese delicacy, often enjoyed during the Lunar New Year, is more than just a dish—it’s a symbol of prosperity and good fortune. Join me as we explore the rich world of nian gao, uncovering its flavors, variations, and the joys of making it at home.

What is Nian Gao?

Nian gao, pronounced “nyen gao,” translates to “year cake” in English. It’s a traditional Chinese dessert made primarily from glutinous rice flour and water. 

This dish is steamed until it becomes a firm, chewy cake. Its creation often involves the blending of textures and flavors, transforming basic ingredients into something incredibly satisfying. Various regional versions exist, some featuring different flavors or fillings. However, the version I cherish is the classic sweet one, adorned with just a hint of orange zest and a touch of molasses.

You will also like the following Dessert recipes!

What is the Flavor Profile of This Dish?

Nian gao boasts a unique flavor profile that balances sweetness and subtle spice. The sweetness comes primarily from brown sugar and a hint of vanilla, which meld perfectly with the chewy texture. 

The addition of orange zest gives a refreshing brightness, while the allspice powder adds a warm, slightly peppery note. The blend of these ingredients results in a comforting treat that feels nostalgic for many and delightful for all.

What Makes This Recipe Different From Other Nian Gao Recipes?

This particular nian gao recipe sets itself apart by incorporating rich flavors and thoughtful details. While traditional recipes often stick to the basics, this version offers a subtle depth with dark molasses and allspice. 

The orange zest adds an unexpected twist that elevates the dish beyond mere sweetness, creating a rich tapestry of flavor. Plus, using a combination of glutinous rice flour and regular rice flour helps achieve that perfect chewy texture while maintaining a bit more complexity overall.

Ingredients You’ll Need

Here’s a quick look at what you’ll need to create your very own nian gao:

  • 1½ pounds glutinous rice flour (This is key for that chewy texture.)
  • ½ pound rice flour (A little addition for a unique touch.)
  • 3½ to 4 cups of water (Depending on your humidity levels; more moisture might be needed in dry areas.)
  • 2 cups dark brown sugar (Feel free to use brown rock sugar here.)
  • 2 teaspoons vegetable oil (Plus more for brushing your baking pans.)
  • 1 tablespoon vanilla extract (For a boost of flavor.)
  • 1 tablespoon dark molasses (This adds richness.)
  • ½ teaspoon allspice powder (Just a hint makes a difference.)
  • Zest of 1 large orange (Brightness in every bite.)
  • 4 slices ginger (Optional, but adds a lovely depth.)
  • 6 dried dates (For decoration, totally optional.)
how to  make Nian Gao recipe

Step-by-Step Directions

Step 1: Prepare Your Ingredients

Gather all of your ingredients on your kitchen counter. Having everything in one place streamlines the process. Measure out your flours, sugar, and any other items you need. This is your kitchen; embrace it.

Step 2: Mix the Dry Ingredients

In a large mixing bowl, combine the glutinous rice flour, rice flour, allspice powder, and orange zest. Use a whisk to make sure there are no lumps—a smooth mix leads to a smooth cake.

Step 3: Stir in the Liquid Ingredients

Slowly add the water, vanilla extract, dark molasses, and vegetable oil to the dry mix. Stir until it’s well combined; you should have a thick, smooth batter. If it feels too thick, add a splash more water, but aim for a pudding-like consistency.

Step 4: Prepare the Steamer

While you’re mixing, it’s time to get your steamer ready. Fill it with water and bring it to a gentle boil. Grease your baking dish with vegetable oil to ensure the nian gao won’t stick. You can use a round cake pan or a square baking dish—whatever you have on hand!

Step 5: Pour the Batter

Once your batter is ready, pour it into the greased baking dish. Spread it out evenly with a spatula to ensure even cooking. Gently press the ginger slices on top, if using.

Step 6: Steam the Nian Gao

Cover the baking dish with a piece of parchment paper or a clean kitchen cloth to trap the steam. Place it in the steamer and let it steam for about 45-60 minutes. The nian gao should firm up and be set when you check it with a toothpick.

Step 7: Cool and Slice

When the timer goes off, carefully remove the nian gao from the steamer. Let it cool completely, then run a knife around the edges to help with removal. Flip the dish upside down on a cutting board, and gently tap it until the nian gao releases.

Step 8: Enjoy!

Slice the nian gao into squares or rectangles and enjoy either warm or at room temperature. It can be eaten plain, or you can sauté it in a bit of oil until crispy for texture, making it an exciting dish to serve to family or friends.

Tips on Making Nian Gao

  1. Humidity Matters: Adjust your water component based on the weather. More moisture may be necessary in drier climates for the right texture.
  2. Grease Wisely: Don’t skimp on oil when prepping your baking pan; a well-greased dish means flawless removal of the cake.
  3. Flavor Experimentation: Feel free to experiment with flavors. Try adding coconut milk or nuts as toppings or within the cake itself.
  4. Steaming Time is Key: Keep an eye on your cake towards the end of the steaming time. Overcooking may lead to a dry texture.
  5. Serving Suggestions: Don’t hesitate to mix nian gao with savory dishes for variety. It pairs well with stir-fried vegetables and proteins, which adds to its versatility.

Nutrition Information

A serving of nian gao (about 100 grams) typically contains approximately:

  • Calories: 250
  • Carbohydrates: 58g
  • Protein: 2g
  • Fat: 1g
  • Fiber: 1g
  • Sugar: 14g

How Can I Store This Nian Gao Recipe?

Nian gao can be stored in an airtight container in the refrigerator for up to a week. If you prefer, slice it first to make it easier to grab portions as you go. If you want to preserve it longer, freeze it in portions. When you’re ready to enjoy, steam it directly from frozen for a seamless treat.

Nian Gao copycat  recipe

Substitutes for Ingredients

If you’re missing some of the ingredients, here are some alternatives that work well:

  • Glutinous Rice Flour: Use sweet rice flour if glutinous rice flour is unavailable. It serves a similar purpose, ensuring that chewy texture.
  • Dark Brown Sugar: Substitute with coconut sugar for a different sweetness—just keep the texture in mind.
  • Vegetable Oil: Coconut oil or canola oil can serve as effective substitutes, providing a mild flavor.
  • Allspice Powder: If you’re out of allspice, try a combination of cinnamon and nutmeg to mimic that warm, spiced essence.
Nian Gao copycat recipe

Nian Gao Recipe

Before diving into the delightful details of making nian gao, let’s take a moment to think about what pairs beautifully with this dish
Prep Time 30 minutes
Cook Time 1 hour
Total Time 1 hour 30 minutes
Course Dessert
Cuisine Chinese
Servings 16
Calories 250 kcal

Equipment

  • Bowl
  • Spatula

Ingredients
  

  • pounds glutinous rice flour This is key for that chewy texture.
  • ½ pound rice flour A little addition for a unique touch.
  • 3½ to 4 cups of water Depending on your humidity levels; more moisture might be needed in dry areas.
  • 2 cups dark brown sugar Feel free to use brown rock sugar here.
  • 2 teaspoons vegetable oil Plus more for brushing your baking pans.
  • 1 tablespoon vanilla extract For a boost of flavor.
  • 1 tablespoon dark molasses This adds richness.
  • ½ teaspoon allspice powder Just a hint makes a difference.
  • Zest of 1 large orange Brightness in every bite.
  • 4 slices ginger Optional, but adds a lovely depth.
  • 6 dried dates For decoration, totally optional.

Instructions
 

Step 1: Prepare Your Ingredients

  • Gather all of your ingredients on your kitchen counter. Having everything in one place streamlines the process. Measure out your flours, sugar, and any other items you need. This is your kitchen; embrace it.

Step 2: Mix the Dry Ingredients

  • In a large mixing bowl, combine the glutinous rice flour, rice flour, allspice powder, and orange zest. Use a whisk to make sure there are no lumps—a smooth mix leads to a smooth cake.

Step 3: Stir in the Liquid Ingredients

  • Slowly add the water, vanilla extract, dark molasses, and vegetable oil to the dry mix. Stir until it’s well combined; you should have a thick, smooth batter. If it feels too thick, add a splash more water, but aim for a pudding-like consistency.

Step 4: Prepare the Steamer

  • While you’re mixing, it’s time to get your steamer ready. Fill it with water and bring it to a gentle boil. Grease your baking dish with vegetable oil to ensure the nian gao won’t stick. You can use a round cake pan or a square baking dish—whatever you have on hand!

Step 5: Pour the Batter

  • Once your batter is ready, pour it into the greased baking dish. Spread it out evenly with a spatula to ensure even cooking. Gently press the ginger slices on top, if using.

Step 6: Steam the Nian Gao

  • Cover the baking dish with a piece of parchment paper or a clean kitchen cloth to trap the steam. Place it in the steamer and let it steam for about 45-60 minutes. The nian gao should firm up and be set when you check it with a toothpick.

Step 7: Cool and Slice

  • When the timer goes off, carefully remove the nian gao from the steamer. Let it cool completely, then run a knife around the edges to help with removal. Flip the dish upside down on a cutting board, and gently tap it until the nian gao releases.

Step 8: Enjoy!

  • Slice the nian gao into squares or rectangles and enjoy either warm or at room temperature. It can be eaten plain, or you can sauté it in a bit of oil until crispy for texture, making it an exciting dish to serve to family or friends.

Notes

  1. Humidity Matters: Adjust your water component based on the weather. More moisture may be necessary in drier climates for the right texture.
  2. Grease Wisely: Don’t skimp on oil when prepping your baking pan; a well-greased dish means flawless removal of the cake.
  3. Flavor Experimentation: Feel free to experiment with flavors. Try adding coconut milk or nuts as toppings or within the cake itself.
  4. Steaming Time is Key: Keep an eye on your cake towards the end of the steaming time. Overcooking may lead to a dry texture.
  5. Serving Suggestions: Don’t hesitate to mix nian gao with savory dishes for variety. It pairs well with stir-fried vegetables and proteins, which adds to its versatility.

Nutrition

Calories: 250kcalCarbohydrates: 58gProtein: 2gFat: 1gFiber: 1gSugar: 14g
Keyword Nian Gao Recipe
Tried this recipe?Let us know how it was!

Frequently Asked Questions

1. Can I make nian gao gluten-free?

While traditional nian gao uses glutinous rice flour, some brands offer gluten-free versions. Check for “gluten-free rice flour” or alternatives that maintain the desired texture.

2. How do I know when the nian gao is done steaming?

Insert a toothpick in the center. If it comes out clean, your nian gao is ready. If any gooey batter sticks to it, continue steaming.

3. Any tips for reheating leftover nian gao?

You can steam leftover slices or lightly pan-fry them in a bit of oil. Both methods keep the dish moist and flavorful.

4. What occasions is nian gao typically served?

Traditionally, nian gao is served during Lunar New Year celebrations to symbolize prosperity and good luck. However, it’s delightful year-round!

5. How do I achieve the perfect chewy texture?

The key is using the right ratio of glutinous rice flour to water. Make sure to measure accurately and maintain humidity for optimal results.

Conclusion

Crafting nian gao at home allows you to indulge in its unique flavors and textures, filling your kitchen with enticing aromas. This dish embodies tradition and modern flair, offering endless possibilities in how you serve it. 

Whether paired with savory sides or enjoyed by itself, nian gao is a wonderful addition to your culinary repertoire. So gather your ingredients, embrace the process, and savor every bite! The delightful chewy texture and engaging flavors will undoubtedly make this dish a favorite in your household.

You’ll also like these latest recipes!

Shrimp Toast – Culinary Chase

Shrimp Toast – Culinary Chase

Imagine enjoying crispy, golden shrimp toast paired with a zesty dipping sauce. This dish is best complemented with a side of sweet chili sauce or a homemade soy-vinegar dip.  A fresh cucumber salad can provide a nice crunch for added texture. Pairing it with a 

Twice Cooked Pork Recipe – Culinary Chase

Twice Cooked Pork Recipe – Culinary Chase

Before I dive into the delicious world of twice-cooked pork, let’s discuss what pairs beautifully with this iconic dish. Imagine sitting down to enjoy twice-cooked pork with a fragrant bowl of steamed jasmine rice. The warmth of the rice complements the savory flavors of the 

Sukiyaki Recipe – Culinary Chase

Sukiyaki Recipe – Culinary Chase

Let’s kick things off by discussing what pairs beautifully with sukiyaki. While it’s a dish loaded with flavors, a few side dishes can complement its richness. A simple cucumber salad can add a refreshing crunch. A bowl of steamed rice serves as a perfect base, soaking up the delightful broth. 

For something with a kick, consider serving kimchi on the side. The tangy, spicy flavor of kimchi contrasts well with the sweetness of the sukiyaki. Finally, don’t forget about a side of pickles—these can cut through the richness and elevate your meal.

sukiyaki recipe

Ah, sukiyaki! Just the word alone conjures up images of sizzling meats and steaming vegetables in a bubbling pot. This age-old Japanese dish brings families together, often wrapped in laughter and conversation. 

It’s more than a meal; it’s an experience, a ritual. If you’ve never had the chance to embrace this culinary adventure, get ready. Today, I’ll guide you step-by-step through the sukiyaki experience, ensuring that you not only know how to make it but appreciate its depth and character.

What is Sukiyaki?

Sukiyaki is a classic Japanese dish that typically consists of thinly sliced meat, vegetables, and noodles simmered together in a sweet and savory broth, often enjoyed in a communal setting. Picture a pot bubbling at the center of your dining table, with everyone diving in, cooking their own morsels. It’s warm, welcoming, and undeniably delicious. The origins of sukiyaki trace back to the Edo period in Japan, evolving over the years into the beloved dish it is today.

In essence, it embodies a simple yet profound culinary philosophy: combine quality ingredients with a nurturing cooking method, and you’ll create something wonderful. To truly enjoy sukiyaki, understanding its components and their significance enhances the overall experience.

What is the Flavor Profile of This Dish?

The flavor profile of sukiyaki is intricate yet balanced. The broth gets its foundation from a mix of tamari or soy sauce, sweet mirin, and sake—these components create a lovely harmony of salty and sweet. The addition of ginger provides a warm undertone that rounds out the taste.

When you taste it, the meat offers a richness that pairs beautifully with the tenderness of the vegetables, like napa cabbage and mushrooms. The noodles soak up the delightful broth, making each bite a delicious explosion of flavors. The combination leads to this comforting umami experience. It’s no wonder sukiyaki has secured its spot in the hearts of many around the globe.

What Makes This Recipe Different From Other Sukiyaki?

Not all sukiyaki recipes are created equal. My take focuses on maintaining the traditional roots while incorporating personal touches that enhance flavor and nutrition. For instance, I use rib-eye steak for its balance of flavor and tenderness, which is vital for a great sukiyaki experience.

Another distinction is the use of shiitake mushrooms. These mushrooms provide depth and a slight earthiness that distinguishes the broth from more straightforward versions. Finally, I swap out standard noodles with Shirataki noodles, making the dish friendlier for those mindful of carbohydrates.

You will also like the following Lunch and Dinner recipes!

Ingredients You’ll Need

Before you embark on your sukiyaki adventure, let’s gather our ingredients. Here’s what you’ll need:

Broth

  • 1 teaspoon freshly grated ginger – Adds warmth and depth.
  • 6 tablespoons fine granulated sugar – Sweetness to balance the salty elements.
  • ½ cup premium sake – Brings depth and a subtle kick.
  • ½ cup tamari or soy sauce – The salty base for the broth.
  • ½ cup sweet mirin – Complements the other flavors with sweetness.

Sukiyaki

  • 8 fresh shiitake mushrooms, stems removed – Earthy and flavorful, enhancing the broth.
  • 4 tablespoons canola oil, divided – For sautéing.
  • 1 stalk Tokyo negi or 5 scallions, sliced diagonally into ½-inch segments – Adds a fresh crunch.
  • 1 ½ pounds well-marbled rib-eye steak, sliced thin (about 1-inch thick pieces) – Tender meat that soaks up the broth.
  • 2 ½ cups chopped napa cabbage (about half a small head) – Sweet and tender, an essential vegetable.
  • 14 ounces cooked Shirataki noodles – The perfect low-carb addition.

With everything laid out, let’s move to the cooking process.

how to cook sukiyaki

Step by Step Directions

Step 1: Prepare the Broth

Start by mixing ginger, sugar, sake, tamari, and mirin in a bowl. Whisk it until the sugar fully dissolves. This mixture should taste sweet and slightly salty, with a hint of warmth from the ginger. Set it aside; we’ll come back to this later.

Step 2: Slice and Prep Ingredients

Using a sharp knife, slice the rib-eye as thinly as you can. This is crucial for tenderness. Next, slice the mushrooms and scallions. Chop up the napa cabbage into bite-sized pieces. The more uniform your cuts, the better your cooking will be.

Step 3: Heat the Pan

In a large, heavy-bottomed pot or skillet, heat two tablespoons of canola oil over medium heat. Once it’s shimmering, add the scallions. Let them sauté for about two minutes, releasing their wonderful aroma.

Step 4: Add the Meat

After the scallions are aromatic, it’s time for the rib-eye. Lay the slices in a single layer in the pan. Don’t crowd the pan, or it might steam instead of sizzle. Sear for about 2-3 minutes until browned, flipping halfway through.

Step 5: Pour in the Broth

Once the meat is ready, pour the broth mixture over the cooked steak. Increase the heat slightly, bringing it to a gentle simmer. Then, add the napa cabbage and shiitake mushrooms, pushing them down into the broth.

Step 6: Incorporate the Noodles

Finally, toss in the Shirataki noodles. Allow everything to cook together for another 5-7 minutes. This allows the noodles to absorb the flavors of the broth and the veggies to become tender yet still vibrant.

Step 7: Serve and Enjoy!

Grab some small bowls and serve piping hot at the table. Encourage everyone to enjoy the communal aspect by cooking individual portions. Can you hear the happy chatter? That’s the sound of a great meal in the making.

Tips on Making Sukiyaki

Here are five essential tips to elevate your sukiyaki game:

  • Use Quality Meat: Opt for well-marbled beef. It makes a significant difference in flavor and tenderness.
  • Don’t Rush the Prep: Take your time cutting vegetables and meat. Uniform sizes ensure even cooking.
  • Experiment with Your Veggies: Feel free to add other vegetables. Bok choy, carrots, or even broccoli can introduce varying textures and flavors.
  • Mind the Heat: Ensure the broth does not boil too fiercely. A gentle simmer allows flavors to meld without overcooking the ingredients.
  • Customize Your Experience: Consider adding a raw egg for dipping. It’s a traditional choice that adds creaminess to each bite.

Nutrition Information

Per serving (based on 4 servings from the ingredients listed):

How Can I Store This Sukiyaki?

If you find yourself with leftovers (an unfortunate rarity), storing them is straightforward:

  1. Cool Down: Allow the sukiyaki to cool to room temperature before storing.
  2. Containers: Use airtight containers for best results.
  3. Fridge: Spill your leftovers into the fridge. It should last for up to three days.
  4. Reheat: When you’re ready to dig in again, reheat gently on the stove. Do not boil it; this can affect texture.
sukiyaki copycat recipe

Substitute Options for Ingredients

If you can’t find something on the list or just want to try something different, here are some solid alternatives:

  • Shirataki Noodles: Try rice noodles or even zucchini noodles. These offer great texture while keeping carbs in check.
  • Rib-Eye Steak: Consider chicken thighs or tofu for a vegetarian option. Both work splendidly with the broth’s flavor.
  • Napa Cabbage: Green cabbage or bok choy are great stand-ins. They’ll provide the crunch and soak up flavors just as well.
  • Mirin: Substitute with a mix of sugar and white wine or rice vinegar. It gives a sweet touch while retaining acidity.
sukiyaki copycat recipe

Sukiyaki Recipe

Let's kick things off by discussing what pairs beautifully with sukiyaki. While it’s a dish loaded with flavors, a few side dishes can complement its richness
Prep Time 10 minutes
Cook Time 15 minutes
Total Time 25 minutes
Course Main Course
Cuisine Japanese
Servings 4
Calories 835 kcal

Equipment

  •  Large cast iron skillet

Ingredients
  

Broth

  • 1 teaspoon freshly grated ginger – Adds warmth and depth.
  • 6 tablespoons fine granulated sugar – Sweetness to balance the salty elements.
  • ½ cup premium sake – Brings depth and a subtle kick.
  • ½ cup tamari or soy sauce – The salty base for the broth.
  • ½ cup sweet mirin – Complements the other flavors with sweetness.

Sukiyaki

  • 8 fresh shiitake mushrooms stems removed – Earthy and flavorful, enhancing the broth.
  • 4 tablespoons canola oil divided – For sautéing.
  • 1 stalk Tokyo negi or 5 scallions sliced diagonally into ½-inch segments – Adds a fresh crunch.
  • 1 ½ pounds well-marbled rib-eye steak sliced thin (about 1-inch thick pieces) – Tender meat that soaks up the broth.
  • 2 ½ cups chopped napa cabbage about half a small head – Sweet and tender, an essential vegetable.
  • 14 ounces cooked Shirataki noodles – The perfect low-carb addition.

Instructions
 

Step 1: Prepare the Broth

  • Start by mixing ginger, sugar, sake, tamari, and mirin in a bowl. Whisk it until the sugar fully dissolves. This mixture should taste sweet and slightly salty, with a hint of warmth from the ginger. Set it aside; we’ll come back to this later.

Step 2: Slice and Prep Ingredients

  • Using a sharp knife, slice the rib-eye as thinly as you can. This is crucial for tenderness. Next, slice the mushrooms and scallions. Chop up the napa cabbage into bite-sized pieces. The more uniform your cuts, the better your cooking will be.

Step 3: Heat the Pan

  • In a large, heavy-bottomed pot or skillet, heat two tablespoons of canola oil over medium heat. Once it’s shimmering, add the scallions. Let them sauté for about two minutes, releasing their wonderful aroma.

Step 4: Add the Meat

  • After the scallions are aromatic, it’s time for the rib-eye. Lay the slices in a single layer in the pan. Don’t crowd the pan, or it might steam instead of sizzle. Sear for about 2-3 minutes until browned, flipping halfway through.

Step 5: Pour in the Broth

  • Once the meat is ready, pour the broth mixture over the cooked steak. Increase the heat slightly, bringing it to a gentle simmer. Then, add the napa cabbage and shiitake mushrooms, pushing them down into the broth.

Step 6: Incorporate the Noodles

  • Finally, toss in the Shirataki noodles. Allow everything to cook together for another 5-7 minutes. This allows the noodles to absorb the flavors of the broth and the veggies to become tender yet still vibrant.

Step 7: Serve and Enjoy!

  • Grab some small bowls and serve piping hot at the table. Encourage everyone to enjoy the communal aspect by cooking individual portions. Can you hear the happy chatter? That’s the sound of a great meal in the making.

Notes

  • Use Quality Meat: Opt for well-marbled beef. It makes a significant difference in flavor and tenderness.
  • Don’t Rush the Prep: Take your time cutting vegetables and meat. Uniform sizes ensure even cooking.
  • Experiment with Your Veggies: Feel free to add other vegetables. Bok choy, carrots, or even broccoli can introduce varying textures and flavors.
  • Mind the Heat: Ensure the broth does not boil too fiercely. A gentle simmer allows flavors to meld without overcooking the ingredients.
  • Customize Your Experience: Consider adding a raw egg for dipping. It’s a traditional choice that adds creaminess to each bite.

Nutrition

Serving: 473gCalories: 835kcalCarbohydrates: 50gProtein: 40gFat: 50.1gSaturated Fat: 16.8gTrans Fat: 2.3gCholesterol: 119mgSodium: 2278mgFiber: 1gSugar: 14g
Keyword Sukiyaki Recipe
Tried this recipe?Let us know how it was!

Frequently Asked Questions

1. Can I make sukiyaki vegetarian?

Absolutely! Replace the beef with firm tofu and use vegetable stock instead of the broth mixture. You can also add more vegetables for a hearty dish.

2. Is sukiyaki spicy?

Traditionally, sukiyaki isn’t spicy. If you wish to add heat, consider including chili peppers in small amounts or serve with a spicy dipping sauce.

3. What’s the best way to reheat sukiyaki?

Reheat it gently in a skillet over low heat, stirring occasionally. Avoid boiling to prevent overcooking the ingredients.

4. Can I freeze leftover sukiyaki?

While it’s safe to freeze, the texture of the vegetables may change. If freezing, consider keeping ingredients separate where possible.

5. Are there other sauces I can use?

Many people enjoy adding ponzu sauce for a citrusy twist. It makes an excellent addition for dipping or as a finishing drizzle.

Conclusion

In the dance of flavors and textures, sukiyaki stands out as a delightful experience that warms not just the belly but the heart. Through the ingredients and the communal preparation, it encourages togetherness, laughter, and a genuine appreciation for food.

So, next time you gather with loved ones, consider introducing them to this Japanese classic. Whether you choose to stick closely to tradition or put your own spin on it, each bowl will tell a story. Get your ingredients ready, and may your sukiyaki adventure be as rich and rewarding as the dish itself. Happy cooking!

You’ll also like these latest recipes!

Shrimp Rice Noodle Rolls (Cheung Fun) – Culinary Chase

Shrimp Rice Noodle Rolls (Cheung Fun) – Culinary Chase

If you’re anything like me, you appreciate a dish that feels like a hug on a plate. Shrimp rice noodle rolls, known as Cheung Fun, are exactly that. This delightfully chewy, savory treat not only satisfies your taste buds but also feeds your soul.  But 

Tan Tan Ramen – Culinary Chase

Tan Tan Ramen – Culinary Chase

When you’re whipping up a quick Chicken Broccoli Mushroom Stir Fry, think about sides that bring additional flavor and texture. Cooked rice or noodles is a classic pairing. They soak up the savory sauce beautifully.  Next up, a fresh cucumber salad can provide a crunchy 

How to Make Pan Fried Salmon – Culinary Chase

How to Make Pan Fried Salmon – Culinary Chase

Let’s take a moment to appreciate the beauty of a perfectly cooked salmon fillet. If you’re like me, you’ve likely experienced that magical moment when the sizzling fish meets the hot pan, releasing its savory essence. Pan-fried salmon can transform a simple meal into a delightful experience. 

That’s why I want to share my approach with you. Join me as we dive into the world of making pan-fried salmon that will not just please your taste buds, but also invite compliments from your family and friends.

How To Make Pan Fried Salmon

What is How to Make Pan Fried Salmon?

Pan-fried salmon is a method of cooking that brings out the fish’s natural flavors while giving it a delicious golden crust. 

This technique allows the fish to sear beautifully, creating a delightful contrast between the crispy exterior and flaky, tender interior. The best part? It’s an easy and quick dish to whip up, making it perfect for weeknight dinners or fancy occasions.

You will also like the following Lunch and Dinner recipes!

Why You’ll Love This Pan Fried Salmon Recipe

There are many reasons to fall in love with this pan-fried salmon recipe. First and foremost, it’s quick. You can go from barely-there fridge ingredients to a plated masterpiece in less than 30 minutes. Second, the flavor is phenomenal. 

With just a handful of ingredients, you’ll discover how truly fulfilling salmon can be. Plus, it’s a healthy option packed with Omega-3 fatty acids, which are great for your heart and well-being. It’s a crowd-pleaser that will surely have everyone asking for seconds.

The Ingredients

Let’s gather our ingredients like a group of friends rallying for a picnic. For this pan-fried salmon, you will need:

Salmon fillets: 4 fillets, each about 6 ounces and approximately 1¼ inches thick (skin removed by fishmonger; it’s optional to keep the skin on).
Extra-virgin olive oil: 1 tablespoon, for that rich flavor.
Fresh lemon zest: 1 teaspoon, to add a refreshing zing.
Sea salt: ½ teaspoon, seasoning our fish just right.
Fresh dill: 1 teaspoon, finely chopped for an aromatic touch.
Freshly cracked black pepper: To taste, because every dish needs a little kick!

How To Make Pan Fried Salmon recipe

Step-by-Step Instructions

Let’s roll up our sleeves and dive into the kitchen! Follow these simple steps to achieve salmon perfection.

Step 1: Preheat the Pan

First things first, heat a non-stick skillet over medium heat. If you have a cast-iron skillet, pull it out for a more beautiful sear! Let it warm up for about 3-4 minutes. You want it hot, but not smoking. Testing the heat is simple: flick a drop of water onto the pan. If it dances and evaporates immediately, you’re good to go.

Step 2: Prepare the Salmon

While the pan is heating, let’s prep our salmon. Pat the fillets dry with paper towels. This removes excess moisture and helps achieve that desired crispy finish. Next, take your olive oil and rub it on both sides of the fillets. T

his not only flavors the salmon but also serves as a barrier against sticking. Sprinkle sea salt, lemon zest, chopped dill, and cracked black pepper on both sides, too. We’re building flavor here!

Step 3: Sear the Salmon

Once the skillet is at the right temperature, gently place your fillets in the pan. Lay them down in the opposite direction of the pan’s heat—this avoids splattering and gives you a nice sizzle. Leave them undisturbed for about 4-5 minutes. The goal is a golden-brown crust.

Step 4: Flip and Finish Cooking

Now, here comes the moment of truth. Carefully flip each fillet using a spatula. Watch for that lovely golden color!

 Let the salmon cook for another 3-4 minutes on this side. Salmon is done when it flakes easily with a fork and has an internal temperature of 125-130°F for medium-rare. If you have a meat thermometer, it’s a handy tool here.

Step 5: Serve Hot

Once your salmon is cooked to perfection, remove it from the heat. Serve immediately! Garnish with a sprinkle of fresh dill or a slice of lemon if you’re feeling fancy.

Tips & Tricks

Now that you’ve mastered pan-frying salmon, here are five tips to keep your culinary skills sharp:

Choose Fresh Salmon: Fresh fish is key. Look for firm fillets with a bright color and pleasant smell.
Don’t Crowd the Pan: Give your salmon space to breathe in the pan. Crowding leads to steaming, not searing.
Use a Good Fish Spatula: If you have one, use a fish spatula for flipping. It’s wider and helps prevent the fillets from breaking.
Rest for Flavor: Allow the salmon to rest for a minute or two after cooking. This helps lock in the juices.
Experiment with Seasonings: Try adding garlic powder, smoked paprika, or even a dash of cumin for a twist.

Nutrition Information

You might be curious about what you’re putting into your body. Here’s a quick rundown per serving:

Calories: 367
Protein: 34g
Total Fat: 22g (Saturated Fat: 4g)
Carbohydrates: 0g
Fiber: 0g
Omega-3 Fatty Acids: 2,260mg

With such nutritional benefits, what’s not to love about pan-fried salmon?

Can I Store Pan Fried Salmon?

Absolutely! If you have leftovers, you can store them in an airtight container in the refrigerator. It will keep for up to 3 days. Just remember, I find that reheated salmon can sometimes lose its charm. To refresh it, consider flaking the salmon and tossing it into a salad or pasta dish.

How To Make Pan Fried Salmon copycat recipe

What Can I Serve with Pan Fried Salmon?

The best part about pan-fried salmon is its versatility. Here are a few pairing ideas that elevate the meal:

Crispy roasted vegetables: Think asparagus, Brussels sprouts, or carrots.
Quinoa or rice: A light grain adds substance without overpowering the fish.
French fries or sweet potato wedges: Because who doesn’t love comfort food on their plate?
Simple green salad: A fresh mix of greens with a lemon vinaigrette complements the dish beautifully.
Pasta with garlic and oil: A light, flavorful pasta can carry the meal further.

Variations

Salmon isn’t one-size-fits-all. You can jazz it up depending on your mood. Here are some tasty variations:

Asian-Inspired: Marinate the salmon in soy sauce, ginger, and garlic before cooking. This gives the fish a different, savory profile that deeply satisfies.

Mediterranean Twist: Add kalamata olives, capers, and tomatoes to the pan while cooking. It transforms the dish with bright, luscious flavors.

Spicy Cajun: Season the salmon with Cajun spices before pan-frying. This option brings a fun kick that’s sure to wake your palate.

Honey Garlic Glaze: Brush the fillets with a mixture of honey and minced garlic in the last few minutes of cooking. This caramelizes the glaze and adds a sweet touch.

Crispy Crusted: Coat the fillets in panko breadcrumbs before cooking for a crunchy crust. It adds texture that’s simply irresistible.

How To Make Pan Fried Salmon copycat recipe

How to Make Pan Fried Salmon

Let’s take a moment to appreciate the beauty of a perfectly cooked salmon fillet .If you're like me, you’ve likely experienced that magical moment when the sizzling fish meets the hot pan releasing its savory essence.
Prep Time 5 minutes
Cook Time 10 minutes
Total Time 15 minutes
Course Main Course
Cuisine American
Servings 4
Calories 367 kcal

Equipment

  • Skillet
  • pan

Ingredients
  

  • 4 fillets Salmon fillets each about 6 ounces and approximately 1¼ inches thick (skin removed by fishmonger; it’s optional to keep the skin on).
  • 1 tablespoon Extra-virgin olive oi for that rich flavor.
  • 1 teaspoon Fresh lemon zest to add a refreshing zing.
  • ½ teaspoon Sea salt seasoning our fish just right.
  • Fresh dill finely chopped for an aromatic touch.
  • Freshly cracked black pepper : To taste because every dish needs a little kick!

Instructions
 

Step 1: Preheat the Pan

  • First things first, heat a non-stick skillet over medium heat. If you have a cast-iron skillet, pull it out for a more beautiful sear! Let it warm up for about 3-4 minutes. You want it hot, but not smoking. Testing the heat is simple: flick a drop of water onto the pan. If it dances and evaporates immediately, you’re good to go.

Step 2: Prepare the Salmon

  • While the pan is heating, let’s prep our salmon. Pat the fillets dry with paper towels. This removes excess moisture and helps achieve that desired crispy finish. Next, take your olive oil and rub it on both sides of the fillets. T
  • his not only flavors the salmon but also serves as a barrier against sticking. Sprinkle sea salt, lemon zest, chopped dill, and cracked black pepper on both sides, too. We’re building flavor here!

Step 3: Sear the Salmon

  • Once the skillet is at the right temperature, gently place your fillets in the pan. Lay them down in the opposite direction of the pan’s heat—this avoids splattering and gives you a nice sizzle. Leave them undisturbed for about 4-5 minutes. The goal is a golden-brown crust.

Step 4: Flip and Finish Cooking

  • Now, here comes the moment of truth. Carefully flip each fillet using a spatula. Watch for that lovely golden color!
  • Let the salmon cook for another 3-4 minutes on this side. Salmon is done when it flakes easily with a fork and has an internal temperature of 125-130°F for medium-rare. If you have a meat thermometer, it’s a handy tool here.

Step 5: Serve Hot

  • Once your salmon is cooked to perfection, remove it from the heat. Serve immediately! Garnish with a sprinkle of fresh dill or a slice of lemon if you’re feeling fancy.

Notes

  • Choose Fresh Salmon: Fresh fish is key. Look for firm fillets with a bright color and pleasant smell.
  • Don’t Crowd the Pan: Give your salmon space to breathe in the pan. Crowding leads to steaming, not searing.
  • Use a Good Fish Spatula: If you have one, use a fish spatula for flipping. It’s wider and helps prevent the fillets from breaking.
  • Rest for Flavor: Allow the salmon to rest for a minute or two after cooking. This helps lock in the juices.
  • Experiment with Seasonings: Try adding garlic powder, smoked paprika, or even a dash of cumin for a twist.

Nutrition

Calories: 367kcalProtein: 34gFat: 22gSaturated Fat: 4g
Keyword How to Make Pan Fried Salmon
Tried this recipe?Let us know how it was!

Frequently Asked Questions

Here’s where I tackle questions that often arise when preparing pan-fried salmon.

1. Can I use frozen salmon?

Yes, but be sure to thaw it in the refrigerator overnight before cooking. Thawing allows for even cooking.

2. What’s the best way to know salmon is cooked?

The flesh should be opaque and flake easily with a fork. A meat thermometer is ideal; it should read between 125°F and 130°F for medium-rare.

3. Can I use other types of fish?

Definitely! This method works for trout, tilapia, or cod. Adjust cooking times based on the thickness of the fillet.

4. What’s the best pan to use for frying salmon?

A non-stick skillet or cast-iron skillet works well. Both can create a beautiful sear and prevent sticking.

5. Can I add vegetables to the pan while cooking the salmon?

Of course! Add quick-cooking veggies like zucchini or bell peppers towards the end of cooking to keep them crisp.

Conclusion

By now, you should feel confident about creating a delicious pan-fried salmon dish. It’s straightforward, flexible, and a guaranteed crowd-pleaser. Once you try it, you might find yourself cooking salmon more often than you thought. I hope that you enjoy every moment spent in your kitchen, experimenting with flavors and making memories around the dinner table. So, gear up, grab that skillet, and let the sizzle begin!

You’ll also like these latest recipes!

Smashed Asian Cucumber Salad Recipe – Culinary Chase

Smashed Asian Cucumber Salad Recipe – Culinary Chase

Before diving into the juicy details of the Smashed Asian Cucumber Salad, let’s talk about what you can pair with it. This vibrant dish bursts with fresh flavor, making it a delightful companion to a variety of meals. 1. Grilled Chicken Grilled chicken complements the