When indulging in Chicken Katsu Curry Rice, you want the perfect accompaniments. Trust me; it can elevate your meal from good to unforgettable. Pickled vegetables are a fantastic choice. Their tangy notes cut through the richness of the curry beautifully. Think pickled cucumbers or daikon radish.
Another great option is miso soup, which complements the dish’s flavors without overwhelming your palate. You could also consider fresh green salad with a light vinaigrette to provide a refreshing contrast. Sushi rolls can be an exciting and fun addition, especially if served as a side. Finally, a simple glass of iced green tea can cleanse your palate and add a soothing element to your dining experience.
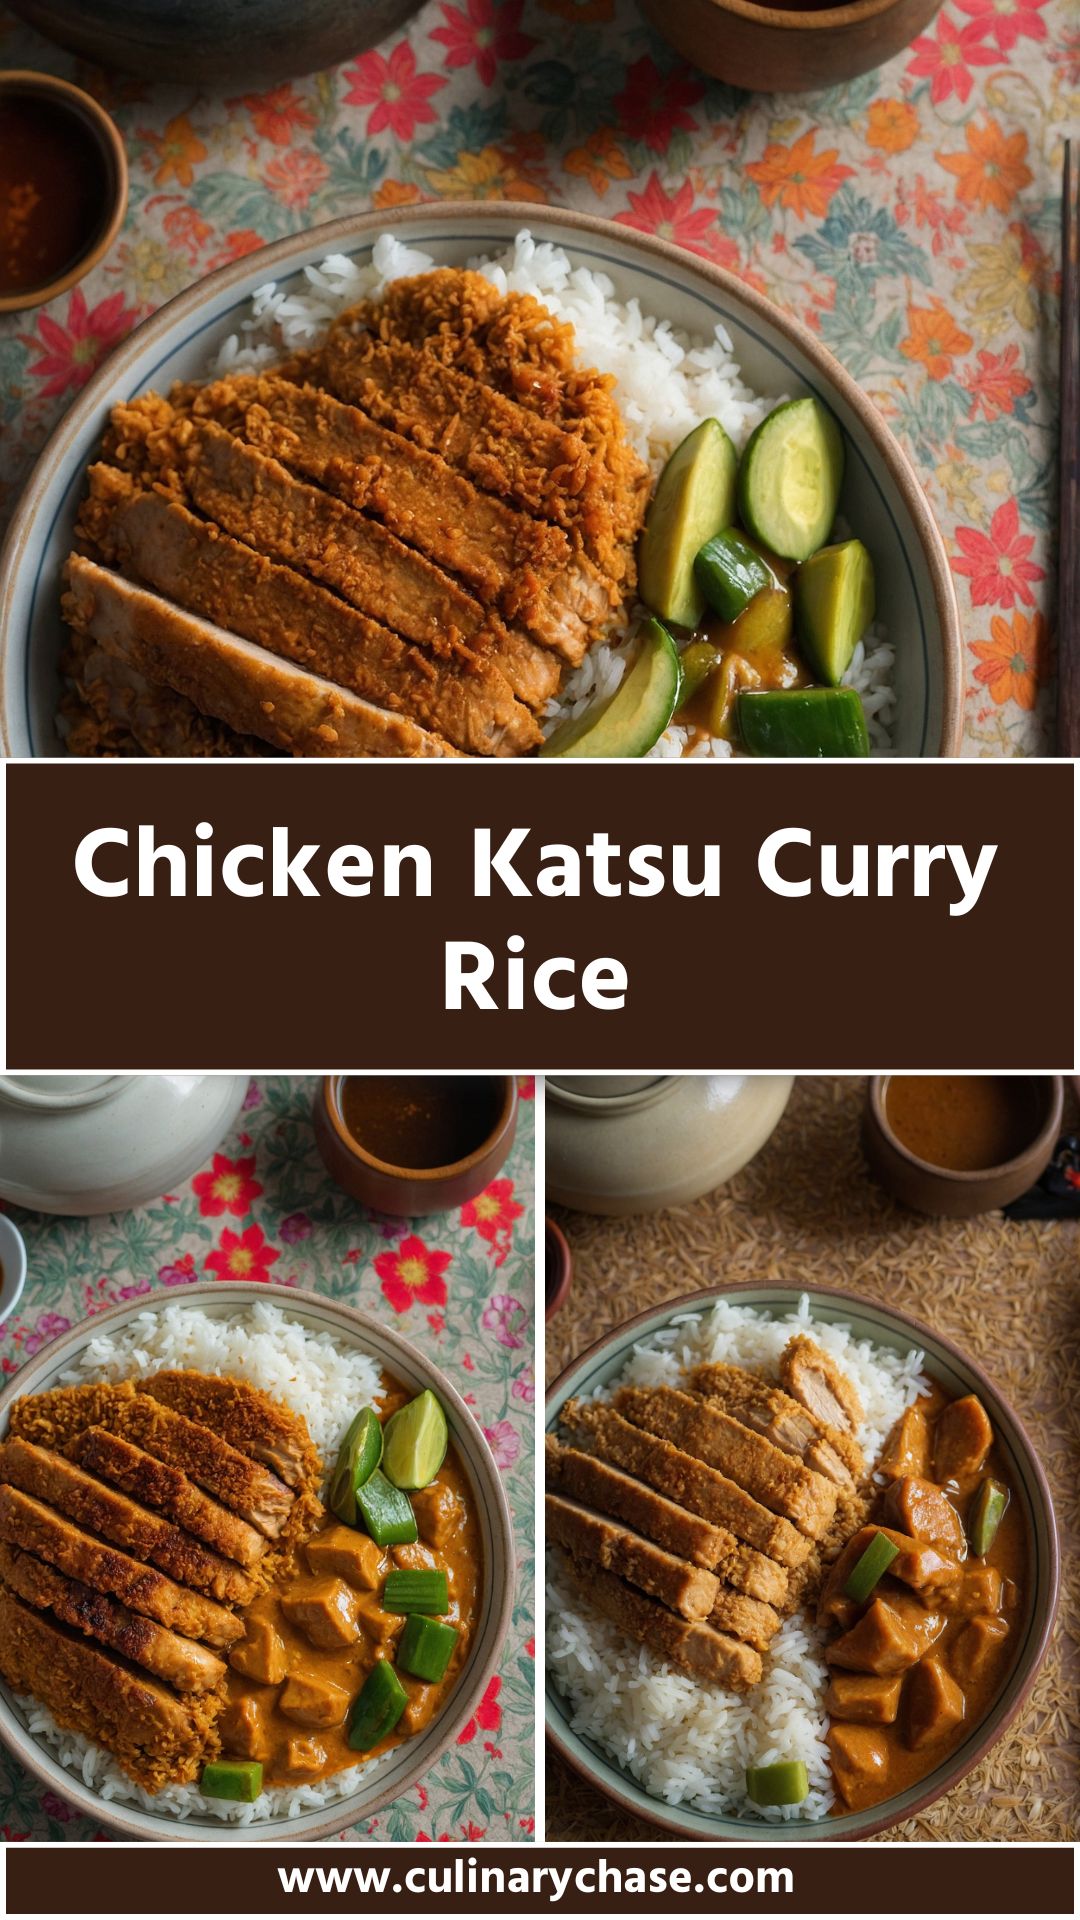
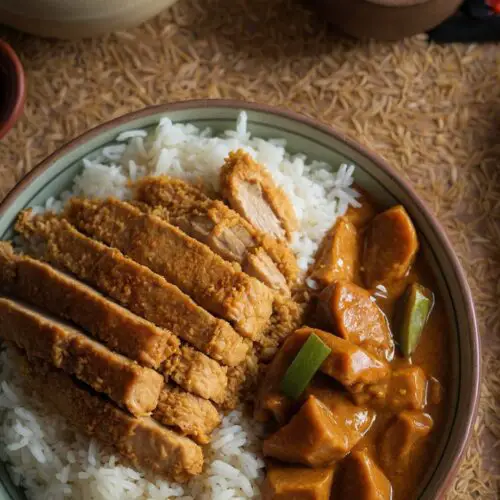
Chicken Katsu Curry Rice is a delightful dish that combines crispy chicken, savory curry sauce, and fluffy rice. It’s an excellent representation of Japanese comfort food that has won hearts worldwide.
Having stumbled upon this treasure at a small Japanese diner years ago, I was immediately captivated by its harmony of flavors. It’s packed with a richness that only deep-fried chicken can bring, paired with the fragrant essence of curry. The beauty? It’s approachable and easy to make, transforming any weeknight into a culinary adventure.
What is Chicken Katsu Curry Rice?
At its core, Chicken Katsu Curry Rice is a fusion dish consisting of three main components: chicken katsu, curry sauce, and rice. The term “katsu” refers to a method of cooking that involves breading and frying meat, while curry is a flavorful sauce flavored with different spices and vegetables.
Traditionally, this dish uses tonkatsu, which is pork, but chicken is a popular option due to its lighter profile. The rice used is often short-grain Japanese rice, perfect for soaking up the delicious sauce.
Why You’ll Love This Chicken Katsu Curry Rice
So, what makes this dish so special? Let me walk you through it. The crispy chicken is a feast for the senses. When you bite into it, the crunchiness of the panko breadcrumbs contrasts beautifully with the juicy, tender chicken inside. It’s not just any fried chicken – it’s elevated comfort food that brings a smile.
The curry sauce is another star of the show. It’s rich, aromatic, and full of warmth. The spice blend used is important. It’s like a warm hug on a plate that feels familiar yet exciting. The combination of onions, garlic, and ginger gives the sauce depth, while carrots and potatoes add heartiness.
Then comes the short-grain rice. Its sticky nature makes it perfect for soaking up the curry sauce, creating a balance that is simply irresistible. This dish is not just a meal; it’s an experience. The way each component comes together creates a layered taste that invites you to dig in for more.
Plus, let’s not forget how adaptable this dish is. It fits snugly into various dietary preferences. You can adjust the spiciness of the curry to match your taste buds, making it suitable for kids or anyone sensitive to heat. And if you’re keeping an eye on dietary restrictions, you can easily swap in alternatives.
You will also like the following Lunch and Dinner recipes!
The Ingredients You Will Need To Make Chicken Katsu Curry Rice
Creating delicious Chicken Katsu Curry Rice requires some foundational ingredients that you may already have in your kitchen. But let’s ensure we have everything needed for this culinary adventure:
For the Curry Sauce:
- 1 tablespoon unsalted or lightly salted butter (added at the end for richness)
- 1 tablespoon neutral oil (like vegetable or canola)
- 10–12 ounces chopped yellow or white onion (about 2 small to medium onions, cut into 1-inch chunks)
- 1 clove garlic, finely minced
- 1 teaspoon freshly grated ginger (optional for warmth)
- 2 tablespoons mild to medium Madras curry powder
- 1 tablespoon concentrated tomato paste
- 1 teaspoon kosher salt
- 1 teaspoon granulated sugar
- 8 ounces carrots, peeled and sliced into triangular pieces
- 8 ounces russet or Yukon Gold potatoes, cut into cubes
- 2 cups low-sodium chicken broth or stock
- 1 tablespoon soy sauce
- 1 tablespoon cornstarch, dissolved in 1 tablespoon water (for thickening)
For the Chicken Katsu:
- 2 pounds boneless, skinless chicken breasts
- 2 tablespoons all-purpose flour, for dredging
- Salt and freshly cracked black pepper, to taste
- 1 large egg, beaten
- 1⅓ cups panko breadcrumbs (Japanese style)
- Vegetable oil (for shallow or deep frying)
For Serving:
- 6 cups cooked short-grain Japanese rice (like koshihikari or sushi rice), steamed and fluffed
Directions
Step 1: Prepare the Curry Sauce
Start by heating the neutral oil in a large pot over medium heat. Once the oil shimmers, toss in the chopped onions. Sauté the onions until they start to soften and become translucent. This generally takes about 5-7 minutes. Add in the minced garlic and grated ginger, stirring until fragrant. This should take around a minute as the aromas fill your kitchen.
Next, introduce the curry powder, tomato paste, salt, and sugar. Stir to combine; the mixture should take on a lovely earthy color. Now it’s time to add the chopped carrots and potatoes. Stir everything together, coating the veggies in the spice mix.
Pour in the chicken broth and soy sauce. Allow it to come to a gentle simmer. Reduce the heat to low and cover the pot. Let it cook for about 20-30 minutes. The goal is to have the vegetables tender while allowing the flavors to mingle beautifully.
As a final touch, create a cornstarch slurry by mixing the cornstarch with water. After the vegetables are tender, slowly pour the slurry into the curry sauce, stirring constantly until it thickens. This should take just a few minutes. Finally, stir in the butter, which adds richness that ties everything together.
Step 2: Prep the Chicken Katsu
While the curry sauce is simmering, it’s time to work on the chicken katsu. First, prepare the chicken breasts by flattening them slightly. This helps them cook evenly. Place each breast between two pieces of plastic wrap, then pound them to about ½-inch thickness with a meat mallet or a rolling pin.
Season both sides with salt and freshly cracked black pepper. Set up a breading station: a shallow dish with flour, one with the beaten egg, and another with panko breadcrumbs.
Dredge each piece of chicken in flour first, shaking off any excess. Dip it in the egg, allowing the excess to drip off, and finally coat it thoroughly with panko breadcrumbs. Make sure each piece is well-covered for maximum crunchiness.
Step 3: Fry the Chicken
In a large skillet, heat a half-inch of vegetable oil over medium to medium-high heat. You can test the oil’s readiness by dropping a breadcrumb into it. If it sizzles and bubbles, you’re good to go.
Carefully place the breaded chicken in the hot oil without overcrowding the pan. Let them fry until golden brown and crispy, about 3-4 minutes for each side. Use a meat thermometer to ensure the chicken is cooked through; it should reach an internal temperature of 165°F. When done, transfer them to a paper towel-lined plate to drain any excess oil.
Step 4: Cook the Rice
While the chicken is frying, cook the rice according to package instructions. Short-grain rice is often soaked for 30 minutes before cooking. This helps achieve the perfect sticky texture.
Once the rice is ready, fluff it with a fork and cover it to keep warm while finishing everything else.
Notes
- Ingredient Quality: Use fresh, high-quality ingredients. This makes a noticeable difference. Fresh vegetables and a good brand of curry powder will enhance the dish significantly.
- Don’t Skip the Slurry: The cornstarch slurry is key to achieving a beautifully thick curry sauce. Without it, your sauce might be too thin.
- Double-Check Cooking Times: Overcooked chicken can become dry. Use a thermometer for precise cooking.
- Experiment with Spice Levels: If you prefer more heat, consider adding chili flakes or using a spicier curry powder.
- Freezing Option: The curry sauce freezes well, making it perfect for meal prep. Simply thaw and reheat when needed.
Storage Tips
If you have leftovers (which is hard to believe!), store them in an airtight container in the refrigerator for up to three days. To properly reheat, warm the curry over low heat on the stovetop, stirring gently to maintain the sauce’s consistency. Alternatively, you can microwave it in short intervals, stirring in between to achieve even heating.
If you want to make extra and store it for longer, the curry sauce can be frozen for up to three months. Meal prep at its finest!
Nutrition Information
Serving Size: 1 plate of Chicken Katsu Curry Rice
- Calories: Approximately 700
- Protein: 45g
- Carbohydrates: 80g
- Fat: 25g
- Fiber: 5g
Nutrition will vary depending on cooking methods, specific brands, and the precise amounts used. Always check specific ingredient labels for the most accurate nutrition facts.
Serving Suggestions
1. Add a Side of Steamed Broccoli: This bright green veggie provides a fresh crunch and balances the richness of the curry. It adds a pop of color and nutrition.
2. Pair with Salad: A simple mixed greens salad with a light dressing adds a refreshing contrast to the richness of the curry and katsu.
3. Top with a Fried Egg: Placing a runny fried egg atop your chicken katsu adds decadence. The yolk mixes with the curry for an incredible flavor boost.
4. Incorporate Kimchi: The spicy, tangy nature of kimchi complements the meal. It adds complexity and enhances the overall flavor experience.
5. Serve with Naan Bread: Believe it or not, naan works beautifully. You can use it to scoop up curry, rounding out the meal.
What Other Substitutes Can I Use in Chicken Katsu Curry Rice?
1. Tofu Instead of Chicken: For a vegan option, firm tofu can be breaded and fried similar to chicken. It absorbs the curry sauce well.
2. Quinoa for Rice: If you’re looking for a healthier alternative, quinoa can replace rice, providing ample protein while still pairing nicely with the curry.
3. Cauliflower for Potatoes: Use cauliflower florets instead of potatoes. They cook quickly and soak up all the wonderful curry flavors.
4. Sweet Potato Instead of Regular Potatoes: Sweet potatoes add sweetness and extra nutrition, creating a delightful twist.
5. Turkey Cutlets for Chicken: If you’re looking for a leaner protein, turkey cutlets can work just as deliciously.
Chicken Katsu Curry Rice
When indulging in Chicken Katsu Curry Rice, you want the perfect accompaniments. Trust me; it can elevate your meal from good to unforgettable.
Prep Time 30 minutes mins
Cook Time 1 hour hr
Total Time 1 hour hr 30 minutes mins
Course Main Course
Cuisine Japanese
Servings 4
Calories 700 kcal
For the Curry Sauce:
- 1 tablespoon unsalted or lightly salted butter added at the end for richness
- 1 tablespoon neutral oil like vegetable or canola
- 10 –12 ounces chopped yellow or white onion about 2 small to medium onions, cut into 1-inch chunks
- 1 clove garlic finely minced
- 1 teaspoon freshly grated ginger optional for warmth
- 2 tablespoons mild to medium Madras curry powder
- 1 tablespoon concentrated tomato paste
- 1 teaspoon kosher salt
- 1 teaspoon granulated sugar
- 8 ounces carrots peeled and sliced into triangular pieces
- 8 ounces russet or Yukon Gold potatoes cut into cubes
- 2 cups low-sodium chicken broth or stock
- 1 tablespoon soy sauce
- 1 tablespoon cornstarch dissolved in 1 tablespoon water (for thickening)
For the Chicken Katsu:
- 2 pounds boneless skinless chicken breasts
- 2 tablespoons all-purpose flour for dredging
- Salt and freshly cracked black pepper to taste
- 1 large egg beaten
- 1⅓ cups panko breadcrumbs Japanese style
- Vegetable oil for shallow or deep frying
For Serving:
- 6 cups cooked short-grain Japanese rice like koshihikari or sushi rice, steamed and fluffed
Step 1: Prepare the Curry Sauce
Start by heating the neutral oil in a large pot over medium heat. Once the oil shimmers, toss in the chopped onions. Sauté the onions until they start to soften and become translucent. This generally takes about 5-7 minutes. Add in the minced garlic and grated ginger, stirring until fragrant. This should take around a minute as the aromas fill your kitchen.
Next, introduce the curry powder, tomato paste, salt, and sugar. Stir to combine; the mixture should take on a lovely earthy color. Now it’s time to add the chopped carrots and potatoes. Stir everything together, coating the veggies in the spice mix.
Pour in the chicken broth and soy sauce. Allow it to come to a gentle simmer. Reduce the heat to low and cover the pot. Let it cook for about 20-30 minutes. The goal is to have the vegetables tender while allowing the flavors to mingle beautifully.
As a final touch, create a cornstarch slurry by mixing the cornstarch with water. After the vegetables are tender, slowly pour the slurry into the curry sauce, stirring constantly until it thickens. This should take just a few minutes. Finally, stir in the butter, which adds richness that ties everything together.
Step 2: Prep the Chicken Katsu
While the curry sauce is simmering, it’s time to work on the chicken katsu. First, prepare the chicken breasts by flattening them slightly. This helps them cook evenly. Place each breast between two pieces of plastic wrap, then pound them to about ½-inch thickness with a meat mallet or a rolling pin.
Season both sides with salt and freshly cracked black pepper. Set up a breading station: a shallow dish with flour, one with the beaten egg, and another with panko breadcrumbs.
Dredge each piece of chicken in flour first, shaking off any excess. Dip it in the egg, allowing the excess to drip off, and finally coat it thoroughly with panko breadcrumbs. Make sure each piece is well-covered for maximum crunchiness.
Step 3: Fry the Chicken
In a large skillet, heat a half-inch of vegetable oil over medium to medium-high heat. You can test the oil’s readiness by dropping a breadcrumb into it. If it sizzles and bubbles, you’re good to go.
Carefully place the breaded chicken in the hot oil without overcrowding the pan. Let them fry until golden brown and crispy, about 3-4 minutes for each side. Use a meat thermometer to ensure the chicken is cooked through; it should reach an internal temperature of 165°F. When done, transfer them to a paper towel-lined plate to drain any excess oil.
Step 4: Cook the Rice
While the chicken is frying, cook the rice according to package instructions. Short-grain rice is often soaked for 30 minutes before cooking. This helps achieve the perfect sticky texture.
Once the rice is ready, fluff it with a fork and cover it to keep warm while finishing everything else.
- Ingredient Quality: Use fresh, high-quality ingredients. This makes a noticeable difference. Fresh vegetables and a good brand of curry powder will enhance the dish significantly.
- Don’t Skip the Slurry: The cornstarch slurry is key to achieving a beautifully thick curry sauce. Without it, your sauce might be too thin.
- Double-Check Cooking Times: Overcooked chicken can become dry. Use a thermometer for precise cooking.
- Experiment with Spice Levels: If you prefer more heat, consider adding chili flakes or using a spicier curry powder.
- Freezing Option: The curry sauce freezes well, making it perfect for meal prep. Simply thaw and reheat when needed.
Calories: 700kcalCarbohydrates: 80gProtein: 45gFat: 25gFiber: 5g
Keyword Chicken Katsu Curry Rice
Frequently Asked Questions
1. Can I make Chicken Katsu Curry Rice ahead of time?
Yes, absolutely! You can prepare the curry sauce and the chicken katsu ahead of time. Just store them separately in airtight containers. When you’re ready to serve, simply reheat the curry and fry the chicken katsu at the last moment to keep it crispy.
2. What type of curry powder should I use?
Madras curry powder is commonly used, providing the right balance of warmth and flavor. However, you can experiment with Thai curry powders or Japanese curry blocks if you prefer a different flavor profile.
3. Can I make this dish spicy?
Sure! You can add more curry powder or chopped fresh chili peppers to the sauce to amp up the heat. Maintaining a balance is key, so taste as you go.
4. Is Chicken Katsu Curry Rice gluten-free?
To make it gluten-free, use gluten-free breadcrumbs and ensure your curry powder and soy sauce are also gluten-free. Adjust the flour used for dredging accordingly.
5. Can I use chicken thighs instead of breasts?
Absolutely! Chicken thighs are juicier and provide a great flavor. Just adjust the cooking time slightly since they may take a bit longer to cook through.
6. What is a good side dish to serve with this meal?
Miso soup, pickled vegetables, or a green salad work wonderfully as side dishes, complementing the flavors of Chicken Katsu Curry Rice while providing a refreshing balance.
Conclusion
Chicken Katsu Curry Rice is more than just a meal; it offers an experience wrapped in warmth and flavor. With crispy chicken, a rich curry sauce, and fluffy rice, it’s simply irresistible. This dish is perfect for busy weeknights and can easily fit into your culinary repertoire. Plus, it can cater to various dietary preferences, making it inclusive for your family and friends.
So grab your apron, gather your ingredients, and prepare for an adventure that will fill your home with delightful aromas. Whether you’re serving it for a casual dinner or a more formal occasion, Chicken Katsu Curry Rice is sure to impress. Dive into this flavorful dish, and I promise, the smiles around the table will be your best reward.
You’ll also like these latest recipes!