If you’ve ever been to a good Chinese restaurant, you know that deep-fried wontons are often the highlight of the appetizer menu. There’s something about the crispy exterior that holds the savory filling inside, paired with a spicy sweet chili sauce that makes each bite a little explosion of flavor. Recently, I decided it was time to try making these little pockets of joy at home. Picture a warm evening with friends gathered, laughter filling the air, plates of these delicious bites nestled among other tasty offerings. Trust me, there’s nothing quite like it!
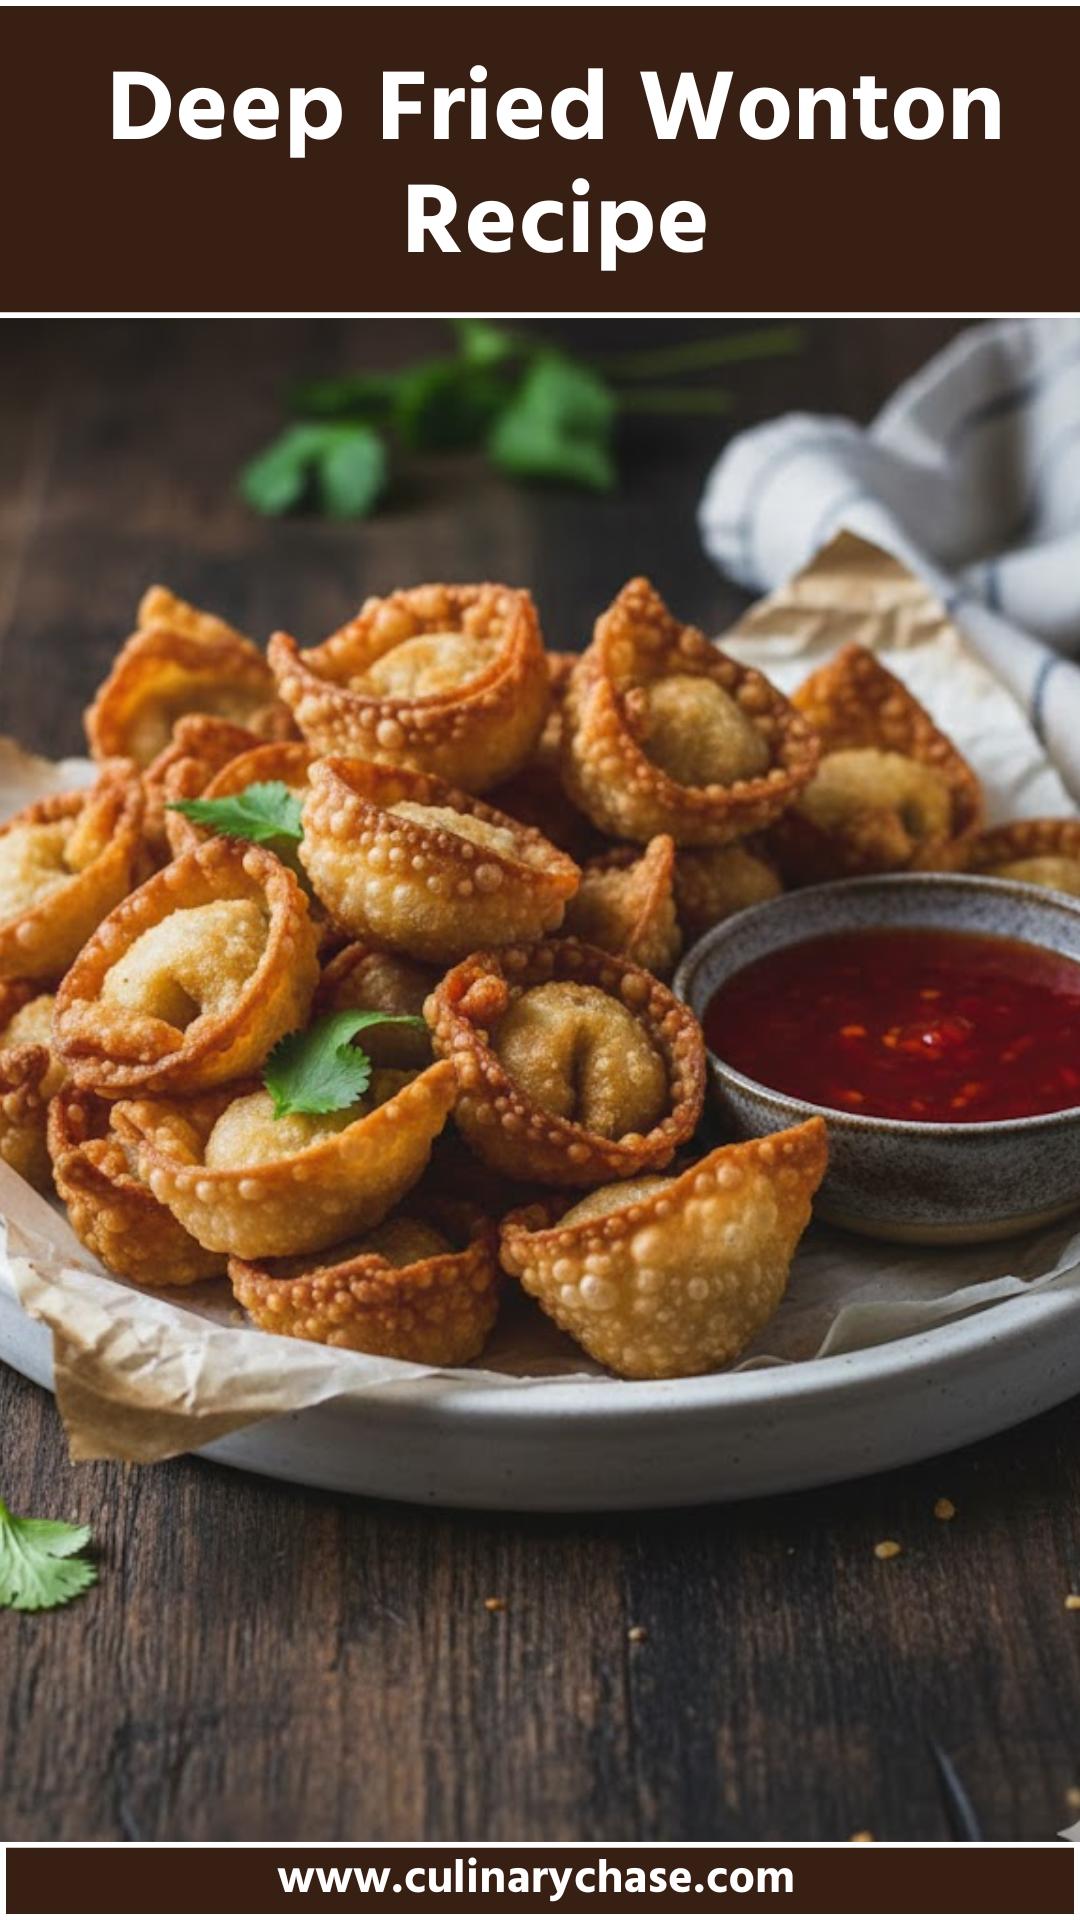
Deep-fried wontons are a popular appetizer that has made their way into the hearts and stomachs of many food lovers. They’re small, golden-brown pillows filled with a delightful mixture of ingredients, traditionally nestled inside a delicate, thin wrapper. Whether you’re serving them at a party or whipping them up for a cozy night in, they are sure to impress and satisfy that craving for something crunchy and savory.
You Might Also Like These Recipes!
Deep Fried Egg Recipe
Bitter Melon with Eggs Recipe
Japanese Sweet Potatoes Recipe
What is Deep Fried Wonton?
Deep-fried wontons are a bite-sized treat made from thin sheets of dough called wonton wrappers, which are usually filled with ground meat, vegetables, and a mix of savory sauces or seasonings. Once filled, the wrappers are sealed and deep-fried until they reach that perfect golden color and satisfying crunch. While they are often associated with Asian cuisine, they are enjoyed around the world, making them quite versatile.
What is the Flavor Profile of This Dish?
The flavor profile of deep-fried wontons is a delightful combination of savory, umami, and aromatic notes. The ground pork provides a rich base, while the minced shiitake mushrooms add an earthy depth. Green onions bring a fresh bite, and the soy sauce and sesame oil enhance the overall taste, delivering that classic Asian-inspired flair. Each bite also carries a touch of warmth from the ginger and garlic, making them addictively flavorful.
Why You’ll Love This Dish
You’re going to love making these deep-fried wontons because they are incredibly easy to prepare and pack a major flavor punch! They are perfect for gatherings, game days, or simply when you want to treat yourself. Plus, the joy of biting into that crispy exterior to find a juicy filling is truly unmatched. They’re also quite customizable, allowing you to adapt the flavors to suit your taste or dietary needs.
The Ingredients
Here’s what you’ll need to create these crispy delights at home:
– 1 pound of ground pork
– 1/2 cup finely minced shiitake mushrooms
– 1/4 cup thinly sliced green onions
– 1 tablespoon soy sauce
– 1 teaspoon toasted sesame oil
– 1 teaspoon cornstarch
– 1/2 teaspoon salt
– 1/4 teaspoon black pepper
– 1/2 teaspoon minced ginger
– 1 teaspoon minced garlic
– 12 ounces of square wonton wrappers
– Vegetable oil for frying
– Optional: Sweet chili sauce for dipping
– Optional: 1/2 teaspoon chopped cilantro for freshness
How to Make Deep Fried Wonton
Ready to dive into the steps? Making deep-fried wontons is a straightforward process. Follow along as I guide you through each step, ensuring you’re set up for success!
Step-by-Step Directions
Step 1: Prepare the Filling
In a spacious mixing bowl, add the ground pork, finely minced shiitake mushrooms, and sliced green onions. Pour in soy sauce, sesame oil, cornstarch, salt, pepper, minced ginger, and minced garlic. Using a spatula or your hands, mix everything together until it’s well combined. This filling is the heart of your wontons – make sure it’s well-seasoned!
Step 2: Assemble the Wontons
On a clean surface, lay out a wonton wrapper. Keep the remaining wrappers covered with a damp towel to avoid drying out. Using a pastry brush, lightly brush the two edges of the wonton wrapper farthest from you with water. This will help seal the wrapper later. Scoop about 3/4 teaspoon of the pork mixture and place it in the center of the wrapper.
Step 3: Shape the Wontons
Fold the wrapper over the filling to form a triangle. Ensure that you press out any air as you do this. Next, take the two bottom corners of the triangle and bring them together, creating a little purse shape. Dab a bit of water on the bottom corners to seal them together. Repeat this process until all the wrappers and filling are used up.
Step 4: Heat the Oil
In a deep pot, pour enough vegetable oil to reach a depth of about three inches. Heat the oil over medium-high heat until it reaches 375°F (190°C). You can use a kitchen thermometer to check the temperature, or you can test it by dropping a small piece of the wonton wrapper in; it should sizzle immediately.
Step 5: Fry the Wontons
Working in batches, carefully place 6-8 wontons in the hot oil. Do not overcrowd the pan; this can lower the oil temperature and lead to soggy wontons. Fry the wontons for approximately 3-5 minutes or until they turn golden brown and crispy. Use a slotted spoon to remove them from the oil, and let them drain on paper towels. Repeat with the remaining wontons.
Step 6: Serve Warm
Once all the wontons are fried, serve them immediately while they’re still hot and crispy. Consider offering a side of sweet chili sauce for those who enjoy a little kick with their crunch.
Tips
– Pre-mix the filling a few hours ahead of time and let it sit in the fridge for the flavors to meld.
– Don’t overfill your wontons, as this can cause them to burst open while frying.
– Test the oil temperature before frying your wontons to achieve a crispy texture.
– Leftover wontons can be frozen. Just lay them flat on a baking sheet, freeze until solid, then transfer to a freezer bag for future snacking!
– Variations are endless; try adding shredded cabbage or carrots for added crunch and nutrients.
How Can You Store This Deep Fried Wonton?
To store any leftover wontons, let them cool completely on paper towels. Once cooled, place them in an airtight container and refrigerate for up to 3 days. To reheat, pop them in a preheated oven or toaster oven at 350°F until crispy again. Freezing is also an option—store them as described before in a freezer-safe bag, and they can last for up to 2 months.
If Some Ingredients Are Not Available, What Are Some Alternative Choices You Can Consider?
If you’re missing some of the ingredients, don’t fret! Here are some substitutes you might find useful:
– Ground Pork:Ground chicken or turkey can work well, offering a lighter option.
– Shiitake Mushrooms:Button or cremini mushrooms can replace shiitakes; both add their own unique flavors.
– Soy Sauce: Consider tamari for a gluten-free version or coconut aminos for a lower-sodium alternative.
– Sesame Oil: If unavailable, olive oil or a drop of peanut oil can provide a different taste, albeit not identical.
– Wonton Wrappers:Spring roll wrappers can be used, though they might be slightly thicker.
Nutrition Information
This delightful appetizer packs an average of 250 calories per serving, offering a balanced mix of protein and flavor. The pork provides essential amino acids, while mushrooms and green onions contribute vitamins such as B vitamins and vitamin C. Just be mindful of portion sizes, especially if enjoying alongside other dishes!
Serving Suggestions
– Serve alongside sweet chili sauce for dipping, enhancing the flavor experience.
– Pair with a pineapple salsa for a tropical twist that complements the savory filling.
– Enjoy with a traditional soy-based dipping sauce sprinkled with sesame seeds for added texture.
– Add a salad with a zesty dressing for a refreshing contrast.
– Consider a side of steamed vegetables to round out the meal with some freshness.
What Other Substitute Can I Use in Deep Fried Wonton Recipe?
Beyond the initial substitutes, you can also consider:
– Miso paste can enhance flavor if you can’t find soy sauce.
– Cabbage can replace mushrooms for crunch if you’re not a fan.
– Cream cheese, when mixed with herbs, can give a rich filling instead of meat.
– Tofu can replace meat for a vegetarian version.
– Different meat options like ground beef or lamb can mix things up based on your taste.
Deep Fried Wonton Recipe
 Joe Williams
Deep-fried wontons are a popular appetizer that has made their way into the hearts and stomachs of many food lovers. They’re small, golden-brown pillows filled with a delightful mixture of ingredients, traditionally nestled inside a delicate, thin wrapper. Whether you're serving them at a party or whipping them up for a cozy night in, they are sure to impress and satisfy that craving for something crunchy and savory.
Prep Time 30 minutes mins
Cook Time 15 minutes mins
Course Appetizer
Cuisine Asian
Servings 6
Calories 250 kcal
Deep pot
Mixing bowl
slotted spoon
paper towels
pastry brush
- Here’s what you’ll need to create these crispy delights at home:
- – 1 pound of ground pork
- – 1/2 cup finely minced shiitake mushrooms
- – 1/4 cup thinly sliced green onions
- – 1 tablespoon soy sauce
- – 1 teaspoon toasted sesame oil
- – 1 teaspoon cornstarch
- – 1/2 teaspoon salt
- – 1/4 teaspoon black pepper
- – 1/2 teaspoon minced ginger
- – 1 teaspoon minced garlic
- – 12 ounces of square wonton wrappers
- – Vegetable oil for frying
- – Optional: Sweet chili sauce for dipping
- – Optional: 1/2 teaspoon chopped cilantro for freshness
Step-by-Step Directions
Step 1: Prepare the Filling
In a spacious mixing bowl, add the ground pork, finely minced shiitake mushrooms, and sliced green onions. Pour in soy sauce, sesame oil, cornstarch, salt, pepper, minced ginger, and minced garlic. Using a spatula or your hands, mix everything together until it’s well combined. This filling is the heart of your wontons – make sure it’s well-seasoned!
Step 2: Assemble the Wontons
On a clean surface, lay out a wonton wrapper. Keep the remaining wrappers covered with a damp towel to avoid drying out. Using a pastry brush, lightly brush the two edges of the wonton wrapper farthest from you with water. This will help seal the wrapper later. Scoop about 3/4 teaspoon of the pork mixture and place it in the center of the wrapper.
Step 3: Shape the Wontons
Fold the wrapper over the filling to form a triangle. Ensure that you press out any air as you do this. Next, take the two bottom corners of the triangle and bring them together, creating a little purse shape. Dab a bit of water on the bottom corners to seal them together. Repeat this process until all the wrappers and filling are used up.
Step 4: Heat the Oil
In a deep pot, pour enough vegetable oil to reach a depth of about three inches. Heat the oil over medium-high heat until it reaches 375°F (190°C). You can use a kitchen thermometer to check the temperature, or you can test it by dropping a small piece of the wonton wrapper in; it should sizzle immediately.
Step 5: Fry the Wontons
Working in batches, carefully place 6-8 wontons in the hot oil. Do not overcrowd the pan; this can lower the oil temperature and lead to soggy wontons. Fry the wontons for approximately 3-5 minutes or until they turn golden brown and crispy. Use a slotted spoon to remove them from the oil, and let them drain on paper towels. Repeat with the remaining wontons.
– Pre-mix the filling a few hours ahead of time and let it sit in the fridge for the flavors to meld.
– Don’t overfill your wontons, as this can cause them to burst open while frying.
– Test the oil temperature before frying your wontons to achieve a crispy texture.
– Leftover wontons can be frozen. Just lay them flat on a baking sheet, freeze until solid, then transfer to a freezer bag for future snacking!
– Variations are endless; try adding shredded cabbage or carrots for added crunch and nutrients. Serving: 6gCalories: 250kcal
Keyword Deep Fried Wonton Recipe
FAQs
1. Can I bake wontons instead of frying them?
Yes, you can! To bake, brush the wontons lightly with oil and place them on a baking sheet. Bake at 375°F for about 15-20 minutes, flipping halfway through until they are golden.
2. How do I prevent wontons from leaking during frying?
Ensure your wontons are sealed well. Use water to moisten the edges and press firmly to remove any air pockets before frying.
3. Can I use store-bought filling?
Definitely! Many stores sell prepared fillings, which can save time. Just make sure to follow the package instructions for cooking.
4. How can I make wontons more flavorful?
Feel free to spice up your filling with additional spices or sauces, such as chili paste, five-spice powder, or even a splash of rice vinegar for a tangy kick!
5. How do I serve wontons to impress my guests?
Presentation matters! Arrange wontons on a platter with colorful garnish, drizzle with sauce, and provide dipping options for a fancy touch.
Conclusion
Deep-fried wontons are not just easy to make; they are also versatile and packed with flavor. Whether for a gathering or just a cozy night at home with loved ones, they’re a hit for sure. So roll up those sleeves, fill those wrappers, and get frying! Enjoying your homemade fried wontons with your favorite dipping sauce is a guaranteed way to elevate your meal. Trust me, once you try this recipe, you’ll find yourself making these crispy beauties again and again. Happy cooking!
You Might Also Like These Latest Recipes!
Deep Fried Egg Recipe
Dairy Free Tartar Sauce Recipe
Dairy Free Cake Chocolate Recipe