When I first encountered Pad Kra Pao, it was like discovering a hidden gem in the bustling streets of Thailand. The sizzling sounds of garlic hitting the pan, the rich aromas filling the air, and that first bite of spiced chicken or tofu topped with …
When it comes to enjoying homemade Chinese dumplings, pair them with a refreshing dipping sauce or a light broth. A simple soy sauce mixed with a dash of rice vinegar and a sprinkle of sesame seeds creates a classic dip. Alternatively, a bowl of warm …
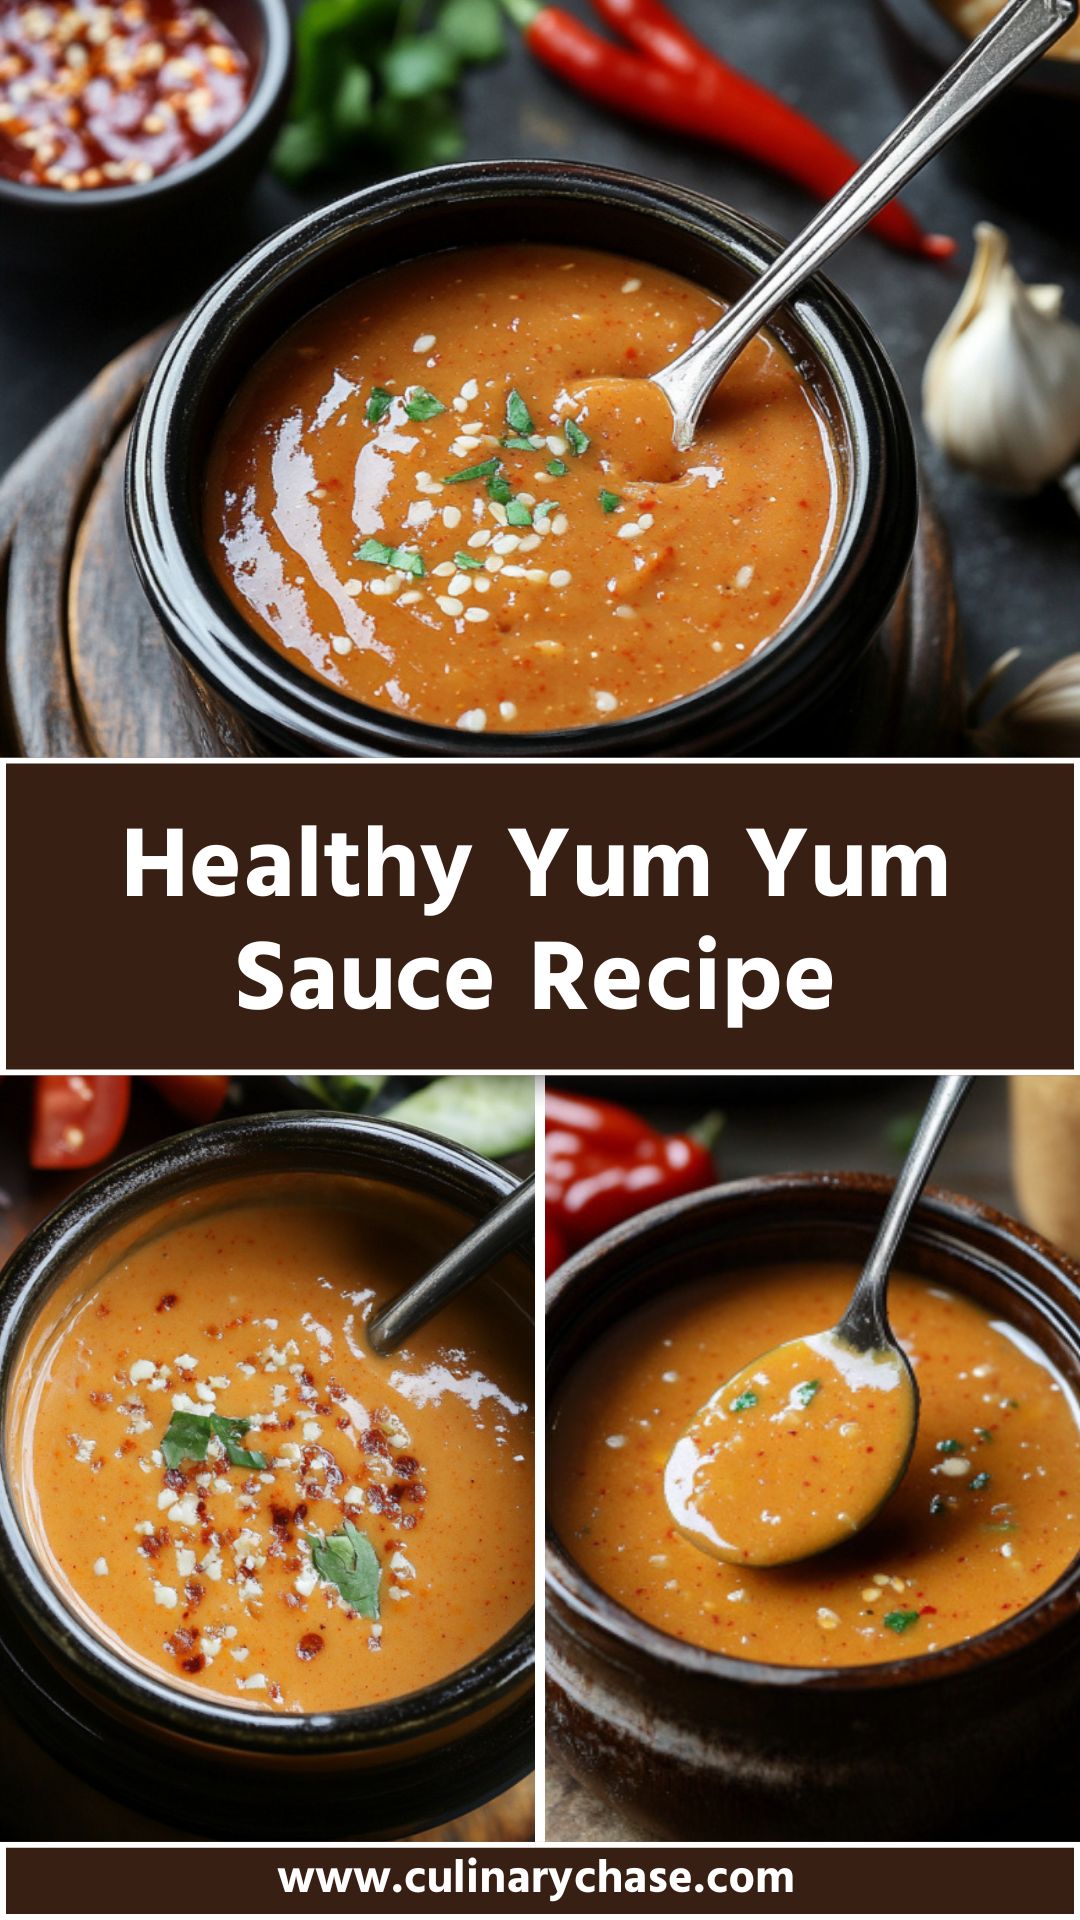
When it comes to enjoying healthy yum yum sauce, the possibilities are endless! I’ve paired this delightful sauce with grilled proteins like chicken and shrimp. It’s equally wonderful on rice bowls, fresh salads, or veggies.
Not to forget, dipping fresh spring rolls or crunchy veggies into this sauce adds a refreshing twist. My personal favorite is drizzling it over a Buddha bowl packed with quinoa, roasted veggies, and a sprinkle of sesame seeds. Yum!
Let’s get one thing straight: healthy eating doesn’t have to be boring. And what better way to elevate your meals than with a creamy, delicious sauce that packs a flavor punch?
That’s where healthy yum yum sauce steps in!
If you’ve ever visited a hibachi restaurant, you’ve likely dipped into this sauce at least once.
Today, I’m excited to share my healthier version of this beloved sauce. Whether you’re jazzing up your grilled chicken or simply drizzling it over a crisp salad, this sauce is a game changer.
What is Healthy Yum Yum Sauce?
So, what exactly is healthy yum yum sauce? At its core, it’s a creamy condiment known for its rich texture and slightly sweet flavor. Traditional recipes often use mayonnaise as the base, but don’t worry; my version swaps this out for fat-free Greek yogurt.
This little twist brings down the calories while keeping the essence of yum yum sauce intact. The blend of spicy Sriracha, tangy rice wine vinegar, and a hint of honey creates a delightful balance you simply won’t forget.
You will also like the following Breakfast And Sauce recipes!
What Makes This Recipe Different From Other Healthy Yum Yum Sauces?
Many recipes call for high-fat ingredients that can derail your healthy eating efforts. My approach takes the classic flavor profile and gives it a makeover. Using Greek yogurt, for example, increases protein and decreases fat content.
Plus, the combination of whole-grain Dijon mustard and toasted sesame oil adds a depth of flavor without compromising health. In this recipe, every ingredient plays a role in maintaining a wholesome approach without losing out on taste.
How Does It Taste?
This sauce is an absolute delight! Imagine a blend of creamy, tangy, and slightly sweet notes all in one bite. It has a mellow heat from the Sriracha, balanced perfectly with the sourness of lime juice and the sweetness of honey.
When you dip your fork into whatever you’re serving, it wraps around every flavor, creating that “yummy” experience we all crave. It’s savory, yet the fresh ingredients shine through, giving you the best of both worlds.
Ingredients You’ll Need To Make Healthy Yum Yum Sauce
Here’s what you’ll need to whip up this flavorful sauce:
Step by Step Instructions for Healthy Yum Yum Sauce
Step 1: Gather Your Ingredients
Make sure you have all your ingredients ready. This sauce comes together quickly!
Step 2: Combine the Base
In a mixing bowl, add 1 cup of fat-free Greek yogurt and 1 tablespoon of whole-grain Dijon mustard. Stir until smooth.
Step 3: Add the Flavor
To the yogurt mixture, pour in 1/4 cup of rice wine vinegar and stir again. This helps balance the creaminess with tangy notes.
Step 4: Season It Right
Sprinkle in 1 teaspoon of kosher salt, 2 teaspoons of toasted sesame oil, and 1 teaspoon of garlic powder (or fresh garlic if you prefer). Mix thoroughly.
Step 5: Spice It Up
Now, add in 1/3 cup of spicy Sriracha sauce. This is where the magic happens. The heat and flavor will elevate the sauce!
Step 6: Sweeten the Deal
Pour in 3 tablespoons of pure honey and 1 tablespoon of lime juice. This combination enhances the richness while balancing the spice. Stir until everything is properly mixed.
Step 7: Taste and Adjust
Here’s where you can get a bit creative. Taste the sauce. If you crave more sweetness, add a touch more honey. If you prefer it spicier, add more Sriracha. Adjust to your liking.
Step 8: Chill Before Serving
Put the sauce in the refrigerator for at least 30 minutes. Chilling allows the flavors to meld beautifully.
Tips & Tricks on Making Healthy Yum Yum Sauce
Adjust Sweetness: Feel free to modify the honey amount based on your taste preference. Start small and add more as needed.
Double the Batch: Making extra is a great idea! This sauce stores well. Use it all week for salads or wraps.
Experiment with Flavors: If you’re curious, add some chopped fresh herbs like cilantro or parsley for an extra flavor kick.
Add a Creamy Twist: Want it even creamier? Stir in a little avocado. It adds health fats and enhances the texture.
Storage: Keep your sauce in a sealed container. It can last in the fridge for about a week without losing its charm.
Nutrition Information
Healthy yum yum sauce recipe nutrition facts
How Do I Store This Dish?
To keep your healthy yum yum sauce fresh and tasty, store it in an airtight container in the refrigerator. It can last about a week, allowing you to enjoy it all week long.
A simple jar works perfectly, and be sure to give it a good shake or stir before using again, as ingredients may separate.
What Other Substitutes Can You Use in Healthy Yum Yum Sauce?
Greek Yogurt Alternatives: You can use low-fat sour cream or cashew cream if you prefer a different flavor profile.
Sweetener Options: Instead of honey, maple syrup or agave nectar are great substitutes for a vegan-friendly option.
Vinegar Variations: Experiment with apple cider vinegar or even lemon juice instead of rice wine vinegar for a completely different taste.
Spice Variations: For an entirely new flavor, swap out Sriracha for chipotle in adobo. It brings a smokier flavor with heat.
Oil Options: If sesame oil is not on hand, olive oil or avocado oil are good substitutes that won’t compromise the sauce’s integrity.
Healthy Yum Yum Sauce Recipe
When it comes to enjoying healthy yum yum sauce, the possibilities are endless! I’ve paired this delightful sauce with grilled proteins like chicken and shrimp. It’s equally wonderful on rice bowls, fresh salads, or veggies.
Make sure you have all your ingredients ready. This sauce comes together quickly!
Step 2: Combine the Base
In a mixing bowl, add 1 cup of fat-free Greek yogurt and 1 tablespoon of whole-grain Dijon mustard. Stir until smooth.
Step 3: Add the Flavor
To the yogurt mixture, pour in 1/4 cup of rice wine vinegar and stir again. This helps balance the creaminess with tangy notes.
Step 4: Season It Right
Sprinkle in 1 teaspoon of kosher salt, 2 teaspoons of toasted sesame oil, and 1 teaspoon of garlic powder (or fresh garlic if you prefer). Mix thoroughly.
Step 5: Spice It Up
Now, add in 1/3 cup of spicy Sriracha sauce. This is where the magic happens. The heat and flavor will elevate the sauce!
Step 6: Sweeten the Deal
Pour in 3 tablespoons of pure honey and 1 tablespoon of lime juice. This combination enhances the richness while balancing the spice. Stir until everything is properly mixed.
Step 7: Taste and Adjust
Here’s where you can get a bit creative. Taste the sauce. If you crave more sweetness, add a touch more honey. If you prefer it spicier, add more Sriracha. Adjust to your liking.
Step 8: Chill Before Serving
Put the sauce in the refrigerator for at least 30 minutes. Chilling allows the flavors to meld beautifully.
Notes
Adjust Sweetness: Feel free to modify the honey amount based on your taste preference. Start small and add more as needed.
Double the Batch: Making extra is a great idea! This sauce stores well. Use it all week for salads or wraps.
Experiment with Flavors: If you’re curious, add some chopped fresh herbs like cilantro or parsley for an extra flavor kick.
Add a Creamy Twist: Want it even creamier? Stir in a little avocado. It adds health fats and enhances the texture.
Storage: Keep your sauce in a sealed container. It can last in the fridge for about a week without losing its charm.
Absolutely! Healthy yum yum sauce is versatile. Just thin it out with a little water or extra vinegar to make it pourable. It adds a deliciously creamy touch to salads.
Q2: Is this sauce suitable for vegans?
While traditional ingredients include dairy, you can easily make it vegan by substituting Greek yogurt with a plant-based yogurt and using maple syrup instead of honey.
Q3: How spicy is this sauce?
It depends on your tolerance for heat. The Sriracha adds a kick, but it can be reduced or replaced to suit your taste. Adjust it gradually until you find your sweet spot!
Q4: Can this sauce be frozen?
I wouldn’t recommend freezing it. Freezing can alter the texture of yogurt-based sauces, making them grainy once thawed. Stick to fresh batches instead.
Q5: What’s the best way to use this sauce?
You can use it as a dip, drizzle over mains, mix into grain bowls, or use as a spread for wraps. The options are endless!
Conclusion
Incorporating healthy yum yum sauce into your meals can transform your dining experience. It brings in flavors, enhances dishes, and, best of all, it’s healthy!
With simple ingredients and easy preparation, this sauce is your new culinary ally. Whether you’re trying to keep your meals nutritious, flavorful, or simply seeking something new, this sauce fits the bill.
I hope you’ll make it, savor it, and even share it at your summer gatherings. Here’s to tasty health—enjoy your cooking!
Planning to enjoy a delightful Japanese beef rice bowl? You’re in for a treat! But hold on—let’s talk about what pairs perfectly with this dish. A few refreshing ideas come to mind: This warm soup enhances your meal with depth. Its savory umami flavor complements …
Before we dive into the delightful world of Hong Kong egg tarts, let’s talk about pairings. These sweet treats are fantastic on their own, but when you add a few complementary items, the experience skyrockets. How about enjoying them alongside a robust cup of Hong …
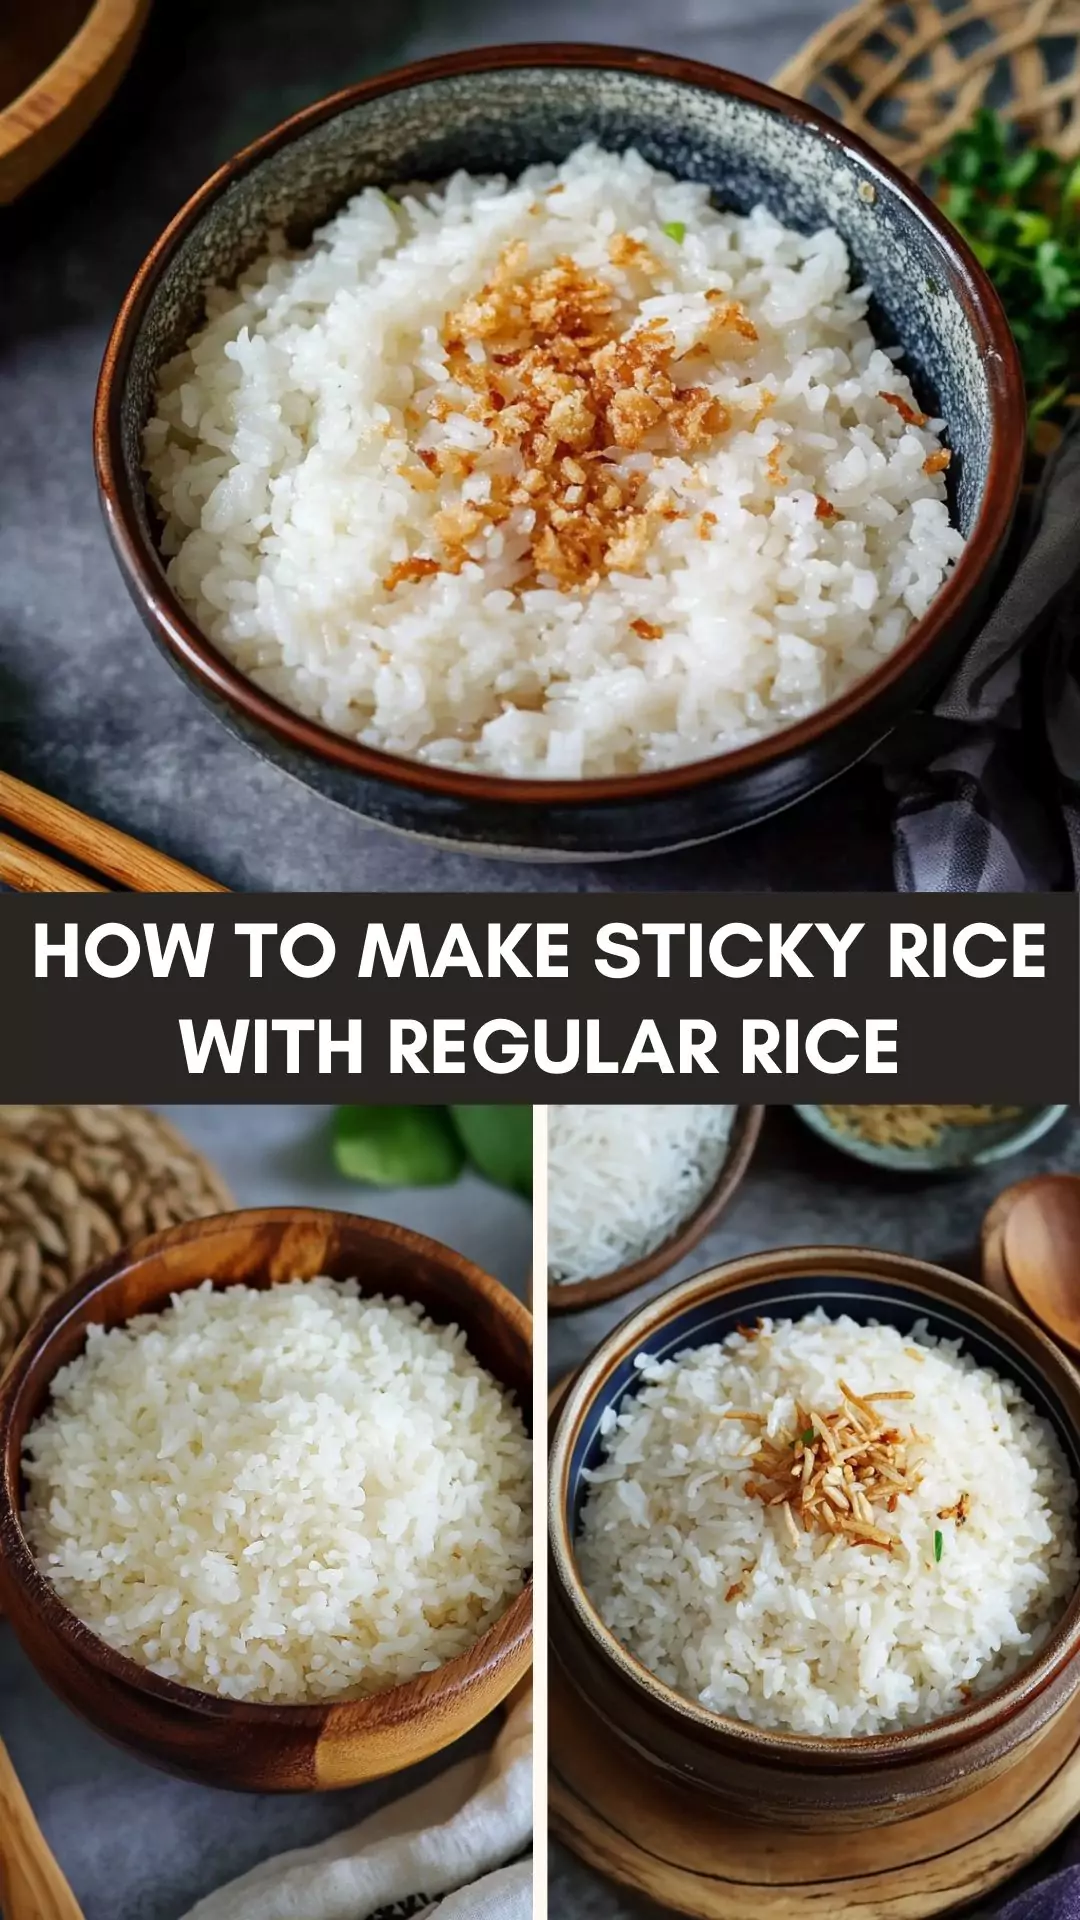
Sticky rice is a true culinary chameleon. It goes well with a wide variety of dishes, from savory to sweet. Picture this: a delicious Thai green curry, where the creamy coconut base and spicy flavors meld perfectly with the stickiness of the glutinous rice.
Alternatively, consider serving it alongside grilled meats or roasted vegetables. You’ll also find it pairs wonderfully with some luscious mango slices for a yummy dessert. In fact, if you’ve never tried sticky rice with mango, are you even living?
So, here I was at an Asian market, browsing through baskets of produce and piles of rice. I stumbled across bags labeled “sticky rice,” and nostalgia rushed over me.
I remembered the delightful meals I had shared with friends and family, where sticky rice accompanied savory dishes and sweet treats alike.
But there it hit me: not everyone has access to this specialty rice. However, I found a way to make sticky rice using regular rice—a method that’s simple and effective.
You might be wondering, “What’s so special about sticky rice anyway?” It’s all about the texture and how it works beautifully in both savory and sweet dishes.
In this guide, I’ll walk you through making sticky rice with plain old regular rice. By the end of this journey, your kitchen will be filled with an alluring fragrance, and you’ll have a beautiful dish in front of you. Trust me; your friends and family will be right there, begging for seconds!
You will also like the following Side Dish recipes!
Sticky rice, also known as glutinous rice, has unique properties that make it chewy and clump together, which is perfect for eating with chopsticks or shaping into balls. But when you reach into your pantry and find nothing but regular rice staring back at you, don’t worry!
You can recreate that sticky texture quite easily with a few tweaks. The key is to increase the starch content in your regular rice, which can be achieved through soaking and cooking methods.
Flavor Profile of This Dish
The flavor profile of long-grain rice is generally neutral, which allows it to serve as a perfect canvas. A delicate hint of sweetness often emerges, especially when paired with mango or salted desserts.
With savory accompaniments, the flavor shifts to something more earthy and hearty. In other words, this sweet rice isn’t competing with your main dish but instead supports it.
Why You’ll Love This
What’s not to love? It’s easy to make, uses ingredients that most of us already have, and can elevate many meals.
Plus, it serves as a fun activity for family members. Kids can form rice balls or help shape it into a creative dish. The best part? By mastering this technique, you add versatility to your culinary repertoire.
Ingredients
– 2 cups water
– 1 to 1 ½ cups regular rice
– A few extra tablespoons of water
– 1 teaspoon salt
– 1 tablespoon rice vinegar
Step-by-Step Instructions
Step 1: Rinse the Rice
Start by rinsing 1 to 1½ cups of your regular rice under cold water. This not only washes away excess starch but also enhances the texture later on.
Allow it to soak in clean water for about 30 minutes. Soaking is essential. It allows the grains to absorb the water and soften, making your rice dreams come true.
Step 2: Drain
Afterward, drain the rice in a fine-mesh colander. You want every drop of that soaked water gone. This step helps in achieving a clumping effect when you cook it.
Step 3: Boil Water
In a medium pot, bring 2 cups of water to a gentle boil. Once it starts bubbling, toss in the drained rice along with the salt. Stir it only a couple of times—over-stirring can make your rice gummy.
Step 4: Steam the Rice
Here comes the trick. After adding the rice, lower the heat to a simmer and cover the pot. Let the mixture cook for about 15-20 minutes.
If the water evaporates too quickly, don’t hesitate to add a few more tablespoons of water. You’re looking for that soft yet firm texture.
Step 5: Rest
Once the time is up, remove the pot from heat. Cover it for an additional 10 minutes. This resting time allows the rice grains to finish cooking in its steam.
Step 6: Add Rice Vinegar
After resting, fluff the rice gently with a fork and mix in 1 tablespoon of rice vinegar. This is where the magic happens—the vinegar enhances the flavor subtly and adds to the stickiness.
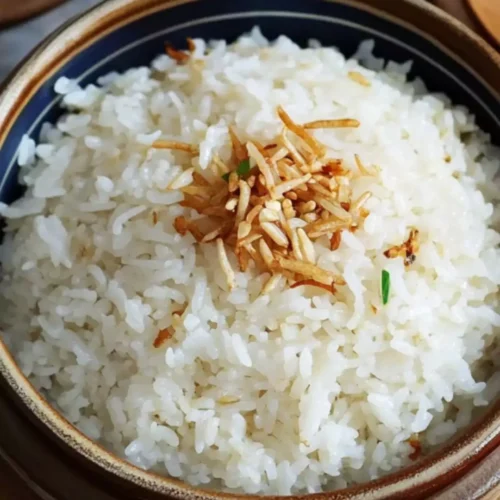
Step 7: Serve
Your dish is ready! Enjoy this perfect rice with your favorite item or as a dessert. You can form it into balls or serve it in bowls.
Tips & Tricks
Use Short Grain Rice: While jasmine is great, using short-grain rice tends to create more sticky results.
Don’t Rush the Soaking: The longer you soak, the better the texture. Aim for at least 30 minutes, but if you can soak overnight, do it!
Save Leftovers: If you have this extra sushi rice, refrigerate it. Just reheat it with a splash of water to restore its stickiness.
Experiment with Flavors: Add coconut milk while cooking if you want a sweeter flavor profile.
Check Consistency: Depending on the type of rice you use, you might need to adjust water levels.
How Can You Store This Rice?
Storing sticky rice is straightforward. Place it in an airtight container and keep it in the refrigerator for up to a week.
To reheat, add a small splash of water, cover it, and microwave for about 30 seconds. This will help regain some moisture.
Alternatives for Missing Ingredients
You might find yourself short on a few ingredients. No worries! Here are some alternatives:
Rice Vinegar: If you don’t have rice vinegar, apple cider vinegar or white vinegar can be good substitutes. They will offer a different flavor but will still provide acidity.
Salt: If you’re watching your sodium intake, you might consider using low-sodium soy sauce to add flavor without too much salt. Just a teaspoon can do wonders.
Regular Rice: In a pinch, you can use brown rice, though you’ll need to adjust cooking times and water amounts, as it requires more hydration.
Easy Sticky Rice With Regular Rice
Joe Williams
Sticky rice is a true culinary chameleon. It goes well with a wide variety of dishes, from savory to sweet. Picture this: a delicious Thai green curry, where the creamy coconut base and spicy flavors meld perfectly with the stickiness of the rice.
Start by rinsing 1 to 1½ cups of your regular rice under cold water. This not only washes away excess starch but also enhances the texture later on.
Allow it to soak in clean water for about 30 minutes. Soaking is essential. It allows the grains to absorb the water and soften, making your sticky rice dreams come true.
Step 2: Drain
Afterward, drain the rice in a fine-mesh colander. You want every drop of that soaked water gone. This step helps in achieving a clumping effect when you cook it.
Step 3: Boil Water
In a medium pot, bring 2 cups of water to a gentle boil. Once it starts bubbling, toss in the drained rice along with the salt. Stir it only a couple of times—over-stirring can make your rice gummy.
Step 4: Steam the Rice
Here comes the trick. After adding the rice, lower the heat to a simmer and cover the pot. Let the mixture cook for about 15-20 minutes.
If the water evaporates too quickly, don’t hesitate to add a few more tablespoons of water. You’re looking for that soft yet firm texture.
Step 5: Rest
Once the time is up, remove the pot from heat. Cover it for an additional 10 minutes. This resting time allows the rice to finish cooking in its steam.
Step 6: Add Rice Vinegar
After resting, fluff the rice gently with a fork and mix in 1 tablespoon of rice vinegar. This is where the magic happens—the vinegar enhances the flavor subtly and adds to the stickiness.
Step 7: Serve
Your sticky rice is ready! Enjoy it with your favorite dish or as a dessert. You can form it into balls or serve it in bowls.
Notes
Use Short Grain Rice: While jasmine is great, using short-grain rice tends to create more sticky results.
Don’t Rush the Soaking: The longer you soak, the better the texture. Aim for at least 30 minutes, but if you can soak overnight, do it!
Save Leftovers: If you have extra rice, refrigerate it. Just reheat it with a splash of water to restore its stickiness.
Experiment with Flavors: Add coconut milk while cooking if you want a sweeter flavor profile.
Check Consistency: Depending on the type of rice you use, you might need to adjust water levels.
Yes, but brown rice requires longer cooking times and more water. You should typically double the cooking time and water ratio. It won’t be as sticky as white rice, but it’s a healthy option.
2. How can I enhance the stickiness of the rice?
You can try soaking the rice longer, or add a bit of cornstarch to the water before cooking. However, this method can alter the taste a bit.
3. What dishes pair well with sticky rice?
You can enjoy it with curries, grilled meats, or even some spicy dishes. It also complements sweets like mango or coconut milk desserts beautifully.
4. Can I use a rice cooker to make sticky rice?
Absolutely! Just follow the same steps of rinsing and soaking the rice, then use the rice cooker’s white rice setting.
5. What should I do if my rice turns out too dry?
If you find yourself with dry rice, add a little boiling water and let it steam in the covered pot for an additional few minutes. Just be cautious not to add too much at once.
Conclusion
Making sticky rice with regular rice isn’t just possible; it’s rather simple and accessible. Armed with this knowledge, you can now elevate your culinary creations. Whether you’re pairing it with savory dishes or sweet delights, this recipe serves you well.
Take the plunge and give it a try. I promise, once you master this technique, your kitchen will never be the same again. So, go ahead and amaze your family with this delightful sticky rice!
Before we dive right into the delicious world of One Pot Hainanese Chicken Rice, let’s consider some fantastic pairings. This dish harmonizes beautifully with a crisp cucumber salad, perhaps with a bit of lime and chili to wake up the flavors. If you’re feeling adventurous, …
Before diving into the delicious world of Qdoba beef, let’s talk about perfect pairings. This shredded beef dish is incredibly versatile and can complement a wide range of sides. A bed of fluffy cilantro lime rice or a crunchy, zesty slaw made with lime and …
Before we dive into the exciting universe of Vietnamese coffee, let’s take a moment to consider what pairs beautifully with this delightful beverage. Imagine starting your day with a steaming cup of Vietnamese coffee alongside a flaky, buttery croissant or a bright, citrusy fruit salad.
For brunch, a bowl of pho with rich broth and fresh herbs complements the boldness of the coffee. If you’re feeling adventurous, serve it with some crispy spring rolls.
The crunchiness of the rolls, combined with the robust flavor of the coffee, creates an experience that dances on your palate. Now, let’s venture deeper into the world of this unique brew.
Vietnamese coffee is not just a drink; it’s a sweet ritual steeped in culture and history. When I first encountered this coffee, it was like stepping into a lively café in Ho Chi Minh City, the rich aroma swirling around me as I watched the slow drip of water through the grounds. This method of brewing is unique and exciting, offering a completely different experience compared to a typical cup of joe.
You’re savoring a cup of coffee that is as bold as it is sweet, with a velvety texture that lingers. It’s a sensation that transports you to bustling streets filled with chatter, laughter, and the aroma of roasted beans.
In this blog post, we’re going to explore everything you need to know about the best Vietnamese coffee. From the ingredients needed to tips for perfecting the brew, let’s take this journey together.
You will also like the following Delicious recipes!
The best Vietnamese coffee is characterized by its strong flavors and unique brewing method. This type of coffee is traditionally made using dark, robusta beans that are finely ground. Vietnam ranks as one of the largest coffee producers in the world, and the richness of its coffee culture is just as impressive.
The famous Vietnamese coffee is often brewed using a phin filter, which allows the hot water to slowly drip through the coffee grounds, producing a concentrated coffee that can be enjoyed hot or iced. The result is a beverage that’s not just strong but has a wonderfully rich and complex flavor.
But what sets this coffee apart is what you add to it. Sweetened condensed milk is a staple ingredient that adds a velvety sweetness, balancing the coffee’s intensity perfectly. When poured over ice, it transforms into a smooth, refreshing drink that’s perfect for warm days.
Why You’ll Love This Best Vietnamese Coffee?
There are many reasons to adore Vietnamese coffee. First, it’s incredibly versatile. You can enjoy it hot or iced, sweetened or unsweetened. The choice is yours, and that’s just one of the perks.
Second, the preparation itself is a delightful experience. Brewing coffee using a phin filter may take a bit of patience, but the ritual can become part of your daily routine. There’s something wonderfully meditative about watching coffee drip slowly, knowing that each drop is bringing you closer to that first sip.
Third, the flavor profile is nothing short of mesmerizing. The earthiness of Vietnamese coffee paired with the creamy sweetness of condensed milk creates an indulgent treat that lingers on the tongue.
Last but not least, this coffee is deeply ingrained in Vietnamese culture. By preparing and enjoying it, you’re participating in a tradition that has been cherished for generations. It’s a beautiful way to connect with a different culture from the comfort of your home.
The Ingredients You Will Need to Make Best Vietnamese Coffee
To brew a fantastic cup of Vietnamese coffee, you’ll need the following ingredients:
1 cup freshly boiled water: Ensure that the water is off the boil, about 200°F, which extracts the best flavor from the coffee grounds without scalding them.
4 teaspoons Cafe Du Monde or Trung Nguyen coffee blend: These brands offer a rich coffee experience. If you can’t find these, look for dark roast robusta coffee.
2 teaspoons sweetened condensed milk: Adjust this based on your sweetness preference.
1 teaspoon vanilla extract: This adds a nice depth of flavor.
1/4 teaspoon ground cinnamon: Cinnamon pairs wonderfully with coffee and adds warmth.
Now that we have our ingredients sorted, it’s time to dive into the steps of making this delightful beverage.
Directions
Step 1: Prepare Your Brewing Equipment
To start, gather your tools. You’ll need a phin filter, a heat-proof cup, and a spoon. If you don’t have a phin, you can use a French press or a pour-over setup, but the phin is traditional and works beautifully for this recipe.
Step 2: Measure the Coffee
Place the phin filter on top of your cup. Add four teaspoons of your coffee blend into the filter, distributing it evenly. You might want to gently press down to create a slightly compacted layer. Not too much pressure; just enough to create an even surface.
Step 3: Add Water to Bloom
Slowly pour a small amount of hot water over the coffee grounds, just to wet them. This step is called blooming, and it helps release carbon dioxide, enhancing the flavor.
Step 4: Brew to Perfection
Once you’ve let the coffee bloom for about 30 seconds, pour the rest of the hot water into the filter. Place the lid on the phin to help keep the heat in. Now, let it drip quietly for about 4 to 5 minutes. The patience pays off as the rich brew forms below.
Step 5: Sweeten and Flavor
Once the coffee has fully dripped into your cup, remove the phin. At this point, add two teaspoons of sweetened condensed milk. Stir until it’s well combined. The transformation is satisfying as the brown coffee swirls together with the creamy milk.
Step 6: Enjoy Your Coffee
You can enjoy it hot right away. For an iced version, let the coffee cool for a bit, then pour it over a glass filled with ice. Optional: Add cinnamon on top for a finishing touch.
Notes
Here are some handy tips for making your Vietnamese coffee truly exceptional:
Use Freshly Ground Coffee: For the best flavor, grind your coffee just before brewing.
Adjust Sweetness to Taste: The amount of condensed milk can be changed based on personal preference. Feel free to taste as you go.
Experiment with Flavors: Adding a pinch of nutmeg or using coconut milk can give your coffee an exciting twist.
Control Your Brew Time: A longer brew results in a stronger coffee. Adjust according to your taste buds.
Always Preheat Your Equipment: Rinsing your filter and cup with hot water before pouring the coffee can help maintain temperature during brewing.
Storage Tips
Freshly brewed coffee is always best, but if you have leftovers, here are some tips:
Store in the Fridge: Pour any remaining coffee into an airtight container and store it in the fridge. It can last up to 2 days.
Reheat Carefully: When reheating, do so gently to avoid burning the coffee. You can reheat in a saucepan. The stovetop is better than the microwave for maintaining flavor.
Iced Coffee: If you’ve made iced coffee, note that dilution from melting ice can affect taste. If you’re making iced coffee for later, avoid adding ice and keep it stored in the fridge.
Serving Suggestions
Are you ready to elevate your Vietnamese coffee experience? Here are some creative serving suggestions:
Serve with a Classic Bánh Mì: This Vietnamese sandwich filled with protein and pickled vegetables complements the coffee’s sweetness beautifully.
Pair with Crispy Fried Bananas: The sweetness of fried bananas contrasts beautifully with the strong taste of coffee. Be ready for happy taste buds!
Enjoy with a Slice of Coconut Cake: The tropical flavors of coconut harmonize perfectly with the rich coffee.
Add a Scoop of Ice Cream for Affogato: Pour hot brewed coffee over a scoop of vanilla ice cream for an indulgent treat that combines hot and cold sensations.
Accompany with Fruit Spring Rolls: Fresh fruit spring rolls with a drizzle of honey or peanut sauce can balance out the coffee’s intensity.
What Other Substitutes Can I Use in Best Vietnamese Coffee?
You might not always have all the ingredients on hand. Here are some possible substitutes to consider:
Regular Coffee: If you can’t find robusta, feel free to use arabica coffee, though the flavor profile might be milder.
Non-Dairy Creamer: If you’re lactose intolerant or vegan, substituting sweetened condensed milk with a plant-based alternative like oat milk can work nicely. Look for sweetened versions for more sweetness.
Coconut Milk: For a tropical twist, use coconut milk in place of sweetened condensed milk. This will give a rich, creamy texture with a unique flavor.
Maple Syrup or Honey: Instead of using condensed milk, consider sweetening your coffee with maple syrup or honey for a natural sweetness.
Ground Cardamom or Ginger: If you want to spice things up, try adding ground cardamom or a bit of powdered ginger for an exciting flavor twist.
Best Vietnamese Coffee
Joe Williams
Before we dive into the exciting universe of Vietnamese coffee, let’s take a moment to consider what pairs beautifully with this delightful beverage.
4teaspoonsCafe Du Monde or Trung Nguyen coffee blend
2teaspoonssweetened condensed milkadjust to taste
1teaspoonvanilla extract
1/4teaspoonground cinnamon
Instructions
Step 1: Prepare Your Brewing Equipment
To start, gather your tools. You’ll need a phin filter, a heat-proof cup, and a spoon. If you don’t have a phin, you can use a French press or a pour-over setup, but the phin is traditional and works beautifully for this recipe.
Step 2: Measure the Coffee
Place the phin filter on top of your cup. Add four teaspoons of your coffee blend into the filter, distributing it evenly. You might want to gently press down to create a slightly compacted layer. Not too much pressure; just enough to create an even surface.
Step 3: Add Water to Bloom
Slowly pour a small amount of hot water over the coffee grounds, just to wet them. This step is called blooming, and it helps release carbon dioxide, enhancing the flavor.
Step 4: Brew to Perfection
Once you’ve let the coffee bloom for about 30 seconds, pour the rest of the hot water into the filter. Place the lid on the phin to help keep the heat in. Now, let it drip quietly for about 4 to 5 minutes. The patience pays off as the rich brew forms below.
Step 5: Sweeten and Flavor
Once the coffee has fully dripped into your cup, remove the phin. At this point, add two teaspoons of sweetened condensed milk. Stir until it’s well combined. The transformation is satisfying as the brown coffee swirls together with the creamy milk.
Step 6: Enjoy Your Coffee
You can enjoy it hot right away. For an iced version, let the coffee cool for a bit, then pour it over a glass filled with ice. Optional: Add cinnamon on top for a finishing touch.
Notes
Here are some handy tips for making your Vietnamese coffee truly exceptional:
Use Freshly Ground Coffee: For the best flavor, grind your coffee just before brewing.
Adjust Sweetness to Taste: The amount of condensed milk can be changed based on personal preference. Feel free to taste as you go.
Experiment with Flavors: Adding a pinch of nutmeg or using coconut milk can give your coffee an exciting twist.
Control Your Brew Time: A longer brew results in a stronger coffee. Adjust according to your taste buds.
Always Preheat Your Equipment: Rinsing your filter and cup with hot water before pouring the coffee can help maintain temperature during brewing.
Yes, Vietnamese coffee is typically strong, using dark roasted robusta beans. The brewing method, which allows for a concentrated brew, adds to its strength.
2. Can I drink Vietnamese coffee without sweetened condensed milk?
Absolutely! You can enjoy it black if you prefer a stronger taste without sweetness. Some people even use regular sugar or natural sweeteners if they like some sweetness.
3. How do I make iced Vietnamese coffee?
To make iced Vietnamese coffee, prepare it as usual. Once brewed, let it cool and pour it over a glass of ice. Adjust the sweetened condensed milk to taste for a refreshing treat.
4. How can I make my Vietnamese coffee less bitter?
To reduce bitterness, use a slightly coarser grind for your coffee. Also, don’t brew for too long; a shorter brewing time can help balance flavors.
5. Can I use decaf coffee for Vietnamese coffee?
Yes, you can use decaf coffee if you want to avoid caffeine. The flavor will still be similar, albeit without the stimulating effects.
6. What’s the difference between Vietnamese coffee and regular coffee?
The primary differences are the type of beans used (robusta vs. arabica), the brewing method (phin filter vs. standard drip), and traditional additives like sweetened condensed milk. The result is a drink that is creamy, thick, and uniquely satisfying.
Conclusion
Exploring the world of Vietnamese coffee opens doors to rich flavors and cultural experiences. Each cup tells a story – one of tradition, love, and care that goes into coffee cultivation and preparation. You’ve learned how to brew it, sweeten it, and even customize it to your taste.
I hope you take the plunge into this wonderful experience. The next time you find yourself craving a cup, give this Vietnamese coffee method a try. You might just find that it becomes a favorite in your routine, a sweet ritual to savor each day. Enjoy your brewing journey, and may your coffee be as bold and rich as the culture it represents. Cheers!
Chili oil is one of those magical concoctions that can elevate even the simplest of dishes, bringing them to life with a spicy kick. It’s certainly a favorite of mine, especially when drizzled over dumplings, noodles, or roasted vegetables. The beautiful thing about chili oil …