Recent Posts

Buddha’s Delight Lo Han Jai – Culinary Chase

Buddha’s Delight Lo Han Jai – Culinary Chase

Before diving into the delightful world of Buddha’s Delight Lo Han Jai, let’s talk about what to serve alongside this intricate dish. A light, fragrant jasmine rice pairs beautifully, soaking up the medley of flavors from the main dish.  Alternatively, a simple vegetable broth or 

Soy Butter Glazed King Oyster Mushrooms – Culinary Chase

Soy Butter Glazed King Oyster Mushrooms – Culinary Chase

Before diving into the savory world of soy butter glazed king oyster mushrooms, let’s talk about what pairs harmoniously with this dish. These mushrooms shine as a main attraction, but let’s not forget about their supporting cast. – Rice: A fluffy mound of jasmine rice 

Fried Corn – Culinary Chase

Fried Corn – Culinary Chase

Fried corn. If those two words don’t bring a smile to your face, I don’t know what will. Imagine that golden, crispy sound as the heat meets those juicy kernels. Just thinking about it makes my mouth water. 

Today, I’m here to share everything you need to know about creating this crowd-pleasing dish. I’ve whipped up countless variations, but they all lead to the same exciting result. Let’s dive in!

fried corn

What is Fried Corn?

Fried corn is a delightful Southern dish that combines fresh corn kernels with seasonings and fat, typically butter. The corn is usually sautéed until golden brown, highlighting its natural sweetness and offering a pleasant crunch. Some might even add bits of bacon or chili for a bit of flair. Think of it as a celebration of summer, where the freshness of corn shines brightest.

Growing up, my grandmother would often make fried corn during the harvest season. I remember the anticipation of that first bite. The sizzle from the pan filled our kitchen, mingling with laughter and stories shared at the table. There’s something magical about the combination of simple ingredients bringing people together over a meal.

Why You’ll Love This Fried Corn

Here’s the deal: fried corn is not just a side dish. It can quickly become the star of your dinner plate. 

The sweet, crunchy texture pairs beautifully with a variety of main courses. You’ll find it’s both easy to prepare and incredibly satisfying. Plus, it’s a great way to showcase fresh produce. When sweet corn is in season, it’s practically begging to be fried!

You will also like the following Side Dishes recipes!

The Ingredients

Gathering what you need is straightforward. Here’s what you’ll want:

  • 1 teaspoon sugar – This enhances the natural sweetness without turning it into a dessert dish.
  • 4 tablespoons unsalted butter, divided – You could increase to 6 tablespoons if you’re feeling particularly indulgent.
  • 2 tablespoons reserved bacon drippings (optional) – These add incredible depth and richness.
  • Salt and freshly ground black pepper, to taste.
  • ¼ teaspoon smoked paprika – It adds a lovely warmth without overpowering the dish.
  • 8 to 10 ears of fresh sweet corn – I’m partial to the Silver Queen variety for its exceptional sweetness.
how to make fried corn

Step by Step Instructions

Let’s get into the details. Here’s how I prepare my fried corn:

Step 1: Prepare the Corn

Start by husking the corn. Remove the silk and any husk that doesn’t want to cooperate. Rinse the ears under cold water, and then dry them completely. Once that’s done, use a sharp knife to slice the kernels off the cobs. Angle the knife slightly to get as much corn off as possible, scraping every bit of goodness.

Step 2: Heat the Pan

In a large skillet, melt 2 tablespoons of the butter over medium heat. If you’re using bacon drippings, you can add that in at this point too. Wait until the butter is sizzling but not browning. The aroma? It’s captivating.

Step 3: Add the Corn

Once the butter is hot, carefully add in your fresh corn kernels. Stir them around, making sure they all get a chance to meet the butter. Here’s where you’ll season generously – sprinkle with salt, pepper, and smoked paprika.

Step 4: Sauté to Perfection

Let the corn cook for about 8-10 minutes. Stir occasionally, so nothing sticks to the bottom. You want a golden-brown color to develop, which adds a fantastic depth of flavor.

Step 5: Sweeten the Deal

After about 10 minutes, sprinkle in that teaspoon of sugar. This will amplify the sweetness. Keep stirring for another minute, allowing the sugar to meld with the corn.

Step 6: Finish with Butter

Turn off the heat and toss in the remaining butter. This extra butter adds a creamy finish that’s hard to resist. Give it a few more stirs before serving.

Tips & Tricks

To perfect your fried corn, here are some useful tips to remember:

  • Fresh Corn is Key: The best fried corn comes from the freshest ears of corn. Look for bright green husks and plump kernels.
  • Don’t Rush the Sauté: Letting the corn sit without stirring for a minute will foster that golden-brown effect. Don’t stir constantly!
  • Taste as You Go: Adjust seasoning as needed. Each batch can be a bit different, depending on the corn.
  • Use High-Quality Butter: This dish has few ingredients. Quality matters. A good butter can elevate the flavors significantly.
  • Be Mindful of Sugar: Just a touch goes a long way. You want your dish to remain savory, not sweet.

Nutrition Information

You’ll find that fried corn isn’t just tasty; it’s also packed with nutrients. Corn is a good source of fiber, vitamins A and C, and antioxidants. A serving (about 1 cup) of fried corn with butter contains approximately:

  • Calories: 155
  • Total Fat: 8 g
  • Saturated Fat: 5 g
  • Cholesterol: 20 mg
  • Sodium: 200 mg
  • Carbohydrates: 20 g
  • Fiber: 2 g
  • Protein: 3 g

Of course, you can adjust the butter or bacon fat to suit your dietary needs.

fried corn copycat recipe

Can I Store Fried Corn?

Yes! Fried corn can be stored in an airtight container in the refrigerator for up to four days. To reheat, you might pop it back in a skillet over medium heat, adding a touch of butter to revive some of its original flavor.

What Can I Serve with Fried Corn?

Fried corn pairs beautifully with a variety of dishes. Here are some ideas:

  • Grilled Chicken: The smoky flavors complement the sweetness nicely.
  • Barbecue Ribs: This is a classic Southern pairing that delights the palate.
  • Fish Tacos: The crunchiness of the corn plays well in fish tacos.
  • Salads: Add it to a fresh salad for added texture and flavor.
  • Egg Dishes: Serve alongside scrambled or fried eggs for a breakfast twist.

Variations

Spice up your fried corn game with these variations:

  • Bacon and Corn: Chop and crisp up some bacon before adding the corn. The salty crunch will take the flavor to new heights.
  • Spicy Corn: Add diced jalapeños or red pepper flakes for extra heat. Perfect for those who love a kick.
  • Cheesy Corn: Sprinkle shredded cheddar or parmesan cheese towards the end of cooking. Allow it to melt for a creamy indulgence.
  • Herbed Corn: Experiment with fresh herbs like cilantro or basil for a fresh, vibrant twist. Just toss them in right before serving.
  • Cajun Corn: Season with Cajun spices for a bold Southern bite. This variant is a game-changer!
how to make fried corn

Fried Corn

Fried corn. If those two words don’t bring a smile to your face, I don’t know what will. Imagine that golden, crispy sound as the heat meets those juicy kernels.
Prep Time 30 minutes
Cook Time 30 minutes
Total Time 1 hour
Course Side Dish
Cuisine southern
Servings 6
Calories 155 kcal

Equipment

  • Skillet

Ingredients
  

  • 1 teaspoon sugar – This enhances the natural sweetness without turning it into a dessert dish.
  • 4 tablespoons unsalted butter divided – You could increase to 6 tablespoons if you’re feeling particularly indulgent.
  • 2 tablespoons reserved bacon drippings optional – These add incredible depth and richness.
  • Salt and freshly ground black pepper to taste.
  • ¼ teaspoon smoked paprika – It adds a lovely warmth without overpowering the dish.
  • 8 to 10 ears of fresh sweet corn – I’m partial to the Silver Queen variety for its exceptional sweetness.

Instructions
 

Step 1: Prepare the Corn

  • Start by husking the corn. Remove the silk and any husk that doesn’t want to cooperate. Rinse the ears under cold water, and then dry them completely. Once that’s done, use a sharp knife to slice the kernels off the cobs. Angle the knife slightly to get as much corn off as possible, scraping every bit of goodness.

Step 2: Heat the Pan

  • In a large skillet, melt 2 tablespoons of the butter over medium heat. If you’re using bacon drippings, you can add that in at this point too. Wait until the butter is sizzling but not browning. The aroma? It’s captivating.

Step 3: Add the Corn

  • Once the butter is hot, carefully add in your fresh corn kernels. Stir them around, making sure they all get a chance to meet the butter. Here’s where you’ll season generously – sprinkle with salt, pepper, and smoked paprika.

Step 4: Sauté to Perfection

  • Let the corn cook for about 8-10 minutes. Stir occasionally, so nothing sticks to the bottom. You want a golden-brown color to develop, which adds a fantastic depth of flavor.

Step 5: Sweeten the Deal

  • After about 10 minutes, sprinkle in that teaspoon of sugar. This will amplify the sweetness. Keep stirring for another minute, allowing the sugar to meld with the corn.

Step 6: Finish with Butter

  • Turn off the heat and toss in the remaining butter. This extra butter adds a creamy finish that’s hard to resist. Give it a few more stirs before serving.

Notes

  • Fresh Corn is Key: The best fried corn comes from the freshest ears of corn. Look for bright green husks and plump kernels.
  • Don’t Rush the Sauté: Letting the corn sit without stirring for a minute will foster that golden-brown effect. Don’t stir constantly!
  • Taste as You Go: Adjust seasoning as needed. Each batch can be a bit different, depending on the corn.
  • Use High-Quality Butter: This dish has few ingredients. Quality matters. A good butter can elevate the flavors significantly.
  • Be Mindful of Sugar: Just a touch goes a long way. You want your dish to remain savory, not sweet.

Nutrition

Calories: 155kcalCarbohydrates: 20gProtein: 3gFat: 8gSaturated Fat: 5gCholesterol: 20mgSodium: 200mgFiber: 2g
Keyword Fried Corn
Tried this recipe?Let us know how it was!

Frequently Asked Questions

1. Can I use frozen corn instead of fresh?

Absolutely! Just make sure to thaw the corn and drain any excess moisture before frying. While fresh corn has its charm, frozen corn can be a convenient option any time of the year.

2. How do I know when the corn is cooked?

You’ll notice a change in color; the kernels will become bright and will have a sweet and slightly caramelized aroma. A quick taste will tell you if it’s to your liking!

3. Is fried corn gluten-free?

Yes, this dish is naturally gluten-free. Always double-check the labels on any added ingredients, like seasonings, to ensure no gluten sneaks in.

4. Can I make this dish vegan?

Certainly! Substitute butter with a plant-based alternative, and skip the bacon drippings. The corn will still be delicious and full of flavor.

5. What if I have leftover fried corn?

Leftover fried corn is fantastic! Use it as a topping for baked potatoes, mix it into soups, or add it to casseroles. The possibilities are endless.

Conclusion

So there you have it! Fried corn is a versatile, delicious dish that can easily become a favorite at your table. It’s quick to prepare, easy to modify, and celebrates the taste of fresh ingredients. 

Whether served as a simple side or the main attraction, it captures the essence of comfort food. Remember, this dish isn’t just about the recipe—it’s about the memories you create while cooking and sharing with those you love. So gather your ingredients, fire up the skillet, and let the frying begin!

You’ll also like these latest recipes!

Braised Beef Noodle Soup – Culinary Chase

Braised Beef Noodle Soup – Culinary Chase

Before diving into the world of braised beef noodle soup, let’s chat about what you can enjoy with this dish. First off, crusty bread is a perfect companion, allowing you to soak up that flavorful broth. Next, consider a refreshing cucumber salad with a light 

Chinese Chicken Broccoli With Brown Sauce – Culinary Chase

Chinese Chicken Broccoli With Brown Sauce – Culinary Chase

Before diving into the delicious world of Chinese Chicken Broccoli Brown Sauce, let’s talk pairings. This dish plays well with a lot of sides and beverages. Suggested Meal Pairings 1. Steamed Jasmine Rice: The fluffy grains absorb the flavorful sauce perfectly.2. Chow Mein Noodles: A 

Hong Kong Milk Tea – Culinary Chase

Hong Kong Milk Tea – Culinary Chase

Before we delve into the delightful world of Hong Kong Milk Tea, let’s talk about what goes well with this beloved drink. This tea is a smooth, creamy companion to a variety of snacks and meals. Picture yourself sipping a warm cup while enjoying buttery pineapple buns, or perhaps a flaky egg tart. 

Both pair beautifully, enhancing the comforting aspect of the tea. For something heartier, consider enjoying it alongside classic Hong Kong-style street food like curry fish balls or savory pork buns. These complementary flavors create a perfect balance and make for an enriching experience.

hong kong milk tea

Have you ever taken a sip of a drink and felt like you were wrapping yourself in a warm blanket? That’s how I feel each time I enjoy a cup of Hong Kong Milk Tea. This drink is not just a beverage; it’s a symbol of culture and history. 

I remember my first taste vividly—in a bustling café in Hong Kong, the steam rising from my cup and the rich, velvety smoothness dancing on my palate. This milk tea tells a story, one that goes back decades, representing the blend of East and West.

Let’s take a journey today as we explore the intricacies of Hong Kong Milk Tea. We’ll uncover what it is, how to make it, and even share some helpful tips along the way. Trust me; you’ll want to make this tea part of your routine.

What is Hong Kong Milk Tea?

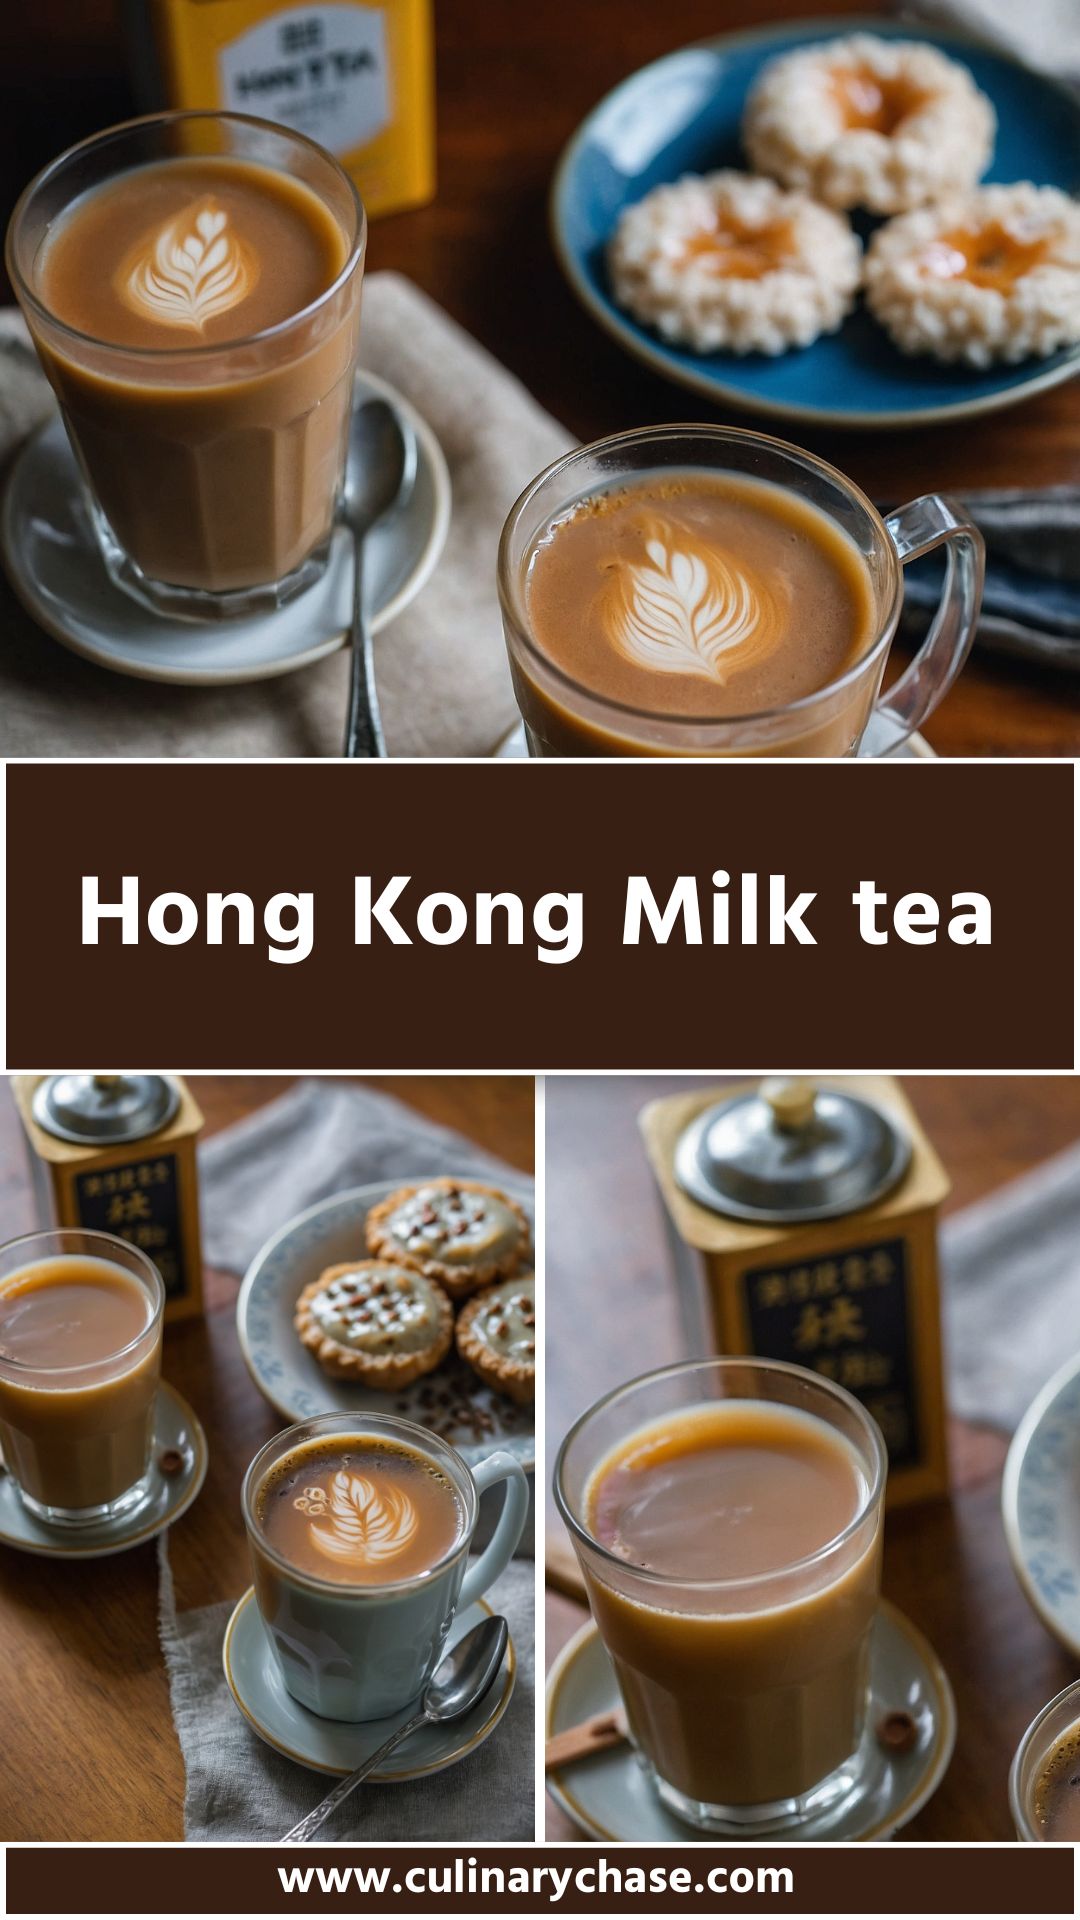
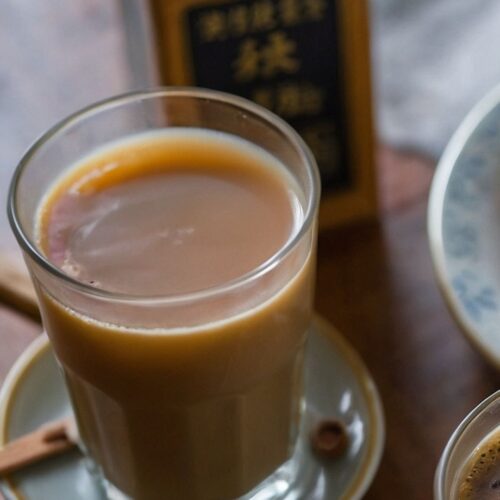
Hong Kong Milk Tea, often referred to simply as “Hong Kong-style milk tea” or “Silk Stocking Tea,” is a beloved beverage made from strong black tea, milk, and sugar. Its origins trace back to British colonial history, when tea culture began to flourish in Hong Kong. 

The preparation involves brewing different types of black teas, which are then poured over evaporated milk to achieve its signature creamy texture. The tea is typically brewed in a unique way—often through a fine mesh strainer, which gives it that smooth, elegant finish.

In many cha chaan teng (Hong Kong-style cafés), the tea is brewed multiple times for extra richness. Some might say it’s an art form, requiring a precise balancing act of flavors. Similar to a comforting cup of coffee, this milk tea has a way of beckoning you back for seconds.

You will also like the following Drinks recipes!

What is the Flavor Profile of This Dish?

The flavor profile of Hong Kong Milk Tea is a delightful experience. Imagine a harmonious blend of sharpness from the black tea, which is counterbalanced by the creaminess of evaporated milk. This combination creates a silky mouthfeel. The addition of sweetened condensed milk brings a touch of sweetness, balancing the bitterness of the tea without overpowering it.

When you take a sip, you encounter a warm richness on the tongue, with a slight sweetness that lingers. Depending on the type of black tea used, you might also catch subtle floral or fruity notes, adding to the overall complexity. Each cup tells a different story based on the blend of teas and ratios of milk and sugar used.

What Makes This Recipe Different From Other Hong Kong Milk Tea?

What sets this Hong Kong Milk Tea recipe apart from others is its authenticity and the commitment to using quality ingredients. The emphasis on brewing techniques makes a significant difference in flavor. The precise selection of tea leaves adds depth. By blending teas like Ceylon Orange Pekoe with Lipton Black, you can achieve a balanced, aromatic infusion.

Moreover, this recipe highlights the use of evaporated milk rather than regular milk, giving the tea its signature creaminess. Many recipes take shortcuts, but this one focuses on authenticity, ensuring that each sip connects you to the rich heritage of Hong Kong.

Ingredients You’ll Need

To create the magic of Hong Kong Milk Tea at home, gather the following:

  • 1⅓ cups evaporated milk (315 ml, or about ⅓ cup per serving)
  • 10 tablespoons black tea leaves or fannings (a mix of Ceylon Orange Pekoe, Lipton Black, Earl Grey, or your preferred blend works wonderfully)
  • ½ teaspoon vanilla extract (for a hint of warmth)
  • 6 cups hot water (1.4L — this yields about 4½ cups of brewed tea)
  • 1 to 2 tablespoons sweetened condensed milk (use ~1 teaspoon per serving; adjust to taste)
  • A fine-mesh strainer (optional: line with fine cheesecloth for a silky-smooth finish)
how to make hong kong milk tea

Step-by-Step Directions

Step 1: Brew the Tea

Start by boiling your 6 cups of water in a pot. Once the water reaches a rolling boil, add the 10 tablespoons of black tea leaves. Let the tea steep for a good 5–7 minutes, depending on your personal taste preference. The longer it steeps, the stronger the flavor. After steeping, remove the leaves using a strainer.

Step 2: Mix in the Milk

In a separate large pitcher, pour in the 1⅓ cups of evaporated milk. The warmth of the brewed tea will blend beautifully with the milk. Pour the freshly brewed tea into the pitcher and mix thoroughly.

Step 3: Add Sweetness

Now, it’s time to sweeten things up. Start with 1 tablespoon of sweetened condensed milk and stir it into the tea mixture. Taste and adjust according to your sweetness preference. One teaspoon per cup is a good starting point.

Step 4: Strain for Smoothness

For that silky texture, strain your tea mixture through a fine-mesh strainer into individual cups or a larger serving pot. If you want to use cheesecloth for extra smoothness, feel free to do so.

Step 5: Serve and Enjoy

Serve your Hong Kong Milk Tea hot, and if you desire, you can add a splash of vanilla extract for an aromatic finish. Enjoy while it’s warm, and feel free to sip slowly to savor those rich flavors.

Tips on Making Hong Kong Milk Tea

To ensure your Hong Kong Milk Tea turns out perfect, consider the following tips:

  • Use Quality Tea: The type of black tea impacts the flavor. Experiment with blends to find your perfect combination.
  • Steep Aggressively: Don’t shy away from longer steep times to get a rich flavor.
  • Creamy Finish: Evaporated milk is key for that Mumbai dish texture. Regular milk can dilute the creaminess.
  • Balance Sweetness: Start with less sweetened condensed milk and add more as needed. You can always add, but you can’t take away.
  • Hot is Best: While iced versions exist, nothing beats a hot cup of Hong Kong Milk Tea fresh from the pot.

Nutrition Information

Here’s a breakdown of the nutrition you can expect per serving of Hong Kong Milk Tea (assuming 4 servings total):

  • Calories: Approximately 140
  • Total Fat: 5g
  • Carbohydrates: 20g
  • Sugars: 10g
  • Protein: 4g

Remember, nutrition may vary slightly based on your specific ingredient choices.

How Can I Store This Hong Kong Milk Tea?

If you’ve made more tea than you can drink, don’t worry! You can store your leftover Hong Kong Milk Tea in the refrigerator. It will keep well for about 2–3 days. When you’re ready for another cup, you can reheat it in the microwave. Just remember to stir well, as some separation may occur.

hong kong milk tea copycat recipe

Ingredient Substitutes

If you find yourself short on certain ingredients, here are some substitutes:

  • Evaporated Milk: You can use whole milk or a combination of cream and milk for a similarly rich texture.
  • Black Tea Leaves: If you can’t find the recommended blends, feel free to use any strong black tea. English Breakfast or Assam are good alternatives.
  • Sweetened Condensed Milk: If you want to avoid added sugars, consider using a sugar-free sweetener or making your own simple syrup.
  • Vanilla Extract: For a different flavor, try almond extract or even a touch of caramel syrup.
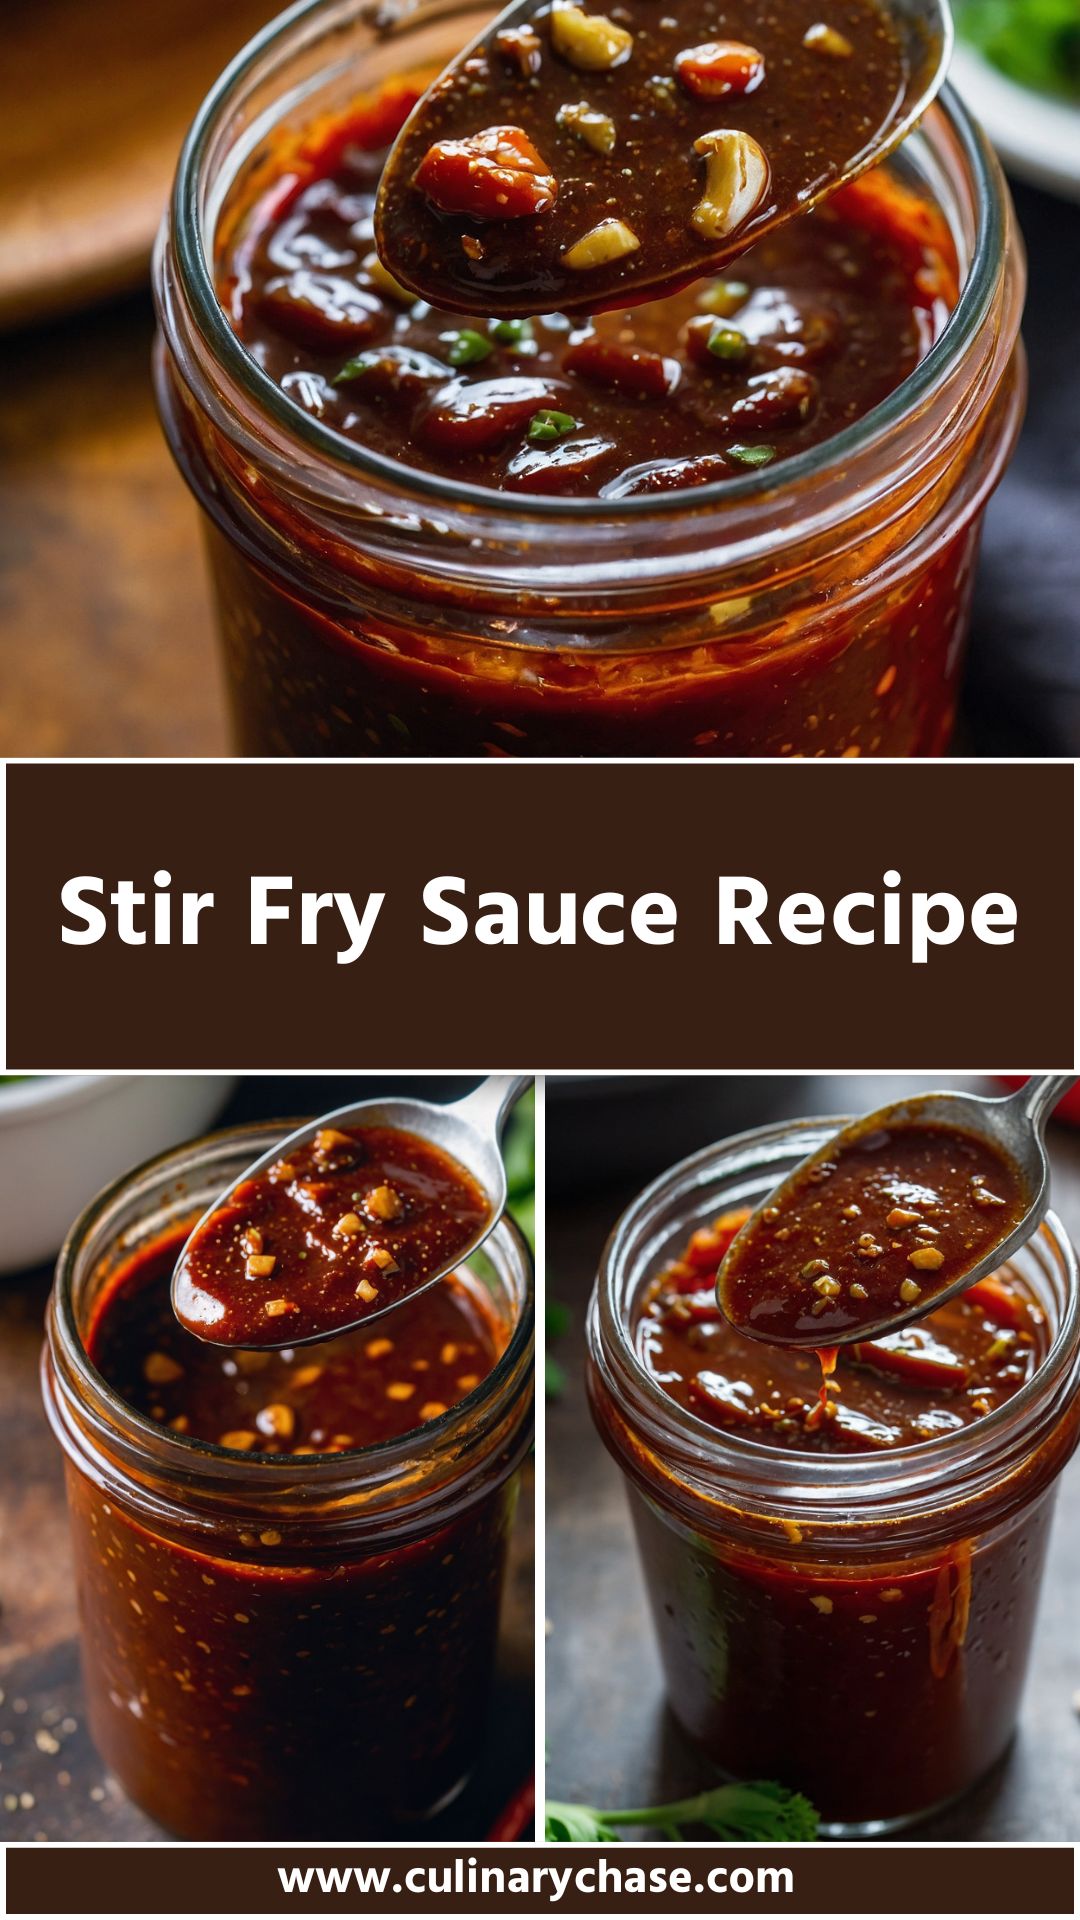
how to make hong kong milk tea

Hong Kong Milk Tea

Before we delve into the delightful world of Hong Kong Milk Tea, let’s talk about what goes well with this beloved drink.This tea is a smooth, creamy companion to a variety of snacks and meals.
Prep Time 25 minutes
Total Time 25 minutes
Course Drinks
Cuisine Hong Kong
Servings 4
Calories 140 kcal

Equipment

  •  Large Pitcher
  • Pot

Ingredients
  

  • 1⅓ cups evaporated milk 315 ml, or about ⅓ cup per serving
  • 10 tablespoons black tea leaves or fannings a mix of Ceylon Orange Pekoe, Lipton Black, Earl Grey, or your preferred blend works wonderfully
  • ½ teaspoon vanilla extract for a hint of warmth
  • 6 cups hot water 1.4L — this yields about 4½ cups of brewed tea
  • 1 to 2 tablespoons sweetened condensed milk use ~1 teaspoon per serving; adjust to taste
  • A fine-mesh strainer optional: line with fine cheesecloth for a silky-smooth finish

Instructions
 

Step 1: Brew the Tea

  • Start by boiling your 6 cups of water in a pot. Once the water reaches a rolling boil, add the 10 tablespoons of black tea leaves. Let the tea steep for a good 5–7 minutes, depending on your personal taste preference. The longer it steeps, the stronger the flavor. After steeping, remove the leaves using a strainer.

Step 2: Mix in the Milk

  • In a separate large pitcher, pour in the 1⅓ cups of evaporated milk. The warmth of the brewed tea will blend beautifully with the milk. Pour the freshly brewed tea into the pitcher and mix thoroughly.

Step 3: Add Sweetness

  • Now, it’s time to sweeten things up. Start with 1 tablespoon of sweetened condensed milk and stir it into the tea mixture. Taste and adjust according to your sweetness preference. One teaspoon per cup is a good starting point.

Step 4: Strain for Smoothness

  • For that silky texture, strain your tea mixture through a fine-mesh strainer into individual cups or a larger serving pot. If you want to use cheesecloth for extra smoothness, feel free to do so.

Step 5: Serve and Enjoy

  • Serve your Hong Kong Milk Tea hot, and if you desire, you can add a splash of vanilla extract for an aromatic finish. Enjoy while it’s warm, and feel free to sip slowly to savor those rich flavors.

Notes

  • Use Quality Tea: The type of black tea impacts the flavor. Experiment with blends to find your perfect combination.
  • Steep Aggressively: Don’t shy away from longer steep times to get a rich flavor.
  • Creamy Finish: Evaporated milk is key for that Mumbai dish texture. Regular milk can dilute the creaminess.
  • Balance Sweetness: Start with less sweetened condensed milk and add more as needed. You can always add, but you can’t take away.
  • Hot is Best: While iced versions exist, nothing beats a hot cup of Hong Kong Milk Tea fresh from the pot.

Nutrition

Calories: 140kcalCarbohydrates: 20gProtein: 4gFat: 5gSugar: 10g
Keyword Hong Kong Milk Tea
Tried this recipe?Let us know how it was!

Frequently Asked Questions about Hong Kong Milk Tea

1. Can I make Hong Kong Milk Tea with tea bags?

 Absolutely! If you’re pressed for time or don’t have loose-leaf tea, tea bags work just as well. Just use the equivalent amount recommended on the package for the same strength.

2. Is Hong Kong Milk Tea typically served cold or hot?

 Hong Kong Milk Tea is traditionally served hot, but it can also be enjoyed iced, especially in warmer months. Just brew the tea, then pour it over ice for a refreshing treat.

3. Can I make variations of Hong Kong Milk Tea?

 Definitely! Many enjoy adding different flavors like caramel, or even spices like cinnamon. Experiment to find your favorite twist.

4. Why is it called “Silk Stocking Tea”?

 The name comes from the traditional method of straining the tea through an old silk stocking to achieve that smooth texture. It might sound strange, but it really does enhance the quality

5. How does the sweetness level compare to other teas?

 Hong Kong Milk Tea is typically sweeter than many traditional teas, due to the addition of sweetened condensed milk. Adjust the amount based on your taste preferences.

Conclusion

Sipping on a cup of Hong Kong Milk Tea is truly an experience. It’s more than just a drink; it’s a blend of cultures, history, and flavors that bring comfort in every sip. By incorporating some easy steps and quality ingredients, you can create this delightful beverage at home. 

Whether enjoyed alone, paired with a snack, or shared with friends, it’s sure to become a favorite. So, grab your ingredients, put the kettle on, and immerse yourself in the enchanting world of Hong Kong Milk Tea. Cheers!

You’ll also like these latest recipes!

Thai Fried Rice – Culinary Chase

Thai Fried Rice – Culinary Chase

When I first encountered the vibrant dish known as Thai fried rice, it was like stumbling upon a treasure trove of flavors. I still remember the aromatic wafts of jasmine rice mingling with the essence of garlic and soy sauce swirling in the bustling atmosphere 

Nai Wong Bao Custard Buns – Culinary Chase

Nai Wong Bao Custard Buns – Culinary Chase

There’s something delightful about enjoying your nai wong bao custard buns with different accompaniments. A light, fresh vegetable stir-fry pairs beautifully with the soft, sweet goodness of the buns. The crunch of fresh bok choy and snap peas can contrast nicely with the custard, creating 

Stir Fry Sauce Recipe – Culinary Chase

Stir Fry Sauce Recipe – Culinary Chase

If you’ve ever sniffed the air and been met with the inviting aroma of a stir-fry sizzling on the stove, then you know there’s something magical about it. I vividly recall my first culinary encounter with stir fry, watching a colorful medley of vegetables and proteins whirl around in a pan like they were dancing. 

That moment inspired me to create a stir fry sauce that transforms ordinary dishes into flavor-packed masterpieces. Today, I want to take you on that journey—one that is filled with vibrant tastes and easy steps to whip up a fantastic stir fry sauce.

So, are you ready? Let’s dive into the art of stir fry sauce making.

stir fry sauce recipe

What is Stir Fry Sauce?

At its core, stir fry sauce is a blend of savory, sweet, sour, and umami flavors. It acts like a conductor, harmonizing every ingredient in your stir fry. The right sauce elevates your meal, making every bite burst with flavor. Think of it as the secret handshake that turns a simple dish into something truly special.

A typical stir fry sauce includes a combination of soy sauce, sweeteners like brown sugar, acidic elements like vinegar, and aromatic additions such as garlic or ginger. Each component works in unison, providing a savory base that enhances whatever you pair it with. Trust me; once you try it, you’ll be eager to have it on hand for all your cooking adventures.

You will also like the following Sauce recipes!

Why You’ll Love This Stir Fry Sauce Recipe

Let me tell you why this stir fry sauce recipe is a game changer. It’s quick, versatile, and absolutely delish. On a hectic weeknight, this sauce can take center stage in a meal that comes together in mere minutes.

Flavor Finesse

This sauce is not just about convenience; it’s expertly crafted. With the perfect balance of sweetness from brown sugar, a hint of spice from red pepper flakes, and the warm zestiness of ginger, it adds depth to your meals. Picture how this would complement vegetables and proteins. It’s like dressing for your salad—just as crucial!

Ingredient Simplicity

You won’t be hunting for exotic ingredients either. Everything you need is likely already in your pantry. No need for a treasure map here! Just staple items that you’ll feel good about using.

Customizable to Your Liking

Whether you’re a spice junkie, a sweet tooth, or someone who loves tangy flavors, this sauce adapts to your preferences. It can be adjusted with just a few tweaks to suit your taste buds. With this recipe, you become the chef!

The Ingredients

Now, let’s get down to the essentials. Here’s what you’ll need for this incredible stir fry sauce:

  • 1 tablespoon cornstarch: For thickening the sauce and giving it that silky finish.
  • ½ cup reduced-sodium soy sauce: This serves as the savory and umami base of your sauce.
  • 1–2 teaspoons freshly grated ginger root: For a warm, zingy kick.
  • ½ teaspoon miso paste: Adds a delightful umami depth.
  • 2 garlic cloves, finely minced: For that bold flavor we all adore.
  • 1 tablespoon brown sugar or natural honey: Sweetness to balance savory notes; feel free to adjust.
  • ½ cup low-sodium vegetable broth (or plain water): For a lighter sauce.
  • ½ tablespoon rice wine vinegar: A gentle touch of tanginess.
  • 1 teaspoon fresh lime juice: Brightness to elevate flavors.
  • 1 teaspoon toasted sesame oil: A nutty, aromatic finish.
  • Pinch of red pepper flakes: Optional, for a hint of heat.

This collection of ingredients sets the stage for a delicious adventure. Gather everything before we start so you can fly through the process.

how to make stir fry sauce recipe

Step by Step Instructions

Step 1: Prepare Your Ingredients

Before you even think of throwing this sauce together, take a moment to prepare everything. Grate the ginger and mince the garlic. Measure each ingredient carefully. This will ensure you achieve that balanced flavor we discussed.

Step 2: Mix the Dry Ingredients

In a mixing bowl, combine the cornstarch and brown sugar (or honey). Whisk them together quickly to prevent any clumps from forming. This step is crucial for a smooth sauce.

Step 3: Add the Liquids

To your dry mix, add the reduced-sodium soy sauce and vegetable broth (or water). Stir it well until everything is combined. Next, add in the rice wine vinegar and lime juice. These ingredients will awaken the mixture.

Step 4: Incorporate the Aromatics

Now comes the fun part. Stir in the minced garlic, freshly grated ginger, and miso paste. Each of these ingredients adds a layer of flavor that’s irresistible. Mix them until they’re fully integrated. If you enjoy heat, sprinkle in a pinch of red pepper flakes at this point.

Step 5: Thicken the Sauce

Pour this mixture into a small saucepan over medium heat. Stir it frequently to prevent sticking. As it heats, the cornstarch will activate, thickening the sauce to a perfect consistency. This usually takes about 5-7 minutes.

Step 6: Add the Sesame Oil

Once your sauce has thickened, take it off the heat. Stir in the toasted sesame oil for that nutty aroma we talked about. This final touch is what makes this sauce sing.

Step 7: Taste and Adjust

Here’s where you play the role of chef. Take a tiny taste. Is it perfect? If you want more sweetness, add another dash of sugar. Need more heat? Toss in a bit more red pepper flakes. Remember, you are in control.

Tips & Tricks

  • Don’t Skimp on Fresh Ingredients: The freshness of garlic and ginger dramatically influences the flavor. Use fresh, not pre-minced.
  • Adjust Sauce Consistency: For a thinner sauce, simply add a bit more broth or water.
  • Store It Right: Keep any leftover sauce in an airtight container in your fridge for up to two weeks. It only improves with age!
  • Mix Your Proteins: Use this sauce with different proteins like chicken, shrimp, or tofu. Change it up based on what you have on hand.
  • Amp Up Your Vegetables: Broccoli, bell peppers, and snap peas work wonderfully. Don’t hold back—try new veggies!

Nutrition Information

A serving of this stir fry sauce (about 2 tablespoons) includes approximately:

  • Calories: 35
  • Protein: 1g
  • Carbohydrates: 6g
  • Fats: 1g
  • Sodium: Varies based on soy sauce used, around 300mg.

This sauce is low in calories and provides great flavor without drastic calorie counts.

Can I Store Stir Fry Sauce?

Absolutely! If you make a double batch (and who wouldn’t?), you can store it. Pour any leftovers into a glass container and seal it tightly. Refrigerate, and it should last for about two weeks. If you’d like to keep it longer, freeze it in ice cube trays and pop out portions as needed.

stir fry sauce copycat  recipe

What Can I Serve with Stir Fry Sauce?

The beauty of this sauce is its versatility! Here are some great ways to enjoy it:

  • Ultimately, Over Noodles: Toss cooked noodles with your stir fry sauce and any mix of veggies and proteins.
  • On Rice: A classic pairing! Serve your stir fry or sauce over steamed rice.
  • With Cauliflower Rice: For a low-carb option that keeps things light.
  • In Spring Rolls: Drizzle it over fresh spring rolls for an added zing.
  • As a Marinade: Before cooking, use it as a marinade for your ingredients to infuse that flavor even before they hit the pan.

Variations

Spice things up with these alternatives:

  • Spicy Szechuan Style: Increase the red pepper flakes and add a splash of chili oil for a fiery kick.
  • Sweet and Sour Fusion: Substitute half the soy sauce with pineapple juice. Enjoy a tangy twist!
  • Garlic Lovers: Double the garlic for a more pronounced flavor—if you’re feeling adventurous.
  • Peanut Sauce Remix: Mix in a tablespoon of peanut butter for a richer sauce that echoes Thai flavors.
  • Herbal Twist: Stir in chopped fresh cilantro or basil just before serving for a burst of freshness.
stir fry sauce copycat recipe

Stir Fry Sauce Recipe

If you’ve ever sniffed the air and been met with the inviting aroma of a stir-fry sizzling on the stove, then you know there’s something magical about it.
Prep Time 5 minutes
Total Time 5 minutes
Course Sauce
Cuisine Asian
Servings 6
Calories 35 kcal

Equipment

  • Bowl
  • saucepan

Ingredients
  

  • 1 tablespoon cornstarch: For thickening the sauce and giving it that silky finish.
  • ½ cup reduced-sodium soy sauce: This serves as the savory and umami base of your sauce.
  • 1 –2 teaspoons freshly grated ginger root: For a warm zingy kick.
  • ½ teaspoon miso paste: Adds a delightful umami depth.
  • 2 garlic cloves finely minced: For that bold flavor we all adore.
  • 1 tablespoon brown sugar or natural honey: Sweetness to balance savory notes; feel free to adjust.
  • ½ cup low-sodium vegetable broth or plain water: For a lighter sauce.
  • ½ tablespoon rice wine vinegar: A gentle touch of tanginess.
  • 1 teaspoon fresh lime juice: Brightness to elevate flavors.
  • 1 teaspoon toasted sesame oil: A nutty aromatic finish.
  • Pinch of red pepper flakes: Optional for a hint of heat.

Instructions
 

Step 1: Prepare Your Ingredients

  • Before you even think of throwing this sauce together, take a moment to prepare everything. Grate the ginger and mince the garlic. Measure each ingredient carefully. This will ensure you achieve that balanced flavor we discussed.

Step 2: Mix the Dry Ingredients

  • In a mixing bowl, combine the cornstarch and brown sugar (or honey). Whisk them together quickly to prevent any clumps from forming. This step is crucial for a smooth sauce.

Step 3: Add the Liquids

  • To your dry mix, add the reduced-sodium soy sauce and vegetable broth (or water). Stir it well until everything is combined. Next, add in the rice wine vinegar and lime juice. These ingredients will awaken the mixture.

Step 4: Incorporate the Aromatics

  • Now comes the fun part. Stir in the minced garlic, freshly grated ginger, and miso paste. Each of these ingredients adds a layer of flavor that’s irresistible. Mix them until they’re fully integrated. If you enjoy heat, sprinkle in a pinch of red pepper flakes at this point.

Step 5: Thicken the Sauce

  • Pour this mixture into a small saucepan over medium heat. Stir it frequently to prevent sticking. As it heats, the cornstarch will activate, thickening the sauce to a perfect consistency. This usually takes about 5-7 minutes.

Step 6: Add the Sesame Oil

  • Once your sauce has thickened, take it off the heat. Stir in the toasted sesame oil for that nutty aroma we talked about. This final touch is what makes this sauce sing.

Step 7: Taste and Adjust

  • Here’s where you play the role of chef. Take a tiny taste. Is it perfect? If you want more sweetness, add another dash of sugar. Need more heat? Toss in a bit more red pepper flakes. Remember, you are in control.

Notes

  • Don’t Skimp on Fresh Ingredients: The freshness of garlic and ginger dramatically influences the flavor. Use fresh, not pre-minced.
  • Adjust Sauce Consistency: For a thinner sauce, simply add a bit more broth or water.
  • Store It Right: Keep any leftover sauce in an airtight container in your fridge for up to two weeks. It only improves with age!
  • Mix Your Proteins: Use this sauce with different proteins like chicken, shrimp, or tofu. Change it up based on what you have on hand.
  • Amp Up Your Vegetables: Broccoli, bell peppers, and snap peas work wonderfully. Don’t hold back—try new veggies!

Nutrition

Calories: 35kcalCarbohydrates: 6gProtein: 1gFat: 1g
Keyword Stir Fry Sauce Recipe
Tried this recipe?Let us know how it was!

Frequently Asked Questions

1. Can I make this sauce in advance?

Yes! You can prepare this sauce up to a week in advance. Just make sure to store it in a sealed container in the fridge.

2. Can I make this sauce gluten-free?

Certainly! You can substitute the soy sauce with a gluten-free option like tamari or coconut aminos. Both work well and keep the flavor profile intact.

3. Can I use this sauce for other dishes?

Absolutely! This sauce is versatile. Use it for marinating proteins, as a dipping sauce, or drizzled over roasted veggies. Unleash your creativity.

4. How do I thicken the sauce if I forget the cornstarch?

If you find yourself without cornstarch, you can use arrowroot powder or even a bit of flour. Just make sure to mix it well with water before adding to the sauce to avoid lumps.

5. What’s the perfect timing for adding the sauce to my stir fry?

Add the stir fry sauce to your pan toward the end of cooking. After the meat and veggies are fully cooked, introduce the sauce and let it simmer for a minute to truly bring everything together.

Conclusion

And there you have it! A beautifully crafted stir fry sauce that invigorates meals and tantalizes taste buds. From the initial mixing to that beautiful finish, you’ve now got the knowledge and skills to transform your meals.

I hope you find joy in making this sauce, just as I have. It’s truly remarkable how something so simple can elevate our culinary experiences. So, grab those ingredients, fire up the stove, and enjoy the delightful dance of flavors you’ve created! Trust me; your taste buds will thank you.

You’ll also like these latest recipes!

Pan Fried Mackerel Recipe – Culinary Chase

Pan Fried Mackerel Recipe – Culinary Chase

Before diving into the delicious world of pan-fried mackerel, let’s flirt with some pairings that can elevate this dish. Mackerel is rich, oily, and flavorful, so you’ll want accompaniments that balance its bold profile. 1. Fresh Green Salad: A crisp lettuce mix with tomatoes and