There’s something magical about nailing a restaurant-quality dish in your own kitchen, isn’t there? Today, I’m sharing a gem with you: Bahama Breeze Jerk Chicken Pasta copycat recipe. This one’s guaranteed to evoke a warm welcome from your taste buds and a round of applause …
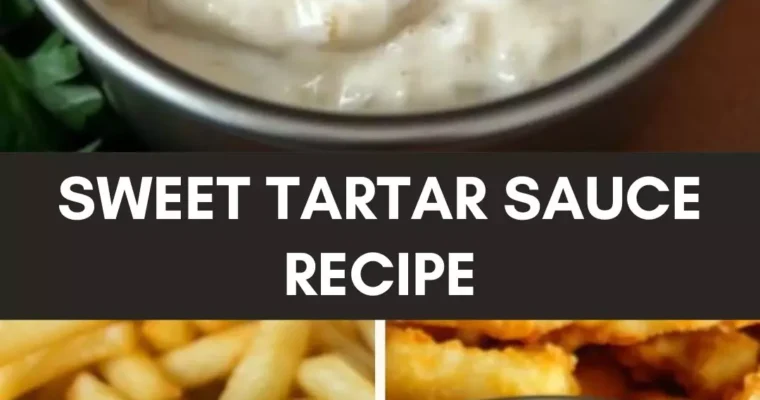
Ah, tartar sauce! It’s that delectable dollop of goodness that can elevate a simple dish into something truly extraordinary. Perfectly paired with crispy fish sticks, savory crab cakes, or crunchy calamari, this sweet tartar sauce is not just any ordinary condiment. It’s the secret weapon …
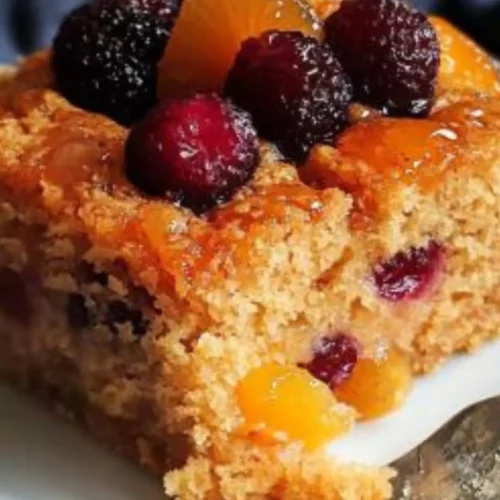
Whether it’s a cooling scoop of vanilla ice cream or a steaming cup of coffee, pairing the right companion with a slice of old fashioned fruit cocktail cake can elevate your tasting experience.
Vanilla ice cream provides a creamy counterbalance to the sweetness of the cake. For those who prefer a warm beverage, a robust cup of coffee or a mild black tea can complement the dessert’s rich flavors.
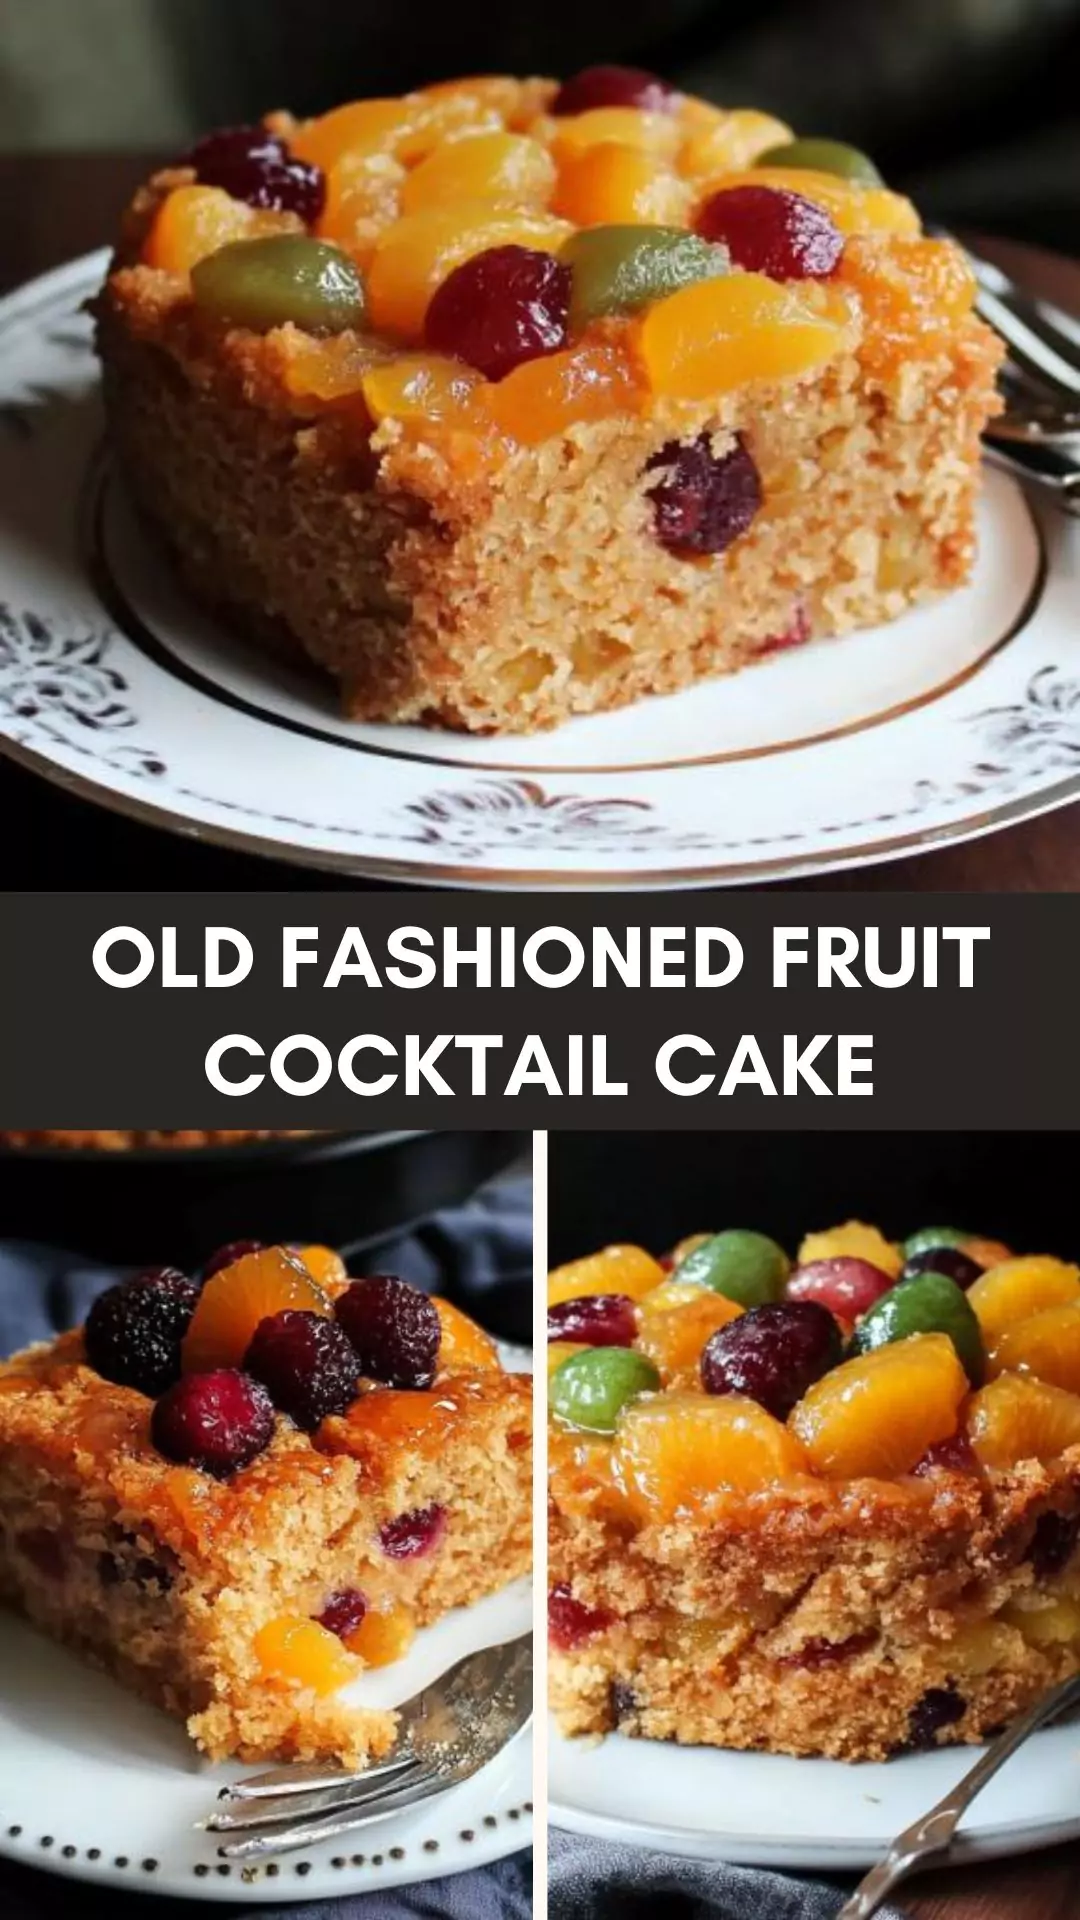
Today I am diving into a delicious piece of nostalgia—the old fashioned fruit cocktail cake. This cake takes me right back to my grandma’s kitchen, where I used to devour it by the slice with a glass of cold milk.
It’s a unique dessert that combines the best of both worlds: the juiciness of fruit cocktail and the comforting familiarity of a homemade cake.
Let’s dig deeper into what makes this cake so special, the ingredients you need, and the step-by-step process to create it.
Stick around for tips, tricks, and alternatives that’ll make you a pro at whipping up this vintage gem.
What is Old Fashioned Fruit Cocktail Cake?
Old fashioned fruit cocktail cake is a charmingly retro dessert that’s packed with canned fruit cocktail. The batter is straightforward but results in a dense, moist cake that boasts a caramel-like crust from the brown sugar.
Topped with a simple yet rich glaze, this cake is a nostalgic nod to recipes from the 1950s when it first gained popularity.
Why This Recipe Works
Oh, you bet it works and here’s why:
Ease of Preparation: No complicated steps or fancy equipment. This cake can be made with a single bowl and a spoon.
Moist and Tender Texture: Thanks to the fruit cocktail, the cake remains delightfully moist and flavorful.
Versatile Ingredients: You can easily tweak the recipe with different fruit cocktails, making it adaptable to what you have on hand.
Kid-Friendly: Even the pickiest eaters can’t resist the sweet, fruity goodness in every bite. Parents, this is a game-changer for family dinners.
Ingredients You’ll Need To Make This Dish
1 cup all-purpose flour
½ teaspoon ground cinnamon
1 teaspoon vanilla extract
1 cup white granulated sugar
15 oz. can of assorted fruit cocktail (do not drain)
1 large egg
½ cup packed light brown sugar
¼ teaspoon sea salt
1 teaspoon baking soda
How To Make This Old Fashioned Fruit Cocktail Cake?
Step 1: Preheat the Oven
First, preheat your oven to 350°F (175°C). Grease a 9×13 inch baking dish or line it with parchment paper.
Step 2: Mix the Dry Ingredients
In a large mixing bowl, combine 1 cup of all-purpose flour, ½ teaspoon of ground cinnamon, ¼ teaspoon of sea salt, and 1 teaspoon of baking soda. Stir well to ensure everything is evenly distributed.
Step 3: Add the Wet Ingredients
Next, add in 1 cup of white granulated sugar, 15 oz. can of assorted fruit cocktail (including the syrup), 1 large egg, and 1 teaspoon of vanilla extract. Mix until the ingredients are well combined, and the batter is smooth.
Step 4: Pour and Top
Pour the batter into the prepared baking dish, spreading it out evenly with a spatula. Sprinkle ½ cup of packed light brown sugar evenly over the top of the batter. This will create a deliciously caramelized crust.
Step 5: Bake
Place your dish in the preheated oven. Bake for about 35–40 minutes, or until a toothpick inserted into the center comes out clean.
Step 6: Cool and Serve
Allow the cake to cool in the pan for at least 15 minutes. Slice and serve warm, ideally with a dollop of whipped cream or a scoop of vanilla ice cream. Trust me, it’s perfection.
Tips & Tricks
Use Fresh Spices: Ground cinnamon loses its potency over time. Fresh spices ensure the best flavor.
Do Not Drain the Fruit Cocktail: The syrup adds moisture and sweetness to the cake.
Room Temperature Egg: This mixes better and helps achieve a smoother batter.
Grease the Pan Well: Prevents sticking and makes for easier cleanup.
Check for Doneness: Every oven is different. Insert a toothpick to check if the cake is fully baked.
Nutrition Information
How Do You Store The Leftovers?
If you’re lucky enough to have any leftovers, store them in an airtight container. The cake keeps well at room temperature for up to two days. For longer storage, place it in the refrigerator for up to a week. Just zap a slice in the microwave for about 10 seconds before eating to bring it back to its gooey, delicious glory.
What Sides Would Complement Old Fashioned Fruit Cocktail Cake?
Let’s not leave the cake hanging! Consider these scrumptious sides:
Whipped Cream: Light and airy, it contrasts wonderfully with the cake’s rich texture.
Vanilla Ice Cream: The creaminess cuts through the sweetness and adds a cooling effect.
Fresh Berries: They add a pop of color and a splash of fresh flavor, enhancing the fruity notes in the cake.
What Alternatives Can You Use For The Ingredients If They Are Not Present In Your Kitchen?
We’ve all been there—missing ingredients but too lazy to go to the store. No worries:
All-Purpose Flour: Substitute with whole wheat flour for a denser, more filling cake.
Brown Sugar: Replace with coconut sugar or honey for a different type of sweetness.
Egg: If you’re out of eggs, use a ¼ cup of unsweetened applesauce or a flaxseed egg.
Vanilla Extract: You could use almond extract for a different, but equally delicious, flavor profile.
Old fashioned fruit cocktail cake
Joe Williams
Today I am diving into a delicious piece of nostalgia—the old fashioned fruit cocktail cake. This cake takes me right back to my grandma’s kitchen, where I used to devour it by the slice with a glass of cold milk.
First, preheat your oven to 350°F (175°C). Grease a 9×13 inch baking dish or line it with parchment paper.
Step 2: Mix the Dry Ingredients
In a large mixing bowl, combine 1 cup of all-purpose flour, ½ teaspoon of ground cinnamon, ¼ teaspoon of sea salt, and 1 teaspoon of baking soda. Stir well to ensure everything is evenly distributed.
Step 3: Add the Wet Ingredients
Next, add in 1 cup of white granulated sugar, 15 oz. can of assorted fruit cocktail (including the syrup), 1 large egg, and 1 teaspoon of vanilla extract. Mix until the ingredients are well combined, and the batter is smooth.
Step 4: Pour and Top
Pour the batter into the prepared baking dish, spreading it out evenly with a spatula. Sprinkle ½ cup of packed light brown sugar evenly over the top of the batter. This will create a deliciously caramelized crust.
Step 5: Bake
Place your dish in the preheated oven. Bake for about 35–40 minutes, or until a toothpick inserted into the center comes out clean.
Step 6: Cool and Serve
Allow the cake to cool in the pan for at least 15 minutes. Slice and serve warm, ideally with a dollop of whipped cream or a scoop of vanilla ice cream. Trust me, it’s perfection.
Notes
Use Fresh Spices: Ground cinnamon loses its potency over time. Fresh spices ensure the best flavor.
Do Not Drain the Fruit Cocktail: The syrup adds moisture and sweetness to the cake.
Room Temperature Egg: This mixes better and helps achieve a smoother batter.
Grease the Pan Well: Prevents sticking and makes for easier cleanup.
Check for Doneness: Every oven is different. Insert a toothpick to check if the cake is fully baked.
Yes! Substitute the all-purpose flour with a 1:1 gluten-free baking flour. Ensure it contains xanthan gum, which will help replicate the texture.
2. What Can I Use Instead of Fruit Cocktail?
If you’re out of fruit cocktail, canned peaches or pineapple work just as well. The syrup from these alternatives helps maintain the cake’s moistness.
3. Can I Freeze This Cake?
Indeed! Wrap individual slices in plastic wrap and store them in a ziplock bag. It can be stored for up to 3 months.
4. Is This Cake Suitable for Vegans?
Substitute the egg with flaxseed egg (1 tablespoon of flaxseed meal + 3 tablespoons water) and use a plant-based caramel topping. Voila, vegan!
5. How Do I Prevent the Cake from Becoming Too Sweet?
If you’re worried about sweetness, opt for fruit cocktail in juice instead of syrup. Additionally, reduce the granulated sugar to ¾ cup.
6. Can I Add Nuts?
Adding nuts like pecans or walnuts can bring a delightful crunch. Just fold in about ½ cup of chopped nuts into the batter before baking.
Conclusion
And there you have it—a comprehensive guide to making an old fashioned fruit cocktail cake. This dessert is a time machine, taking us back to simpler times while satisfying modern taste buds.
From its easy preparation to its unmatched versatility, it’s no wonder this cake has stood the test of time. Ready to give it a whirl? Trust me; you won’t be disappointed.
So, prep your kitchen and get ready for some comforting, old-school baking. First slice is always the best; just remember to enjoy it with your favorite side!
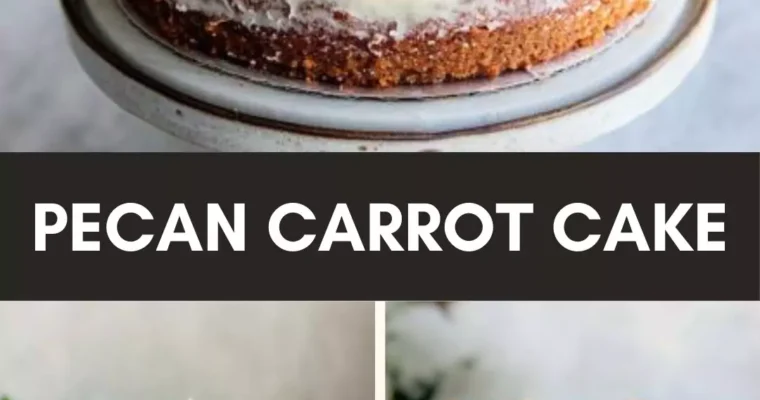
Pecan Carrot Cake is the perfect companion for a steaming cup of your favorite tea or coffee, a scoop of vanilla ice cream or whipped cream. Or a dollop of plain Greek yogurt that adds a delightful contrast to the cake’s sweetness. Welcome to the …
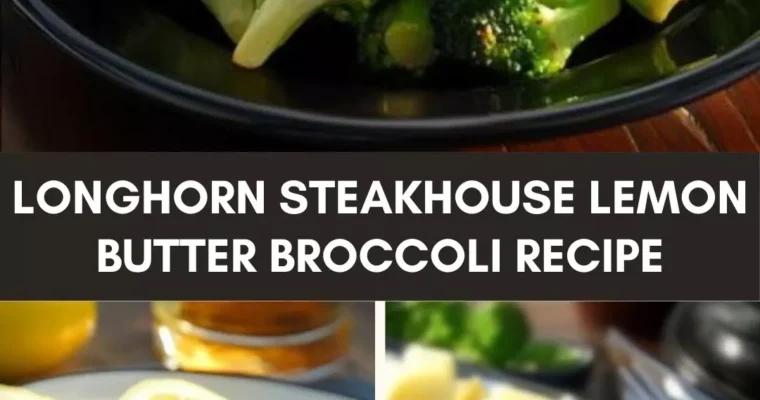
Let’s start with what to serve alongside this gem. Imagine a juicy ribeye steak sizzling on the grill, the aroma filling your backyard. Pair that with mashed potatoes with a hint of garlic and a touch of creamy gravy. Now, picture a tall glass of …
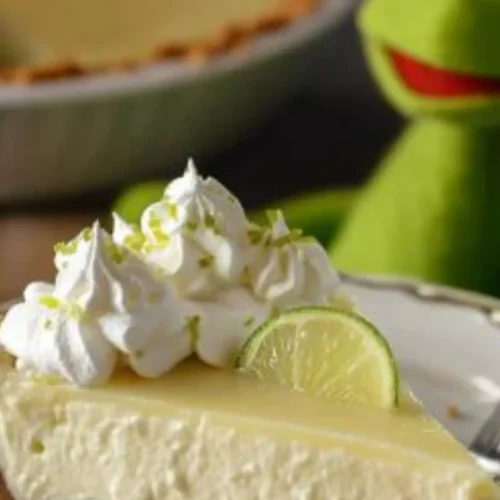
Key Lime Pie is a classic dessert that never goes out of style. It’s sweet and tangy at the same time, with a creamy filling and a buttery crust. But what pairs well with it? I recommend a light, freshening beverage like a mint mojito or an iced tea spritzer. If you’re into a bit of evening luxury, a glass of bubbly can be delightful. Additionally, serving it with a side of fresh berries can balance the pie’s tartness beautifully.
Have you ever found yourself wandering through life, feeling a little incomplete? Maybe it’s because you haven’t made a Key Lime Pie with Kermit yet. Yes, Kermit! No, not the green talking frog, but the vibrant, zesty character that brings the pie to life.
Today, I’m here to guide you, step-by-step, on how to create this heartwarming dessert that will make your taste buds sing. Ready? Let’s dive in!
What is Key Lime Pie With Kermit?
Key Lime Pie With Kermit is a refreshingly zesty dessert made from key lime juice, sweetened condensed milk, and a graham cracker crust. But what sets this apart is the delightful inclusion of some ingredients that usually play supporting roles coming into the spotlight. Like Kermit from the Muppets who has his own way of shining bright, this pie will do the same on your dessert table.
How Does It Taste Like?
Imagine a balance of sweet and tart that dances on your palate effortlessly. The creamy filling paired with the crunch of the graham cracker crust creates a blend of textures that’s both satisfying and light. The lime zest adds a burst of freshness, enhancing every bite.
Why You’ll Love This
Simplicity: Easy steps make this a no-fuss dessert.
Versatility: Perfect for any occasion from BBQs to formal dinners.
Nostalgia: Brings back memories of warm summer days.
Healthier Option: With Greek yogurt, it’s lighter but still decadent.
Crowd-Pleaser: Always a hit at parties and gatherings.
Ingredients
Pie Crust Ingredients:
⅓ cup white sugar
6 tablespoons melted butter
1½ cups crushed graham crackers
Filling Ingredients:
½ teaspoon vanilla extract
½ cup plain Greek yogurt
1 tablespoon lime zest
3 cups sweetened condensed milk
¾ cup freshly squeezed key lime juice
Step-by-Step Directions
Step 1: Preparing the Crust
Preheat your oven to 350°F (175°C). Mix together the graham crackers, melted butter, and sugar in a bowl. Stir until the crumbs are well-coated. Press this mixture into the bottom and sides of a 9-inch pie pan. Bake for about 10 minutes, then let it cool.
Step 2: Making the Filling
In a large bowl, combine the sweetened condensed milk, Greek yogurt, vanilla extract, and lime zest. Mix until smooth. Gradually whisk in the key lime juice until fully incorporated.
Step 3: Filling the Pie Crust
Pour the filling into the cooled pie crust. Smooth it out with a spatula to ensure an even surface.
Step 4: Baking the Pie
Bake the pie in the preheated oven for about 15 minutes. The filling should be set but still have a bit of a wobble in the center.
Step 5: Cooling and Chilling
Allow the pie to cool on a wire rack. Once it reaches room temperature, transfer it to the refrigerator to chill for at least 2 hours.
Tips On Making Key Lime Pie With Kermit
Use Fresh Lime Juice: Bottled juice doesn’t do justice to the flavors.
Don’t Skip The Zest: It adds an important depth of flavor.
Press The Crust Firmly: Ensures a solid base that won’t crumble.
Don’t Overbake: The center should be slightly wobbly; it sets as it cools.
Chill Properly: Gives time for flavors to meld together beautifully.
Nutrition Information
How Do You Store This Key Lime Pie With Kermit?
Storing Key Lime Pie is straightforward. Once it has chilled and set, cover it with plastic wrap or aluminum foil and keep it in the refrigerator. It will stay fresh for up to 3 days. For longer storage, you can freeze the pie. Wrap it tightly with plastic wrap and then with aluminum foil. It can be frozen for up to 2 months. To serve, thaw it in the refrigerator overnight.
What Other Substitutes Can You Use in Key Lime Pie With Kermit?
Graham Crackers: If you’re out of graham crackers, Digestive biscuits or vanilla wafers make a good crust substitute.
Greek Yogurt: Sour cream or plain regular yogurt can be used as replacements.
Sweetened Condensed Milk: Coconut milk-based sweetened condensed milk is available for a dairy-free option.
Key Lime Juice: Regular lime juice is an acceptable alternative.
Butter: Coconut oil or margarine can work in place of butter for the crust.
How To Make Key Lime Pie With Kermit
Joe Williams
Have you ever found yourself wandering through life, feeling a little incomplete? Maybe it’s because you haven’t made a Key Lime Pie with Kermit yet.
½teaspoonvanilla extractfor a subtle depth of flavor
½cupplain Greek yogurtfor added creaminess
1tablespoonlime zest
3cupssweetened condensed milk
¾cupfreshly squeezed key lime juice
Instructions
Step 1: Preparing the Crust
Preheat your oven to 350°F (175°C). Mix together the graham crackers, melted butter, and sugar in a bowl. Stir until the crumbs are well-coated. Press this mixture into the bottom and sides of a 9-inch pie pan. Bake for about 10 minutes, then let it cool.
Step 2: Making the Filling
In a large bowl, combine the sweetened condensed milk, Greek yogurt, vanilla extract, and lime zest. Mix until smooth. Gradually whisk in the key lime juice until fully incorporated.
Step 3: Filling the Pie Crust
Pour the filling into the cooled pie crust. Smooth it out with a spatula to ensure an even surface.
Step 4: Baking the Pie
Bake the pie in the preheated oven for about 15 minutes. The filling should be set but still have a bit of a wobble in the center.
Step 5: Cooling and Chilling
Allow the pie to cool on a wire rack. Once it reaches room temperature, transfer it to the refrigerator to chill for at least 2 hours.
Notes
Use Fresh Lime Juice: Bottled juice doesn’t do justice to the flavors.
Don’t Skip The Zest: It adds an important depth of flavor.
Press The Crust Firmly: Ensures a solid base that won’t crumble.
Don’t Overbake: The center should be slightly wobbly; it sets as it cools.
Chill Properly: Gives time for flavors to meld together beautifully.
1. Can I use bottled lime juice instead of fresh key lime juice?
While you can, bottled lime juice lacks the vibrant flavor of fresh key lime juice. Fresh juice really makes a difference in how bright and zesty the pie turns out.
2. Do I have to bake the crust and filling?
Baking the crust helps set it, making it less crumbly. Baking the filling ensures it sets properly with a creamy texture. So, yes, both steps are crucial.
3. Can I make the pie ahead of time?
Absolutely! This pie can be made a day in advance and stored in the fridge. In fact, it tastes even better as the flavors have time to meld.
4. What type of pie pan should I use?
A standard 9-inch pie pan works perfectly. If using a deep-dish pan, you might need to adjust the quantity of filling or bake time.
5. How do I know the pie is finished baking?
The filling should be set but still slightly jiggly in the center. It will continue to set as it cools down.
6. Can I add meringue on top?
While traditional Key Lime Pie doesn’t have meringue, there’s no rule saying you can’t. If you love meringue, go for it!
Conclusion
There you have it—a beautifully tangy yet sweet Key Lime Pie with Kermit that’s easy to make and absolutely delightful. It’s a little bit of sunshine in every bite. Whether you’re a seasoned baker or a newbie, this pie is a sure bet for any occasion. So gather those limes, roll up your sleeves, and let’s get baking! And don’t forget to share your pie adventures; I’d love to hear how your pie turns out. Happy baking!
As a self-proclaimed food enthusiast, I’ve had my fair share of culinary adventures. Today, we’re diving into a dish that perfectly embodies comfort and flavor: Mike’s Tree Farm Mac and Cheese. But before we dive into the nitty-gritty, let’s talk about pairings. It goes well …
Before we dive headfirst into the magic of peanut butter cookies with sour cream, allow me to paint a picture. You’re about to enjoy the ultimate cookie experience, but what else can you nibble on to complement these scrumptious treats? A glass of cold milk …
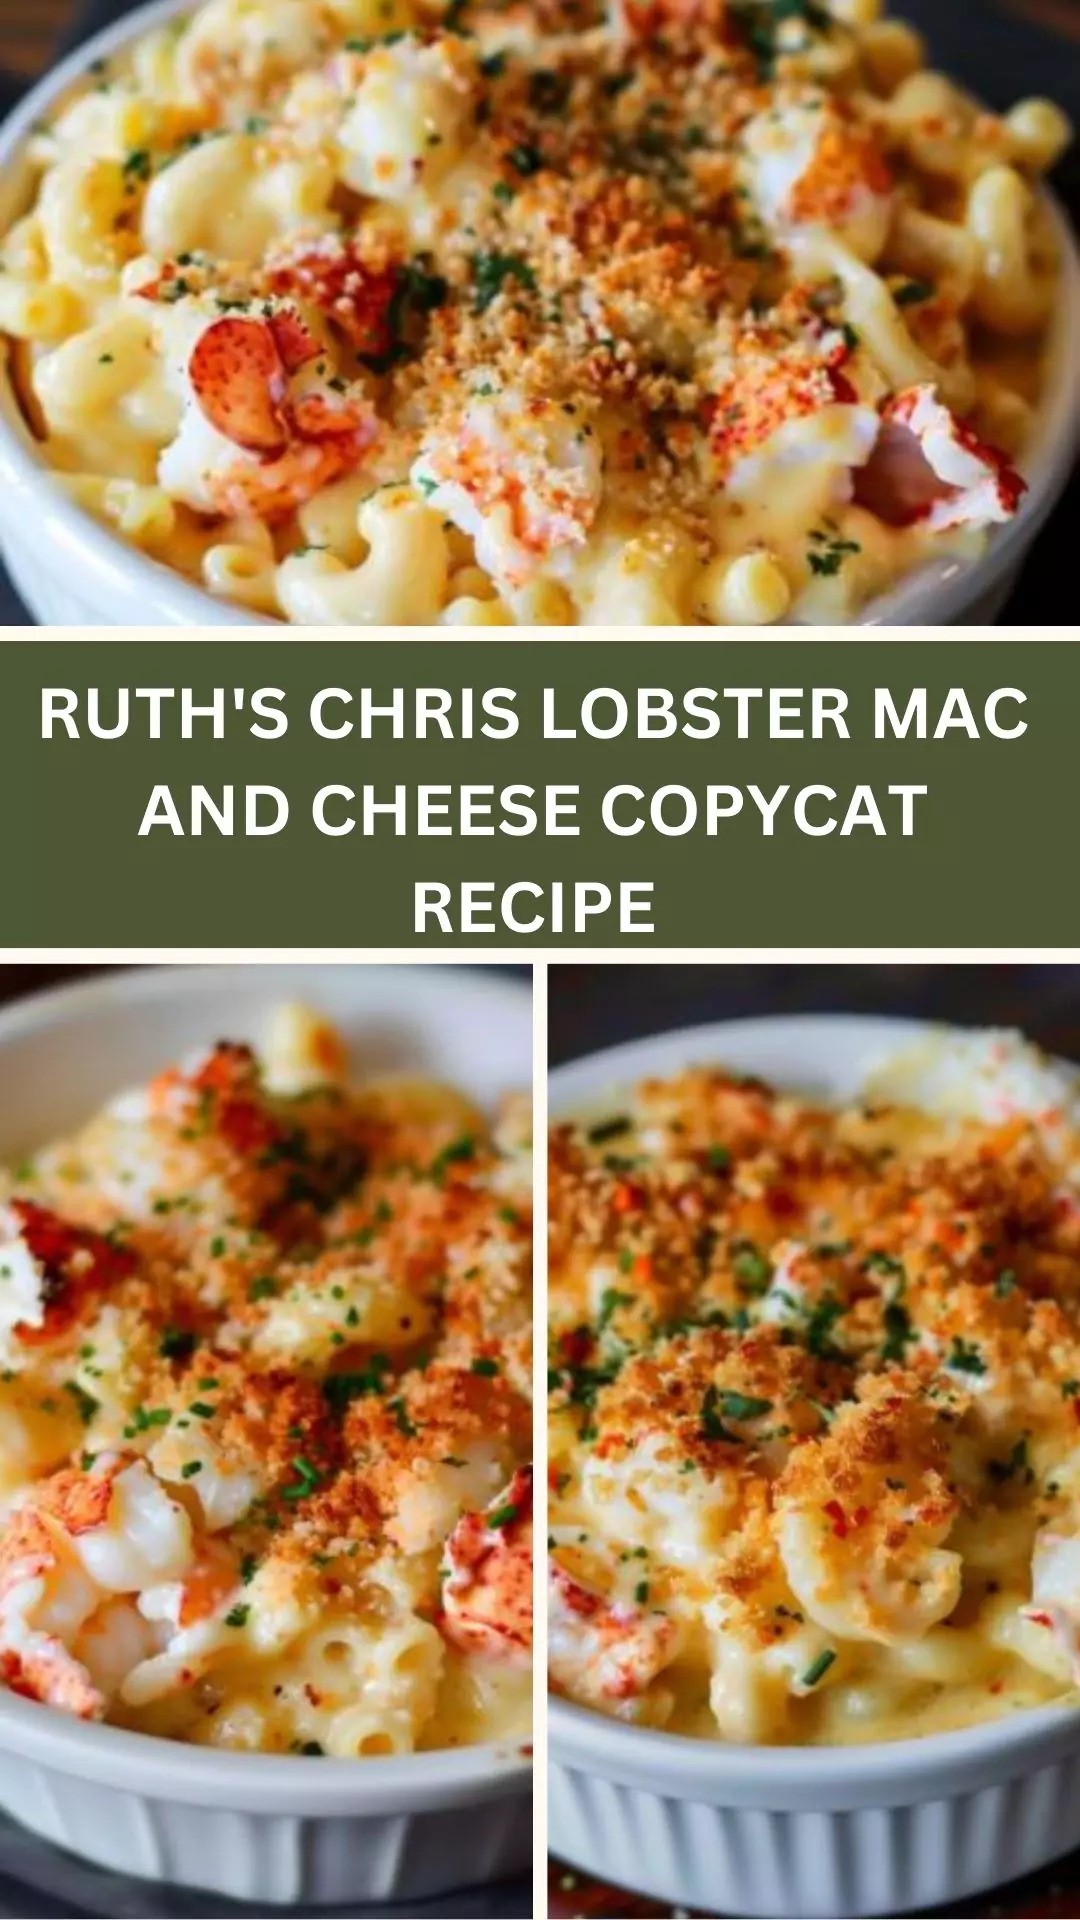
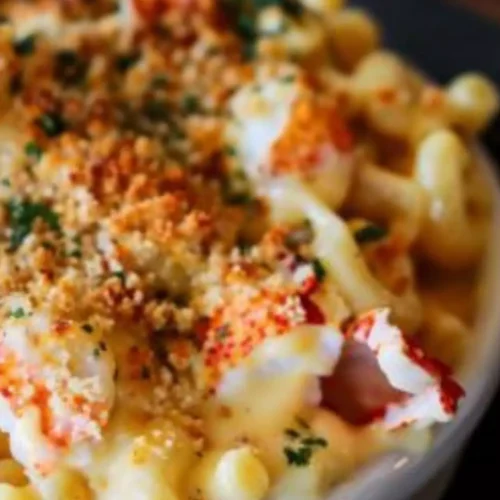
Hey there, foodies! Gather around because today, I’m about to let you in on a delightful secret – how to make Ruth’s Chris Lobster Mac and Cheese right in your own kitchen. Whether you’re preparing for a special occasion or just want to treat yourself during a cozy night in, this creamy and luscious dish will elevate your meal game.
I was inspired to recreate this dish after indulging in it at Ruth’s Chris Steak House. I wanted to capture that same rich, cheesy, and amazingly flavorful experience. I experimented with different ingredients and techniques to get it just right, and I’m thrilled to share my copycat recipe with you.
Why This Recipe is Great for You
This Lobster Mac and Cheese is not only a feast for the eyes but also a comfort food that’s prime for any occasion. The blend of different cheeses creates an ultra-creamy sauce that hugs every macaroni elbow. The succulent lobster adds a touch of luxury and elevates the dish to a whole new level of deliciousness. This recipe is perfect for impressing guests or simply spoiling yourself.
Ingredients Used in this Recipe
When it comes to ingredients, I always believe in using the freshest and best quality available. Here’s why each ingredient shines in this recipe:
Lobster Tails: Adds a rich, seafood flavor that perfectly pairs with the creamy cheese sauce.
Freshly Shredded Cheddar Cheese: Provides a sharp and tangy base for the cheese sauce.
Whole Milk: Helps to make the sauce rich and creamy without being overly heavy.
Grated Parmesan Cheese: Lends a nutty flavor and a hint of saltiness.
Butter: Smoothes out the sauce and adds a comforting richness.
Garlic Powder: Infuses a subtle but delightful hint of garlic.
Shredded Gruyere Cheese: Known for its melting qualities, it adds a distinct creamy texture and slightly nutty flavor.
All-Purpose Flour: Combines with butter to create the roux, which thickens the sauce.
Salt and Pepper: Essential for seasoning and bringing out the flavors.
Elbow Macaroni Pasta: The classic choice that ensures that every bite is perfectly coated with gooey cheese.
Optional Seasonings (Mustard Powder, Nutmeg): Provide depth and complexity to the sauce.
Ingredients List with Measurements
Before we dive into the cooking steps, let’s go through our ingredient checklist:
2 lobster tails, pre-chopped and cooked
2 1/2 cups freshly shredded cheddar cheese
2 cups whole milk
1/2 cup parmesan cheese, grated
1/2 stick of butter
1/2 tsp garlic powder
1/2 cup shredded gruyere cheese
3 tbsp all-purpose flour
1 tsp salt
Pepper (to taste)
1/2 lb elbow macaroni pasta (pre-cooked according to package instructions)
Optional: 1/2 tsp mustard powder, 1/2 tsp nutmeg
Ready to get started? Let’s dive into how to create this masterpiece.
How to Make Ruth’s Chris Lobster Mac and Cheese Copycat Recipe
Step 1: Pre-cook Your Pasta
Ensure that your macaroni is cooked to al dente. Follow the package instructions carefully, then drain and set aside. I usually add a little olive oil to prevent the pasta from sticking together.
Step 2: Cook and Prep the Lobster Tails
Boil or steam your lobster tails until they reach that beautiful, bright red color. It usually takes about 8-10 minutes, depending on the size of the tails. Once cooked, let them cool slightly, then chop the lobster meat into bite-sized pieces.
Step 3: Make the Roux
In a large saucepan, melt the butter over medium heat. Once it’s completely melted, whisk in the all-purpose flour until it forms a smooth, golden paste. This is your roux and it will be the thickening backbone for your cheese sauce.
Step 4: Add the Milk to the Roux
Slowly whisk in the whole milk. This step is crucial as it prevents the sauce from getting lumpy. Keep whisking until the mixture is smooth and starts to thicken.
Step 5: Add Seasonings
Now, add the garlic powder, salt, and pepper. If you’re feeling adventurous, sprinkle in the mustard powder and nutmeg. These optional spices heighten the flavor profile of the dish.
Step 6: Incorporate the Cheeses
Gradually add the shredded cheddar cheese, parmesan, and gruyere cheese to the milk mixture. Whisk continuously until all the cheese has melted and the sauce is smooth and creamy.
Step 7: Combine Pasta and Cheese Sauce
Add the cooked macaroni to the cheese sauce. Stir well to ensure that every noodle is coated with the cheesy goodness.
Step 8: Add the Lobster
Gently fold in the chopped lobster meat. Be careful not to break up the lobster too much – you want those nice chunks to stand out in the dish.
Step 9: Bake the Mac and Cheese
Preheat your oven to 375°F (190°C). Transfer the lobster mac and cheese mixture into a buttered baking dish. Optional: Top with extra grated cheese or breadcrumbs for a crispy finish. Bake for about 15-20 minutes until the top is golden and bubbly.
Recipe Notes
Lobster Tails
Boiling or steaming are quick and effective methods for cooking lobster tails. Fresh or frozen tails work well, but make sure to thaw if using frozen.
Cheddar Cheese
Sharp cheddar is preferable for its bold flavor. Freshly shredding your cheese is always worth the extra effort as it melts more smoothly than pre-shredded.
Whole Milk
You can use half-and-half for an even creamier sauce.
Parmesan Cheese
Grate it freshly to impart a strong essence. Pre-grated usually includes anti-caking agents that can affect the smoothness of your sauce.
Butter and Flour
This duo creates the roux, which is the foundation for any creamy cheese sauce.
Optional Seasonings
Nutmeg and mustard powder are often used in French béchamel sauces. They can add an unexpected twist.
Recipe Variations
Lobster Alternatives: Not a fan of lobster? Swap it out for shrimp, crab, or even chicken.
Spice Level: Add a touch of cayenne pepper or red pepper flakes for a spicy kick.
Herbs: Fresh herbs like parsley, chives, or thyme can be incorporated for a fresh taste.
Gluten-Free: Substitute the pasta and flour with their gluten-free counterparts.
RUTH’S CHRIS LOBSTER MAC AND CHEESE COPYCAT RECIPE
Joe Williams
Whether you’re preparing for a special occasion or just want to treat yourself during a cozy night in, this creamy and luscious dish will elevate your meal game.
Before we dive into the cooking stepslet’s go through our ingredient checklist:
2lobster tailspre-chopped and cooked
2 1/2cupsfreshly shredded cheddar cheese
2cupswhole milk
1/2cupparmesan cheesegrated
1/2stick of butter
1/2tspgarlic powder
1/2cupshredded gruyere cheese
3tbspall-purpose flour
1tspsalt
Pepperto taste
1/2lbelbow macaroni pastapre-cooked according to package instructions
Optional: 1/2 tsp mustard powder1/2 tsp nutmeg
Instructions
STEP 1: PRE-COOK YOUR PASTA
Ensure that your macaroni is cooked to al dente. Follow the package instructions carefully, then drain and set aside. I usually add a little olive oil to prevent the pasta from sticking together.
STEP 2: COOK AND PREP THE LOBSTER TAILS
Boil or steam your lobster tails until they reach that beautiful, bright red color. It usually takes about 8-10 minutes, depending on the size of the tails. Once cooked, let them cool slightly, then chop the lobster meat into bite-sized pieces.
STEP 3: MAKE THE ROUX
In a large saucepan, melt the butter over medium heat. Once it’s completely melted, whisk in the all-purpose flour until it forms a smooth, golden paste. This is your roux and it will be the thickening backbone for your cheese sauce.
STEP 4: ADD THE MILK TO THE ROUX
Slowly whisk in the whole milk. This step is crucial as it prevents the sauce from getting lumpy. Keep whisking until the mixture is smooth and starts to thicken.
STEP 5: ADD SEASONINGS
Now, add the garlic powder, salt, and pepper. If you’re feeling adventurous, sprinkle in the mustard powder and nutmeg. These optional spices heighten the flavor profile of the dish.
STEP 6: INCORPORATE THE CHEESES
Gradually add the shredded cheddar cheese, parmesan, and gruyere cheese to the milk mixture. Whisk continuously until all the cheese has melted and the sauce is smooth and creamy.
STEP 7: COMBINE PASTA AND CHEESE SAUCE
Add the cooked macaroni to the cheese sauce. Stir well to ensure that every noodle is coated with the cheesy goodness.
STEP 8: ADD THE LOBSTER
Gently fold in the chopped lobster meat. Be careful not to break up the lobster too much – you want those nice chunks to stand out in the dish.
STEP 9: BAKE THE MAC AND CHEESE
Preheat your oven to 375°F (190°C). Transfer the lobster mac and cheese mixture into a buttered baking dish. Optional: Top with extra grated cheese or breadcrumbs for a crispy finish. Bake for about 15-20 minutes until the top is golden and bubbly.
Notes
Lobster Alternatives: Not a fan of lobster? Swap it out for shrimp, crab, or even chicken.
Spice Level: Add a touch of cayenne pepper or red pepper flakes for a spicy kick.
Herbs: Fresh herbs like parsley, chives, or thyme can be incorporated for a fresh taste.
Gluten-Free: Substitute the pasta and flour with their gluten-free counterparts.
Nutrition
Calories: 1552kcal
Keyword RUTH’S CHRIS LOBSTER MAC AND CHEESE COPYCAT RECIPE
Absolutely! You can prepare the lobster mac and cheese and store it in the refrigerator for up to 2 days before baking. Just make sure to cover it well.
2. What’s the best way to reheat leftover lobster mac and cheese?
Reheat in the oven at 350°F (175°C) for about 20 minutes, until it’s warmed through. Avoid the microwave if you can, as it can make the sauce grainy.
3. Is it possible to freeze this dish?
Yes, you can freeze it. After assembling, cover tightly with plastic wrap and foil. It can be stored in the freezer for up to a month. Thaw overnight in the refrigerator before baking.
4. My sauce turned out grainy. What went wrong?
Graininess usually happens if the cheese sauce is cooked at too high a temperature or if pre-shredded cheese is used. Stick to freshly shredded cheese and moderate heat to ensure smoothness.
5. Can I use a different type of pasta?
Absolutely. While elbow macaroni is classic, other types like cavatappi, penne, or rotini work just as well. Just make sure it’s curved or has ridges to hold onto the sauce.
6. Do I have to bake the mac and cheese?
Baking is optional. If you prefer a stovetop version, you can skip the baking step. Just combine the pasta and cheese sauce, then fold in the lobster. Heat everything over low, ensuring it’s well mixed.
Conclusion
And there you have it – a delightful way to bring the restaurant experience home with this Ruth’s Chris Lobster Mac and Cheese copycat recipe. Each bite is bursting with rich, cheesy flavors and tender pieces of lobster, making it a dish that truly feels indulgent. Whether you’re cooking for yourself, your family, or special guests, this recipe is sure to impress.
Give it a try and let me know how it turns out. Happy cooking!