When I first encountered the vibrant dish known as Thai fried rice, it was like stumbling upon a treasure trove of flavors. I still remember the aromatic wafts of jasmine rice mingling with the essence of garlic and soy sauce swirling in the bustling atmosphere …
There’s something delightful about enjoying your nai wong bao custard buns with different accompaniments. A light, fresh vegetable stir-fry pairs beautifully with the soft, sweet goodness of the buns. The crunch of fresh bok choy and snap peas can contrast nicely with the custard, creating …
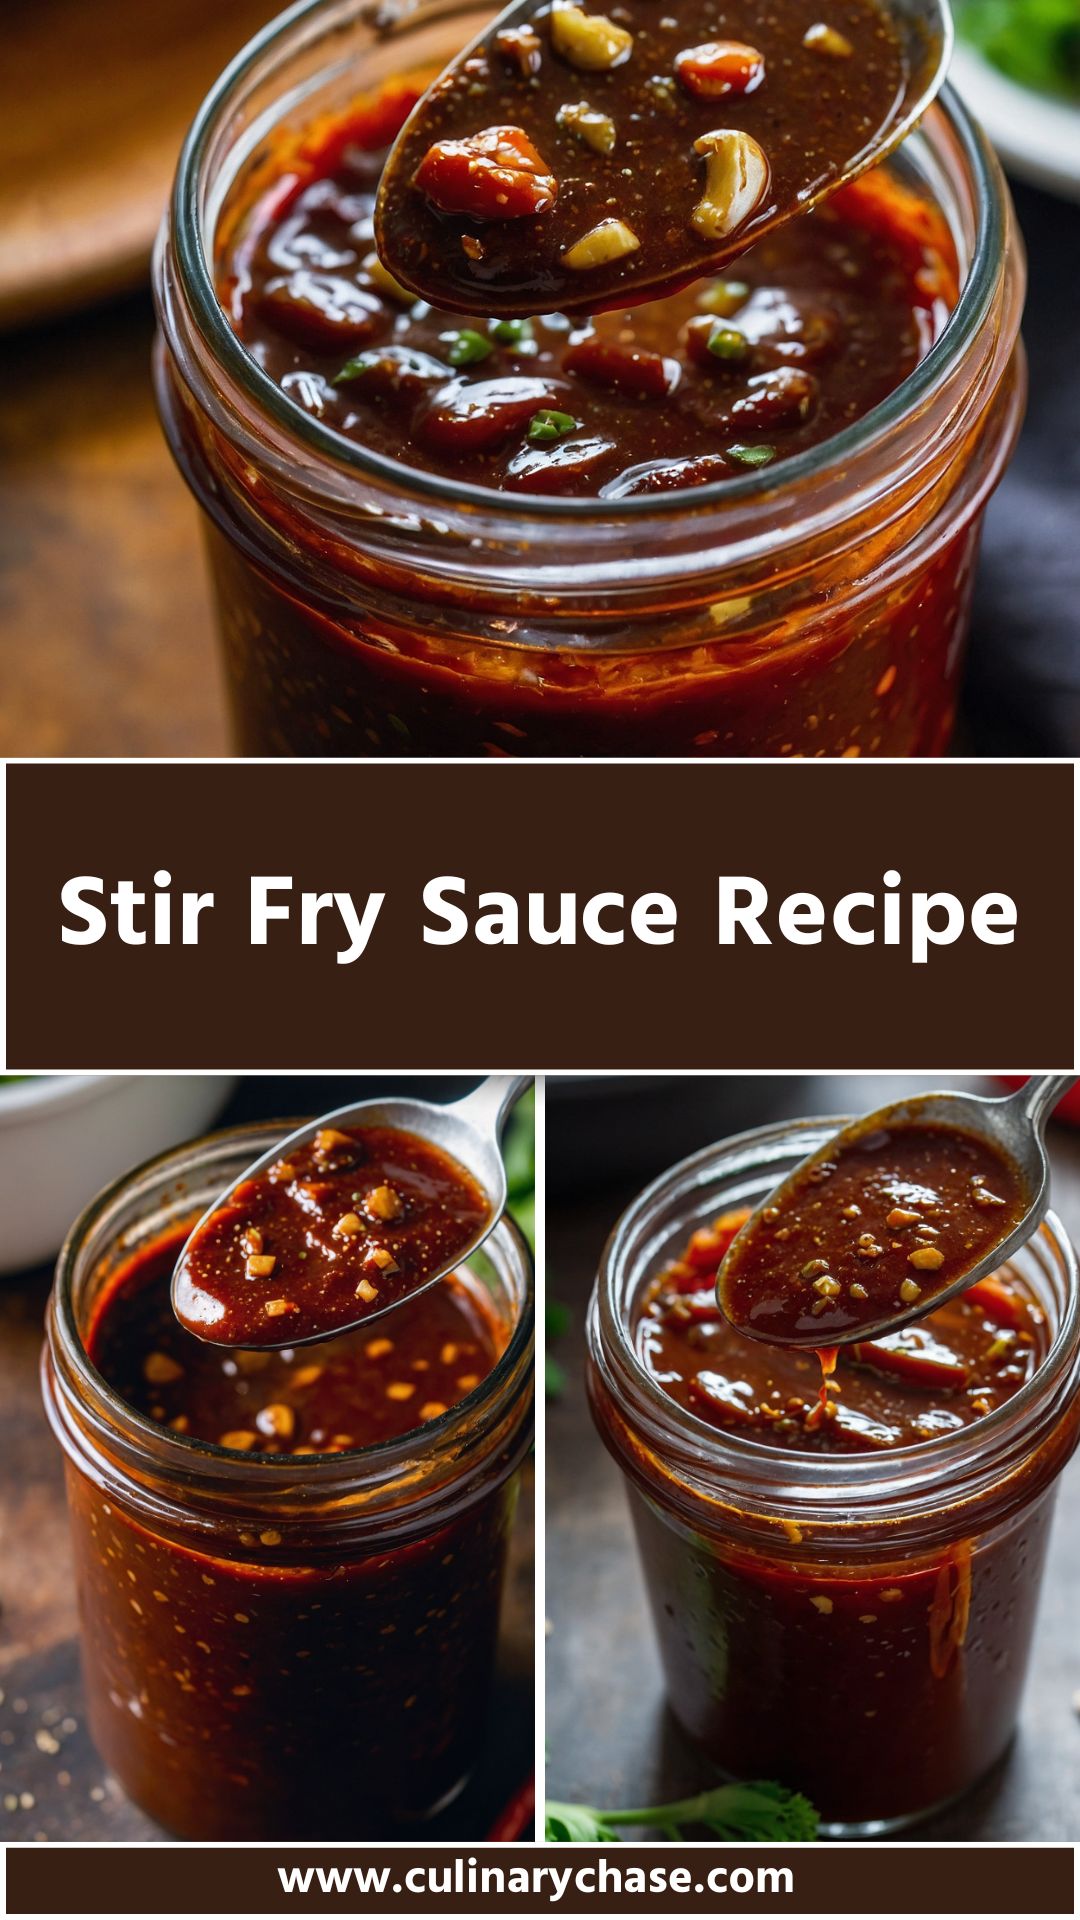
If you’ve ever sniffed the air and been met with the inviting aroma of a stir-fry sizzling on the stove, then you know there’s something magical about it. I vividly recall my first culinary encounter with stir fry, watching a colorful medley of vegetables and proteins whirl around in a pan like they were dancing.
That moment inspired me to create a stir fry sauce that transforms ordinary dishes into flavor-packed masterpieces. Today, I want to take you on that journey—one that is filled with vibrant tastes and easy steps to whip up a fantastic stir fry sauce.
So, are you ready? Let’s dive into the art of stir fry sauce making.
What is Stir Fry Sauce?
At its core, stir fry sauce is a blend of savory, sweet, sour, and umami flavors. It acts like a conductor, harmonizing every ingredient in your stir fry. The right sauce elevates your meal, making every bite burst with flavor. Think of it as the secret handshake that turns a simple dish into something truly special.
A typical stir fry sauce includes a combination of soy sauce, sweeteners like brown sugar, acidic elements like vinegar, and aromatic additions such as garlic or ginger. Each component works in unison, providing a savory base that enhances whatever you pair it with. Trust me; once you try it, you’ll be eager to have it on hand for all your cooking adventures.
Let me tell you why this stir fry sauce recipe is a game changer. It’s quick, versatile, and absolutely delish. On a hectic weeknight, this sauce can take center stage in a meal that comes together in mere minutes.
Flavor Finesse
This sauce is not just about convenience; it’s expertly crafted. With the perfect balance of sweetness from brown sugar, a hint of spice from red pepper flakes, and the warm zestiness of ginger, it adds depth to your meals. Picture how this would complement vegetables and proteins. It’s like dressing for your salad—just as crucial!
Ingredient Simplicity
You won’t be hunting for exotic ingredients either. Everything you need is likely already in your pantry. No need for a treasure map here! Just staple items that you’ll feel good about using.
Customizable to Your Liking
Whether you’re a spice junkie, a sweet tooth, or someone who loves tangy flavors, this sauce adapts to your preferences. It can be adjusted with just a few tweaks to suit your taste buds. With this recipe, you become the chef!
The Ingredients
Now, let’s get down to the essentials. Here’s what you’ll need for this incredible stir fry sauce:
1 tablespoon cornstarch: For thickening the sauce and giving it that silky finish.
½ cup reduced-sodium soy sauce: This serves as the savory and umami base of your sauce.
1–2 teaspoons freshly grated ginger root: For a warm, zingy kick.
½ teaspoon miso paste: Adds a delightful umami depth.
2 garlic cloves, finely minced: For that bold flavor we all adore.
1 tablespoon brown sugar or natural honey: Sweetness to balance savory notes; feel free to adjust.
½ cup low-sodium vegetable broth (or plain water): For a lighter sauce.
½ tablespoon rice wine vinegar: A gentle touch of tanginess.
1 teaspoon fresh lime juice: Brightness to elevate flavors.
1 teaspoon toasted sesame oil: A nutty, aromatic finish.
Pinch of red pepper flakes: Optional, for a hint of heat.
This collection of ingredients sets the stage for a delicious adventure. Gather everything before we start so you can fly through the process.
Step by Step Instructions
Step 1: Prepare Your Ingredients
Before you even think of throwing this sauce together, take a moment to prepare everything. Grate the ginger and mince the garlic. Measure each ingredient carefully. This will ensure you achieve that balanced flavor we discussed.
Step 2: Mix the Dry Ingredients
In a mixing bowl, combine the cornstarch and brown sugar (or honey). Whisk them together quickly to prevent any clumps from forming. This step is crucial for a smooth sauce.
Step 3: Add the Liquids
To your dry mix, add the reduced-sodium soy sauce and vegetable broth (or water). Stir it well until everything is combined. Next, add in the rice wine vinegar and lime juice. These ingredients will awaken the mixture.
Step 4: Incorporate the Aromatics
Now comes the fun part. Stir in the minced garlic, freshly grated ginger, and miso paste. Each of these ingredients adds a layer of flavor that’s irresistible. Mix them until they’re fully integrated. If you enjoy heat, sprinkle in a pinch of red pepper flakes at this point.
Step 5: Thicken the Sauce
Pour this mixture into a small saucepan over medium heat. Stir it frequently to prevent sticking. As it heats, the cornstarch will activate, thickening the sauce to a perfect consistency. This usually takes about 5-7 minutes.
Step 6: Add the Sesame Oil
Once your sauce has thickened, take it off the heat. Stir in the toasted sesame oil for that nutty aroma we talked about. This final touch is what makes this sauce sing.
Step 7: Taste and Adjust
Here’s where you play the role of chef. Take a tiny taste. Is it perfect? If you want more sweetness, add another dash of sugar. Need more heat? Toss in a bit more red pepper flakes. Remember, you are in control.
Tips & Tricks
Don’t Skimp on Fresh Ingredients: The freshness of garlic and ginger dramatically influences the flavor. Use fresh, not pre-minced.
Adjust Sauce Consistency: For a thinner sauce, simply add a bit more broth or water.
Store It Right: Keep any leftover sauce in an airtight container in your fridge for up to two weeks. It only improves with age!
Mix Your Proteins: Use this sauce with different proteins like chicken, shrimp, or tofu. Change it up based on what you have on hand.
Amp Up Your Vegetables: Broccoli, bell peppers, and snap peas work wonderfully. Don’t hold back—try new veggies!
Nutrition Information
A serving of this stir fry sauce (about 2 tablespoons) includes approximately:
Calories: 35
Protein: 1g
Carbohydrates: 6g
Fats: 1g
Sodium: Varies based on soy sauce used, around 300mg.
This sauce is low in calories and provides great flavor without drastic calorie counts.
Can I Store Stir Fry Sauce?
Absolutely! If you make a double batch (and who wouldn’t?), you can store it. Pour any leftovers into a glass container and seal it tightly. Refrigerate, and it should last for about two weeks. If you’d like to keep it longer, freeze it in ice cube trays and pop out portions as needed.
What Can I Serve with Stir Fry Sauce?
The beauty of this sauce is its versatility! Here are some great ways to enjoy it:
Ultimately, Over Noodles: Toss cooked noodles with your stir fry sauce and any mix of veggies and proteins.
On Rice: A classic pairing! Serve your stir fry or sauce over steamed rice.
With Cauliflower Rice: For a low-carb option that keeps things light.
In Spring Rolls: Drizzle it over fresh spring rolls for an added zing.
As a Marinade: Before cooking, use it as a marinade for your ingredients to infuse that flavor even before they hit the pan.
Variations
Spice things up with these alternatives:
Spicy Szechuan Style: Increase the red pepper flakes and add a splash of chili oil for a fiery kick.
Sweet and Sour Fusion: Substitute half the soy sauce with pineapple juice. Enjoy a tangy twist!
Garlic Lovers: Double the garlic for a more pronounced flavor—if you’re feeling adventurous.
Peanut Sauce Remix: Mix in a tablespoon of peanut butter for a richer sauce that echoes Thai flavors.
Herbal Twist: Stir in chopped fresh cilantro or basil just before serving for a burst of freshness.
Stir Fry Sauce Recipe
If you’ve ever sniffed the air and been met with the inviting aroma of a stir-fry sizzling on the stove, then you know there’s something magical about it.
1tablespooncornstarch: For thickening the sauce and giving it that silky finish.
½cupreduced-sodium soy sauce: This serves as the savory and umami base of your sauce.
1–2 teaspoons freshly grated ginger root: For a warmzingy kick.
½teaspoonmiso paste: Adds a delightful umami depth.
2garlic clovesfinely minced: For that bold flavor we all adore.
1tablespoonbrown sugar or natural honey: Sweetness to balance savory notes; feel free to adjust.
½cuplow-sodium vegetable brothor plain water: For a lighter sauce.
½tablespoonrice wine vinegar: A gentle touch of tanginess.
1teaspoonfresh lime juice: Brightness to elevate flavors.
1teaspoontoasted sesame oil: A nuttyaromatic finish.
Pinchof red pepper flakes: Optionalfor a hint of heat.
Instructions
Step 1: Prepare Your Ingredients
Before you even think of throwing this sauce together, take a moment to prepare everything. Grate the ginger and mince the garlic. Measure each ingredient carefully. This will ensure you achieve that balanced flavor we discussed.
Step 2: Mix the Dry Ingredients
In a mixing bowl, combine the cornstarch and brown sugar (or honey). Whisk them together quickly to prevent any clumps from forming. This step is crucial for a smooth sauce.
Step 3: Add the Liquids
To your dry mix, add the reduced-sodium soy sauce and vegetable broth (or water). Stir it well until everything is combined. Next, add in the rice wine vinegar and lime juice. These ingredients will awaken the mixture.
Step 4: Incorporate the Aromatics
Now comes the fun part. Stir in the minced garlic, freshly grated ginger, and miso paste. Each of these ingredients adds a layer of flavor that’s irresistible. Mix them until they’re fully integrated. If you enjoy heat, sprinkle in a pinch of red pepper flakes at this point.
Step 5: Thicken the Sauce
Pour this mixture into a small saucepan over medium heat. Stir it frequently to prevent sticking. As it heats, the cornstarch will activate, thickening the sauce to a perfect consistency. This usually takes about 5-7 minutes.
Step 6: Add the Sesame Oil
Once your sauce has thickened, take it off the heat. Stir in the toasted sesame oil for that nutty aroma we talked about. This final touch is what makes this sauce sing.
Step 7: Taste and Adjust
Here’s where you play the role of chef. Take a tiny taste. Is it perfect? If you want more sweetness, add another dash of sugar. Need more heat? Toss in a bit more red pepper flakes. Remember, you are in control.
Notes
Don’t Skimp on Fresh Ingredients: The freshness of garlic and ginger dramatically influences the flavor. Use fresh, not pre-minced.
Adjust Sauce Consistency: For a thinner sauce, simply add a bit more broth or water.
Store It Right: Keep any leftover sauce in an airtight container in your fridge for up to two weeks. It only improves with age!
Mix Your Proteins: Use this sauce with different proteins like chicken, shrimp, or tofu. Change it up based on what you have on hand.
Amp Up Your Vegetables: Broccoli, bell peppers, and snap peas work wonderfully. Don’t hold back—try new veggies!
Yes! You can prepare this sauce up to a week in advance. Just make sure to store it in a sealed container in the fridge.
2. Can I make this sauce gluten-free?
Certainly! You can substitute the soy sauce with a gluten-free option like tamari or coconut aminos. Both work well and keep the flavor profile intact.
3. Can I use this sauce for other dishes?
Absolutely! This sauce is versatile. Use it for marinating proteins, as a dipping sauce, or drizzled over roasted veggies. Unleash your creativity.
4. How do I thicken the sauce if I forget the cornstarch?
If you find yourself without cornstarch, you can use arrowroot powder or even a bit of flour. Just make sure to mix it well with water before adding to the sauce to avoid lumps.
5. What’s the perfect timing for adding the sauce to my stir fry?
Add the stir fry sauce to your pan toward the end of cooking. After the meat and veggies are fully cooked, introduce the sauce and let it simmer for a minute to truly bring everything together.
Conclusion
And there you have it! A beautifully crafted stir fry sauce that invigorates meals and tantalizes taste buds. From the initial mixing to that beautiful finish, you’ve now got the knowledge and skills to transform your meals.
I hope you find joy in making this sauce, just as I have. It’s truly remarkable how something so simple can elevate our culinary experiences. So, grab those ingredients, fire up the stove, and enjoy the delightful dance of flavors you’ve created! Trust me; your taste buds will thank you.
Before diving into the delicious world of pan-fried mackerel, let’s flirt with some pairings that can elevate this dish. Mackerel is rich, oily, and flavorful, so you’ll want accompaniments that balance its bold profile. 1. Fresh Green Salad: A crisp lettuce mix with tomatoes and …
Before diving into the deliciousness of youtiao, let’s talk about what pairs well with this delightful treat. These crispy, golden strips can complement various dishes and flavors, making them incredibly versatile. Soy Milk: A classic pairing, sweetened or unsweetened. A warm bowl of soy milk …
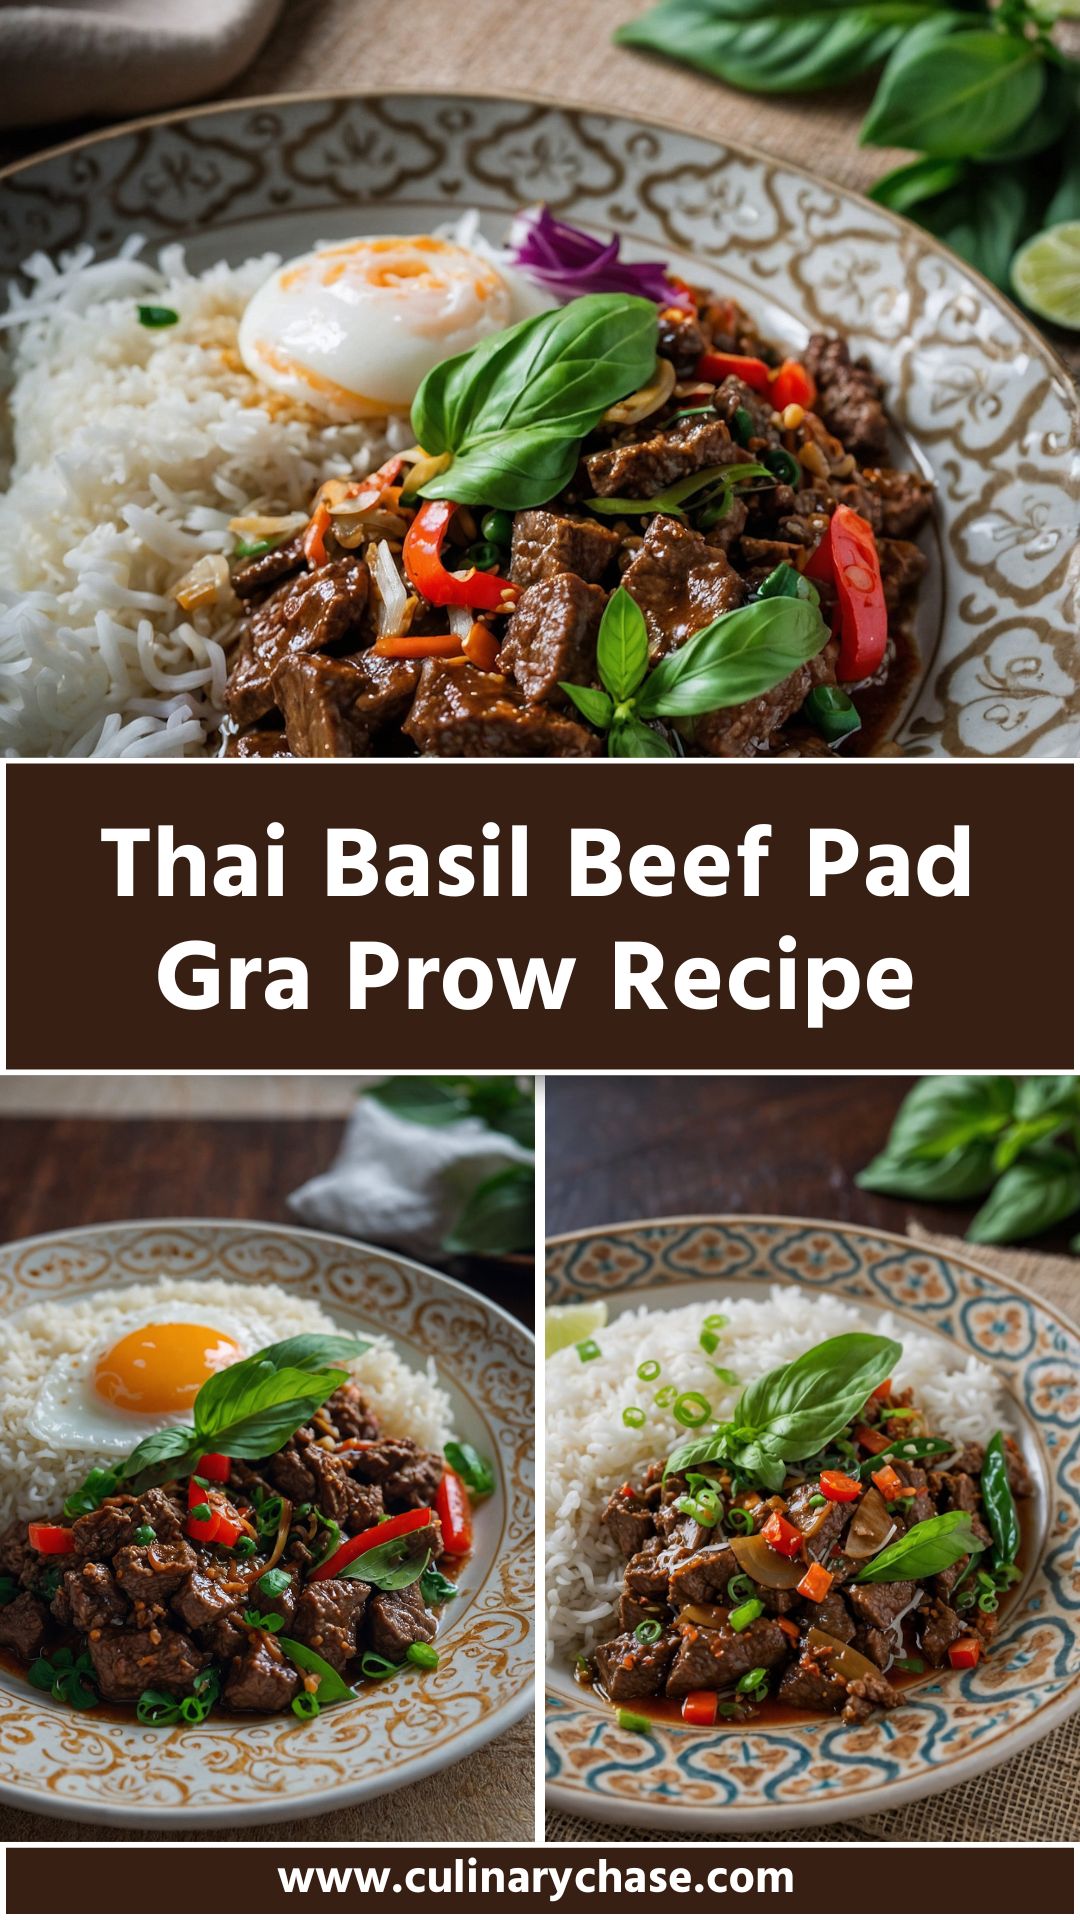
Before diving into the delightful world of Thai Basil Beef Pad Gra Prow, let’s talk about what pairs wonderfully with this vibrant dish. Picture this: a side of fluffy jasmine rice, soaking up the savory juices, or maybe even some fresh cucumber salad to add a crunch. For the beverage? A chilled Thai iced tea would complement the spicy flavors beautifully. If you prefer something lighter, a crisp pilsner can cut through the richness. The combination of flavors creates a culinary experience that’s truly memorable.
Welcome to my kitchen! Today, we’re embarking on a flavorful journey that takes us straight to Thailand with a classic dish that’s a favorite among many: Thai Basil Beef Pad Gra Prow. This vibrant recipe showcases the delicious harmony of spicy, savory, and herbal notes. Think of it as comfort food with a kick. Each bite reveals the wonderful blend of beef, fresh herbs, and zesty spices that transport you to a bustling Thai market street.
Have you ever been curious about the magic behind this dish? I remember the first time I tasted it at a local Thai restaurant. The aroma filled my senses, and the first bite was an explosion of flavor. Trust me, once you try this dish, it might just become a household staple.
What is Thai Basil Beef Pad Gra Prow?
At its core, Thai Basil Beef Pad Gra Prow is a stir-fry dish hailing from Thailand, featuring ground beef, Thai basil, and bold seasonings. The main star here is the holy basil, a unique herb with a peppery taste that stands out extraordinary among other basils. This dish is not just about the ingredients; it’s about the art of combining them into a meal that is quick to make yet rich in flavor.
The term “Pad Gra Prow” translates to “stir-fried with holy basil.” “Pad” means stir-fry, while “Gra Prow” refers to the fragrant holy basil. Traditionally, this dish is prepared with ground meat, often beef or chicken, and then tossed with garlic, chilies, soy sauce, and fish sauce. It’s simple yet packs a punch!
How Does It Taste?
Imagine diving into a plate of Thai Basil Beef Pad Gra Prow. The ground beef is tender, perfectly seasoned, and combines with the freshness of the herbs. The balance between spicy, sweet, and savory is expertly crafted. If you’re a fan of heat, the bird’s eye chilies provide a kick that can be adjusted to your preference.
The dish’s jazz is in its layers of flavors. You have the aromatic garlic, the spicy chilies, and the fresh crunch of the basil. Each element complements the others, creating a mouthwatering experience. If you like a bit of heat and a lot of flavor, you’re in for a treat.
You will also like the following Lunch and Dinner recipes!
There’s a reason this dish has garnered a loyal fan base. Thai Basil Beef Pad Gra Prow is not only a feast for the taste buds but also for the eyes. The vibrant colors of green basil and red chilies are enticing. Plus, it’s a quick-to-make weeknight wonder that requires minimal prep.
Whether you’re an experienced home chef or a beginner wanting to impress your friends, this dish is your golden ticket. And let’s face it, who doesn’t love a dish that can be whipped up in under 30 minutes?
Ingredients
To embark on your culinary adventure, gather the following ingredients:
½ teaspoon freshly ground black pepper
3 Thai bird’s eye chilies, or more to taste for desired heat
1 tablespoon white granulated sugar
12 oz ground beef – lean or regular, as you prefer
¼ cup finely chopped mild red chilies – such as Fresno or red banana peppers
2 tablespoons neutral oil – such as canola or grapeseed
1 tablespoon + 2 teaspoons Thai fish sauce – adjust to taste
⅓ cup thinly sliced mild red chilies – julienned for texture
Cooked fragrant jasmine rice – for serving
6 cloves fresh garlic – minced
½ cup low-sodium beef or chicken stock – or water as a substitute
1 ¼ cups holy basil leaves, or substitute with Thai or sweet basil
3 eggs – for crispy fried eggs
Oil for frying eggs, as needed
Who knew that with just a few ingredients you could create something so flavor-rich?
Step-by-Step Directions
Let’s break down the process and make it easy to follow.
Step 1: Prepare Your Ingredients
Gather all your ingredients on the counter. Chop the garlic, slice the chilies, and measure everything out. This makes cooking smoother and more enjoyable.
Step 2: Heat the Oil
In a large skillet or wok, heat the neutral oil over medium-high heat. You want that oil to shimmer but not smoke. This step is crucial as it helps in achieving the perfect stir-fry texture.
Step 3: Sauté Garlic
Add the minced garlic to the hot oil. You’ll want to sauté it until fragrant, around 30 seconds. Don’t let it burn; burnt garlic won’t taste good and will ruin your dish.
Step 4: Add the Meat
Toss in the ground beef, breaking it apart with a spatula. Cook it until browned, which usually takes about 4-5 minutes. Ensure it’s cooked through but still juicy.
Step 5: Spice It Up
Now it’s time to add the bird’s eye chilies and chopped mild red chilies. Stir and let them mingle with the beef for another minute. You’ll feel the heat building, and it’s fantastic.
Step 6: Season the Stir-Fry
Pour in the fish sauce and sprinkle in the sugar and black pepper. Stir everything together, ensuring the meat is well-coated in the sauce.
Step 7: Add the Stock
Pour the low-sodium beef or chicken stock into the pan. This will create a lush sauce that brings everything together.
Step 8: Incorporate Holy Basil
Just before taking it off the heat, add the holy basil leaves. Stir gently to wilt them. Resist cooking them too long; you want that fresh basil flavor to shine.
Step 9: Fry the Eggs
In a separate pan, add a bit of oil and fry the eggs until crispy. The yolks should be runny for that delightful contrast.
Step 10: Serve
Serve the stir-fry over jasmine rice, topped with crispy fried eggs. Dig right in, and get ready for an explosion of flavors.
Tips on Making Thai Basil Beef Pad Gra Prow
Cooking is an experience, and I’m here to help you make it a smooth one. Here are some helpful tips.
Use Fresh Ingredients: Fresh garlic, basil, and chilies make a world of difference in flavor.
Adjust the Heat: Start with a few bird’s eye chilies. You can always add more if you want extra spice.
Prep Ahead: Chop everything beforehand so when you’re ready to cook, you can focus on the process.
Pan Choice Matters: A wok heats evenly and retains heat well, giving a better stir-fry texture.
Serve Immediately: This dish is best enjoyed fresh and hot!
Nutrition Information
For those counting calories or tracking their nutrition, here’s a quick breakdown per serving (without rice):
Please note these are estimates and can vary depending on specific ingredients used.
How Do You Store Thai Basil Beef Pad Gra Pro?
Leftovers? No problem! Store any leftover pad grain in an airtight container in the fridge. It should last about 3-4 days. When reheating, add a splash of water or stock to keep it moist.
What Other Substitutes Can You Use in Thai Basil Beef Pad Gra Pro?
So, what if you don’t have everything? No worries. Here are some substitutes:
Ground Pork: Swap beef with this for a sweeter, juicier option.
Tofu: A fantastic substitute for a vegetarian meal that soaks up flavors wonderfully.
Sriracha: If you can’t find Thai chilies, this sauce goes well for spice. Just use sparingly!
Sweet Basil: As a last resort, this can work, but it’ll change the flavor profile slightly.
Soy Sauce: If you lack fish sauce, soy sauce provides a savory, salty flavor, though it won’t match the unique taste of fish sauce.
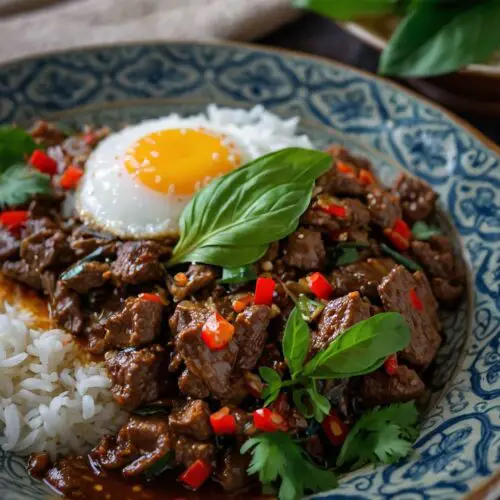
Thai Basil Beef Pad Gra Prow Recipe
Before diving into the delightful world of Thai Basil Beef Pad Gra Prow, let's talk about what pairs wonderfully with this vibrant dish.
3Thai bird’s eye chiliesor more to taste for desired heat
1tablespoonwhite granulated sugar
12ozground beef – lean or regularas you prefer
¼cupfinely chopped mild red chilies – such as Fresno or red banana peppers
2tablespoonsneutral oil – such as canola or grapeseed
1tablespoon+ 2 teaspoons Thai fish sauce – adjust to taste
⅓cupthinly sliced mild red chilies – julienned for texture
Cooked fragrant jasmine rice – for serving
6clovesfresh garlic – minced
½cuplow-sodium beef or chicken stock – or water as a substitute
1 ¼cupsholy basil leavesor substitute with Thai or sweet basil
3eggs – for crispy fried eggs
Oil for frying eggsas needed
Instructions
Step 1: Prepare Your Ingredients
Gather all your ingredients on the counter. Chop the garlic, slice the chilies, and measure everything out. This makes cooking smoother and more enjoyable.
Step 2: Heat the Oil
In a large skillet or wok, heat the neutral oil over medium-high heat. You want that oil to shimmer but not smoke. This step is crucial as it helps in achieving the perfect stir-fry texture.
Step 3: Sauté Garlic
Add the minced garlic to the hot oil. You’ll want to sauté it until fragrant, around 30 seconds. Don’t let it burn; burnt garlic won’t taste good and will ruin your dish.
Step 4: Add the Meat
Toss in the ground beef, breaking it apart with a spatula. Cook it until browned, which usually takes about 4-5 minutes. Ensure it’s cooked through but still juicy.
Step 5: Spice It Up
Now it’s time to add the bird’s eye chilies and chopped mild red chilies. Stir and let them mingle with the beef for another minute. You’ll feel the heat building, and it’s fantastic.
Step 6: Season the Stir-Fry
Pour in the fish sauce and sprinkle in the sugar and black pepper. Stir everything together, ensuring the meat is well-coated in the sauce.
Step 7: Add the Stock
Pour the low-sodium beef or chicken stock into the pan. This will create a lush sauce that brings everything together.
Step 8: Incorporate Holy Basil
Just before taking it off the heat, add the holy basil leaves. Stir gently to wilt them. Resist cooking them too long; you want that fresh basil flavor to shine.
Step 9: Fry the Eggs
In a separate pan, add a bit of oil and fry the eggs until crispy. The yolks should be runny for that delightful contrast.
Step 10: Serve
Serve the stir-fry over jasmine rice, topped with crispy fried eggs. Dig right in, and get ready for an explosion of flavors.
Notes
Use Fresh Ingredients: Fresh garlic, basil, and chilies make a world of difference in flavor.
Adjust the Heat: Start with a few bird’s eye chilies. You can always add more if you want extra spice.
Prep Ahead: Chop everything beforehand so when you’re ready to cook, you can focus on the process.
Pan Choice Matters: A wok heats evenly and retains heat well, giving a better stir-fry texture.
Serve Immediately: This dish is best enjoyed fresh and hot!
Possibly, but I recommend preparing it fresh right before serving. The basil flavor is best enjoyed at its peak.
Can I use chicken instead of beef?
Absolutely! Ground chicken works well and provides a light taste.
Is holy basil essential?
Yes, it’s a key ingredient. If you can’t find it, sweet basil can be a secondary option, but it won’t have the same taste.
How spicy is this dish?
It varies! You control the number of chilies. For those who don’t handle spice well, start low and build up.
Can I freeze leftovers?
Yes, you can freeze the stir-fry for about a month. Just thaw and reheat gently.
What should I serve with this dish?
Traditionally served with jasmine rice, fresh salad or cucumber slices also pair well.
Conclusion
In the end, Thai Basil Beef Pad Gra Prow is more than just a dish; it’s a symphony of flavors, a quick dinner solution, and a delightful way to impress your family and friends. It embodies simplicity while delivering a glorious taste experience. So roll up your sleeves, gather your ingredients, and let’s create something delicious together. With this dish in your repertoire, you’ll be the go-to person for quick Asian meals that impress every time. Happy cooking!
When thinking about what to serve alongside Chinese roast duck, the options can be splendid! Picture a lush, vibrant stir-fry of seasonal vegetables tossed in a light garlic sauce; the crunch of fresh bok choy, bell peppers, and snap peas will contrast beautifully with the …
When diving into the delicious world of Shanghai fried noodles, it’s essential to think about what will complement this dish perfectly. Consider pairing these savory noodles with a light, refreshing cucumber salad dressed in sesame oil. The cool crunch of the cucumbers will provide a …
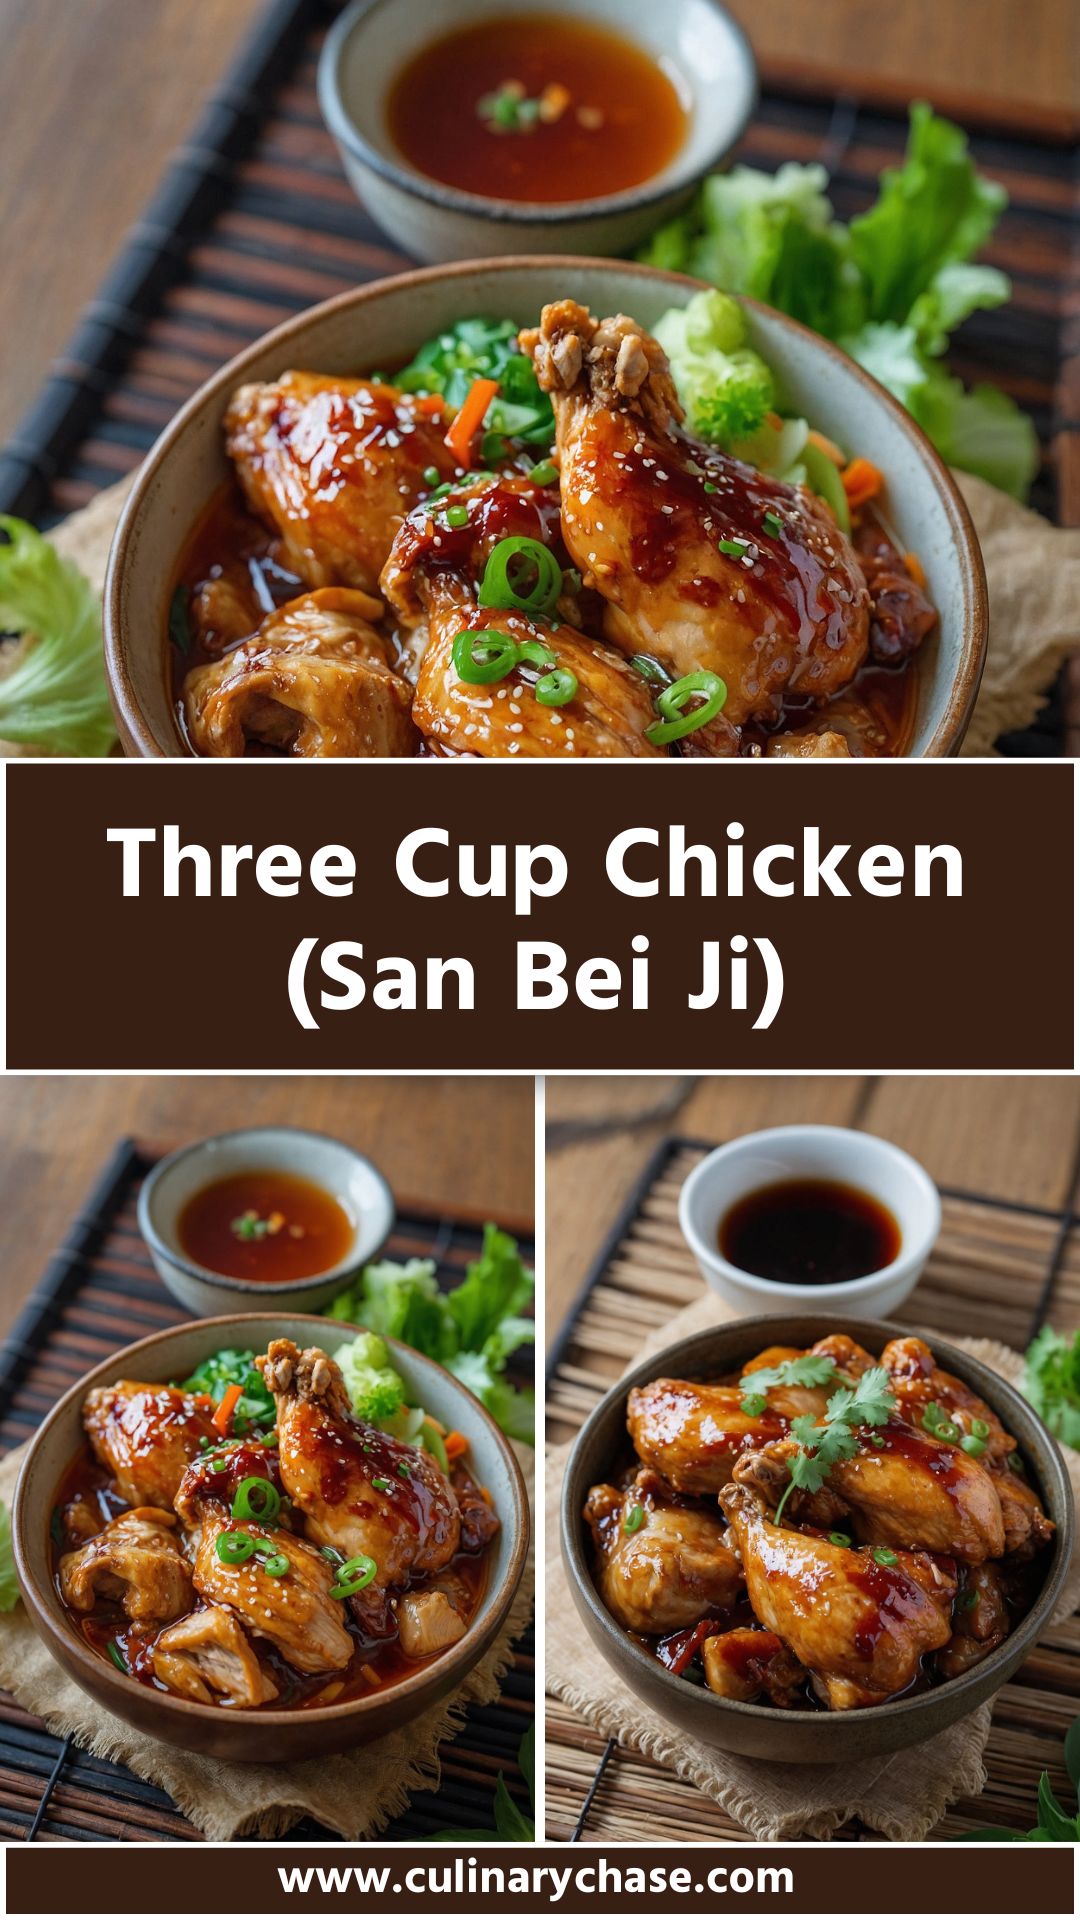
Ah, the allure of a well-cooked meal. If there’s one dish that has captured my attention—and palate—it’s Three Cup Chicken, or as the Taiwanese lovingly refer to it, San Bei Ji. This dish tells a delightful story of flavors and tradition every time it graces my table. Now, let’s dive into this culinary adventure!
What is Three Cup Chicken (San Bei Ji)?
Let me paint a picture for you. Picture a traditional Taiwanese kitchen, where the aroma of garlic, ginger, and soy sauce wafts through the air.
Three Cup Chicken is a classic dish that derives its name from the use of three primary ingredients: a cup of soy sauce, a cup of sesame oil, and a cup of rice wine. While the original recipe plays off this simplistic trio, I find the variations are what make this dish endlessly enjoyable.
This preparation involves a delightful marriage of chicken and fragrant herbs, slow-cooked to perfection. It’s all about comfort food mixed with a hint of sauce magic.
You will also like the following Lunch and Dinner recipes!
Every bite of Three Cup Chicken sends me soaring into a euphoric state of culinary bliss. What’s so special about it? For starters, it’s a fantastic blend of sweet, salty, and spicy. Fortified by the lusciousness of sesame oil, it reaches heights that many other dishes can only dream of.
Moreover, it evokes nostalgia. Whether you’ve traveled to Taiwan or are simply wanting to experience its charm at home, making this dish is like unearthing a secret treasure from a luscious tropical island. It’s family-friendly, adaptable, and surprisingly simple to create. Let’s not forget the Thai basil—a fragrant herb that elevates the dish beyond its humble roots.
The Ingredients
To whip up this beauty, gather the following ingredients. These will form the backbone of the dish:
1/4 cup Shaoxing wine: This Chinese rice wine adds depth and flavor.
1 tablespoon sesame oil: For that beautiful nutty aroma.
2 teaspoons sugar: A touch of sweetness balances the savory elements.
5 cloves garlic, sliced: Always a winning flavor booster!
2 tablespoons vegetable oil: For cooking.
1/4 cup warm water: Helps to achieve the right consistency in the sauce.
2 teaspoons rice vinegar: A splash of acidity to brighten the dish.
6 slices ginger: For a warming, spicy kick.
2–5 teaspoons dark soy sauce: For rich color and flavor.
1/2 teaspoon five-spice powder: To deepen the flavors.
1 dried chili, halved: If you like it spicy!
2 1/4 pounds chicken wings (cut at the joint): You can also opt for drumsticks!
1 1/2 tablespoons light soy sauce: To season the chicken.
Small bunch of Thai basil leaves or 2 scallions: Finishing touch!
Step by Step Instructions
Ready to get cooking? Follow along as I guide you through creating this culinary masterpiece.
Step 1: Prepare the Chicken
Start by cleaning your chicken. Cut the wings at the joint, discarding the tips. Combine the chicken pieces with light soy sauce in a bowl. Let this marinate while you prepare the other ingredients. The flavors have to meld together, right from the outset!
Step 2: Heat the Oils
In a large pot or wok, heat the vegetable oil over medium heat. Once the oil is shimmering, add the sliced garlic and ginger. Sauté until they become golden and fragrant—this will take just a couple of minutes. Be cautious, as you don’t want them to burn.
Step 3: Add the Chicken
Introduce your marinated chicken into the pot, stirring it frequently to coat it with the garlicky oil. Let it cook for about 5–7 minutes. You’ll want the chicken to develop some color; this adds richness to the final dish.
Step 4: Integrate the Sauce
After you’ve achieved a nice color on the chicken, it’s time for the star players. Pour in the Shaoxing wine, dark soy sauce, sesame oil, sugar, rice vinegar, and warm water. Stir well! The mixture will bubble away, and a wonderful aroma will envelop your kitchen.
Step 5: Add Spice & Simmer
Now toss in the halved dried chili and five-spice powder. Lower the heat to a gentle simmer and cover the pot. Allow it to cook for about 20–30 minutes, stirring occasionally, until the chicken is tender. The meat should practically fall off the bone; trust me, this is the goal!
Step 6: Finish with Basil
The final touch is paramount. Right before serving, stir in the Thai basil leaves—this will brighten the dish significantly. If you’re using scallions, toss them in as well. Turn off the heat and let the flavors marry for a few moments.
Tips & Tricks
Choose Your Chicken: Wingets or drumsticks—both work wonderfully. Wings have more flavor, but drumsticks are meatier.
Control the Spice: Adjust the dried chili based on your heat level preference. Love it hot? Add more!
Marination Time: A longer marination time can enhance the chicken’s flavor. A few hours or even an overnight rest can do wonders.
Fresh Ingredients: Go for fresh vibrant Thai basil hence the best flavor. The herb showcases the dish beautifully.
Leftover Magic: This dish tastes even better the next day as the flavors continue to meld.
Nutrition Information
A typical serving of Three Cup Chicken (without rice or sides) contains approximately:
Calories: 380
Protein: 28g
Fat: 26g
Carbohydrates: 12g
Fiber: 1g
Sugar: 4g
While these values may vary based on portion size and exact ingredients, this dish certainly offers a satisfying protein-packed and flavorful meal!
Can I Store Three Cup Chicken?
Absolutely! Leftover Three Cup Chicken can be stored in an airtight container in the refrigerator for up to 3 days. The flavors become even richer as they sit! Reheat it slowly over low heat, adding a splash of water if it seems too thick.
What Can I Serve with Three Cup Chicken?
This dish pairs wonderfully with a range of side options. Here are a few recommendations:
Steamed Rice: A classic combination, fluffy rice soaks up that delicious sauce.
Stir-Fried Veggies: Keep it light and add some greens like bok choy or broccoli.
Noodles: Toss them with a bit of sesame oil and soy sauce for a quick side.
Pickled Veggies: Add a tangy crunch to contrast the chicken’s richness.
Chinese Buns: For a fun twist, serve with soft buns to soak up the sauce.
Variations of Three Cup Chicken
This dish is quite versatile, so let’s explore some variations:
Thai Basil Chicken: Use more Thai basil for an herb-forward dish.
Spicy San Bei Ji: Increase the number of dried chilies or add fresh bird’s eye chilis for an extra kick.
Coconut Cream Delight: Stir in a bit of coconut milk towards the end for a creamy soft finish.
Vegetarian Twist: Substitute chicken with firm tofu or seitan for a delightful vegetarian experience.
Three Cup Tofu: An entirely plant-based variation, use tofu soaked in the marinade to absorb those flavors deeply.
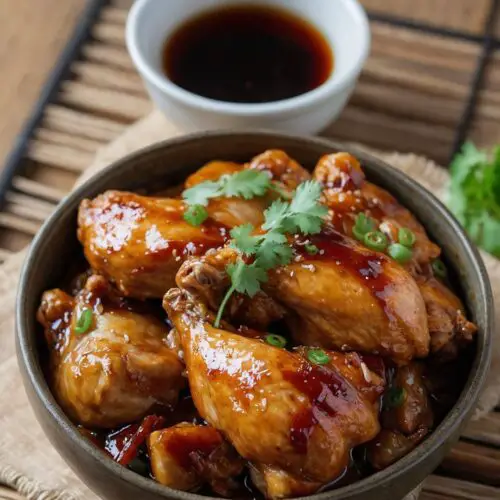
Three Cup Chicken (San Bei Ji)
Ah, the allure of a well-cooked meal. If there’s one dish that has captured my attention—and palate—it’s Three Cup Chicken
1/4cupShaoxing wine: This Chinese rice wine adds depth and flavor.
1tablespoonsesame oil: For that beautiful nutty aroma.
2teaspoonssugar: A touch of sweetness balances the savory elements.
5clovesgarlicsliced: Always a winning flavor booster!
2tablespoonsvegetable oil: For cooking.
1/4cupwarm water: Helps to achieve the right consistency in the sauce.
2teaspoonsrice vinegar: A splash of acidity to brighten the dish.
6slicesginger: For a warmingspicy kick.
2–5 teaspoons dark soy sauce: For rich color and flavor.
1/2teaspoonfive-spice powder: To deepen the flavors.
1dried chilihalved: If you like it spicy!
2 1/4poundschicken wingscut at the joint: You can also opt for drumsticks!
1 1/2tablespoonslight soy sauce: To season the chicken.
Small bunch of Thai basil leaves or 2 scallions: Finishing touch!
Instructions
Step 1: Prepare the Chicken
Start by cleaning your chicken. Cut the wings at the joint, discarding the tips. Combine the chicken pieces with light soy sauce in a bowl. Let this marinate while you prepare the other ingredients. The flavors have to meld together, right from the outset!
Step 2: Heat the Oils
In a large pot or wok, heat the vegetable oil over medium heat. Once the oil is shimmering, add the sliced garlic and ginger. Sauté until they become golden and fragrant—this will take just a couple of minutes. Be cautious, as you don’t want them to burn.
Step 3: Add the Chicken
Introduce your marinated chicken into the pot, stirring it frequently to coat it with the garlicky oil. Let it cook for about 5–7 minutes. You’ll want the chicken to develop some color; this adds richness to the final dish.
Step 4: Integrate the Sauce
After you’ve achieved a nice color on the chicken, it’s time for the star players. Pour in the Shaoxing wine, dark soy sauce, sesame oil, sugar, rice vinegar, and warm water. Stir well! The mixture will bubble away, and a wonderful aroma will envelop your kitchen.
Step 5: Add Spice & Simmer
Now toss in the halved dried chili and five-spice powder. Lower the heat to a gentle simmer and cover the pot. Allow it to cook for about 20–30 minutes, stirring occasionally, until the chicken is tender. The meat should practically fall off the bone; trust me, this is the goal!
Step 6: Finish with Basil
The final touch is paramount. Right before serving, stir in the Thai basil leaves—this will brighten the dish significantly. If you’re using scallions, toss them in as well. Turn off the heat and let the flavors marry for a few moments.
Notes
Choose Your Chicken: Wingets or drumsticks—both work wonderfully. Wings have more flavor, but drumsticks are meatier.
Control the Spice: Adjust the dried chili based on your heat level preference. Love it hot? Add more!
Marination Time: A longer marination time can enhance the chicken’s flavor. A few hours or even an overnight rest can do wonders.
Fresh Ingredients: Go for fresh vibrant Thai basil hence the best flavor. The herb showcases the dish beautifully.
Leftover Magic: This dish tastes even better the next day as the flavors continue to meld.
Yes! While the original recipe often uses chicken wings, you can easily use thighs or drumsticks. Just adjust the cooking time accordingly, as the size and thickness will vary.
2. Is Three Cup Chicken very spicy?
Not necessarily. The spice level largely depends on how many dried chilies you decide to include. You can also omit them altogether if you prefer a milder flavor.
3. Can I freeze Three Cup Chicken?
Yes! You can freeze the cooked chicken for up to a month. Just ensure it’s within an airtight container. Thaw it in the fridge overnight before reheating.
4. Can I make this dish ahead of time?
Absolutely! This dish is great for meal prep. Cook it a day in advance, let it cool, and store it in the fridge. Reheating is as simple as warming it on the stove; the flavors deepen and become even more delicious.
5. What if I can’t find Shaoxing wine?
If you can’t locate Shaoxing wine, substitutes like dry sherry or even a mix of white wine and a splash of rice vinegar can work in a pinch, though they won’t carry the exact same flavor
Conclusion
Three Cup Chicken, or San Bei Ji, isn’t just a meal; it’s a celebration of flavors that resonates with history and culture. As I savor each bite, I can’t help but marvel at the simplicity of the ingredients and the depth of the flavors. Whether you’re preparing for family dinners, entertaining, or just looking for a comforting dish, this recipe won’t disappoint.
So, gather your ingredients, roll up your sleeves, and enjoy the fragrant, sumptuous journey of making Three Cup Chicken. It’s a recipe that will not only fill your tummy but also warm your heart. Happy cooking!
As a seafood lover, I can’t help but get excited about crab fried rice. What makes it even better? Pairing it with the right sides and beverages! Here are a few fantastic options to consider. 1. Fresh Salad: A zesty cucumber salad adds crunch and …