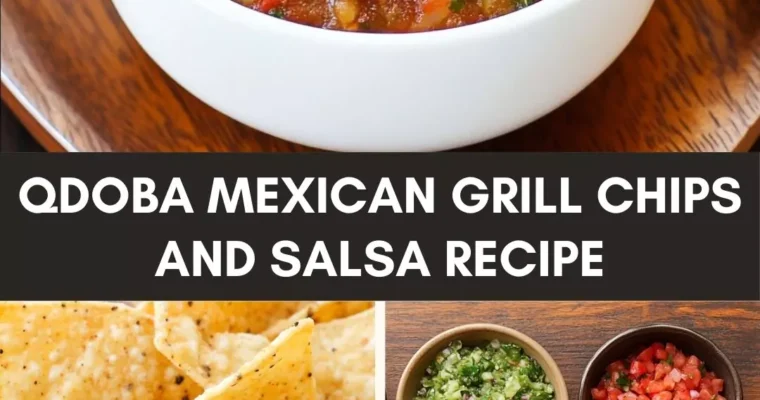
Let’s take a flavorful journey into the enticing world of Qdoba Mexican Grill’s chips and salsa. You may be wondering what’s so special about this particular dish. I promise, by the end of this, you’ll be craving a bowl of chips and salsa so badly …
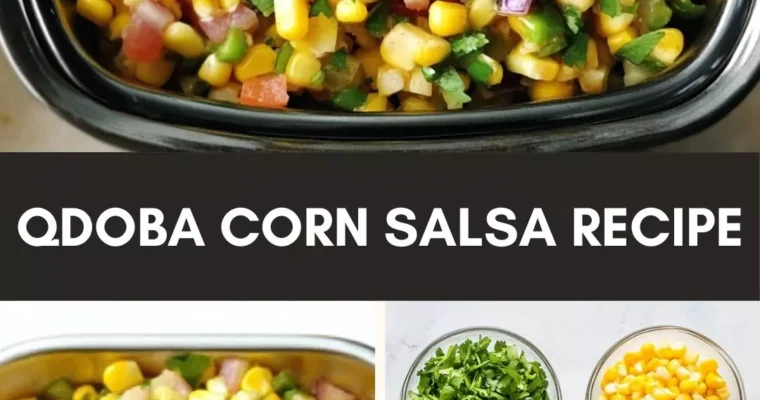
When I think about Qdoba corn salsa, I envision vibrant gatherings filled with laughter and delicious food. This salsa pairs beautifully with a plethora of dishes. Imagine it atop grilled chicken or fish—its zest cuts through the meat beautifully. Picture it spooned generously onto tacos, …
Before diving into the delightful world of Qdoba Gumbo Soup, let’s talk about pairings. You can turn a simple soup into a memorable meal with the right sides. Think about cornbread; its sweet, crumbly nature complements the spice of the soup.
A crisp, fresh salad adds texture and a refreshing contrast. And let’s not forget about some cheesy quesadillas—extra cheese always elevates the vibes.
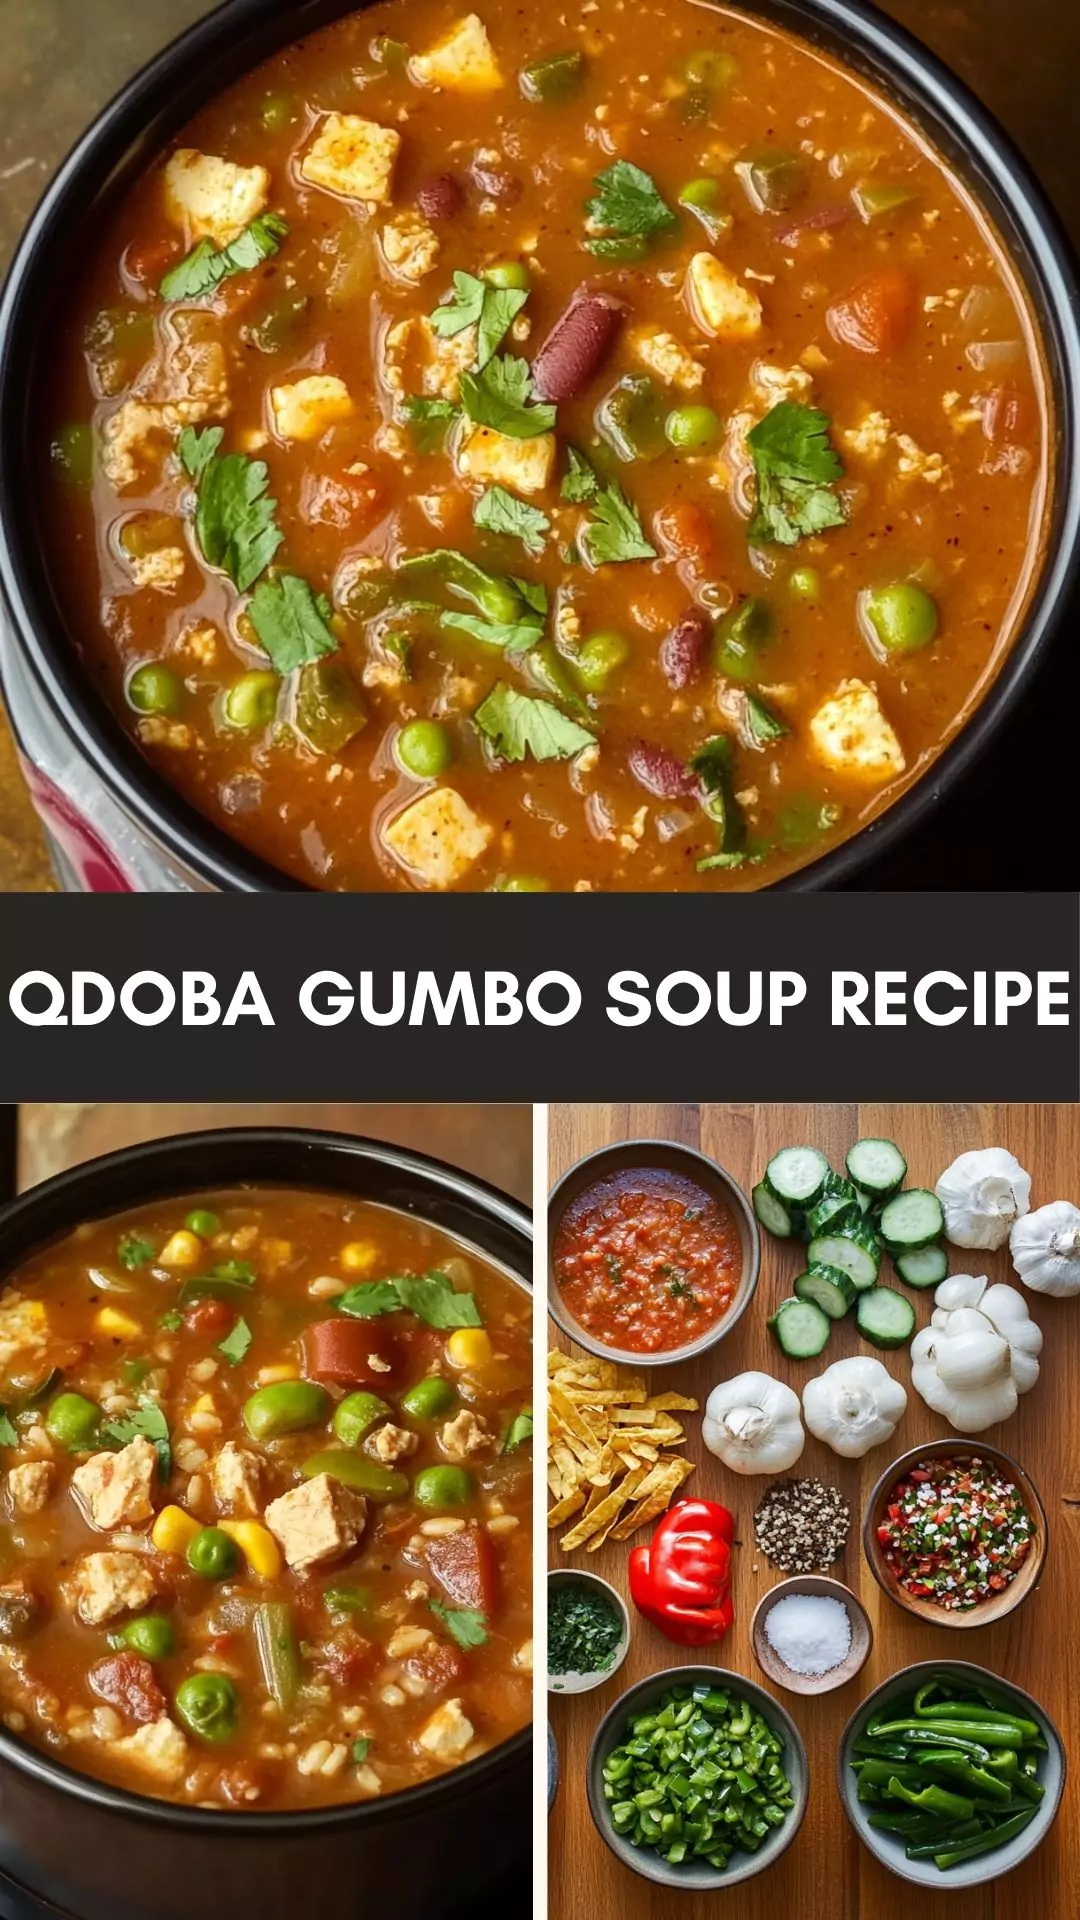
I’ll never forget the first time I slurped down a bowl of Qdoba Gumbo Soup. It was a chilly evening, and that rich, warming flavor hit all the right notes. Imagine the perfect mix of spices, tender chicken, and hearty beans wrapped up in a warm broth. It was like a hug in a bowl.
I felt an immediate connection with the dish; it was a comforting melody of flavors that just made sense. If you’re on the lookout for a dish that’s both satisfying and simple, then hang tight. Let’s explore what makes this soup special.
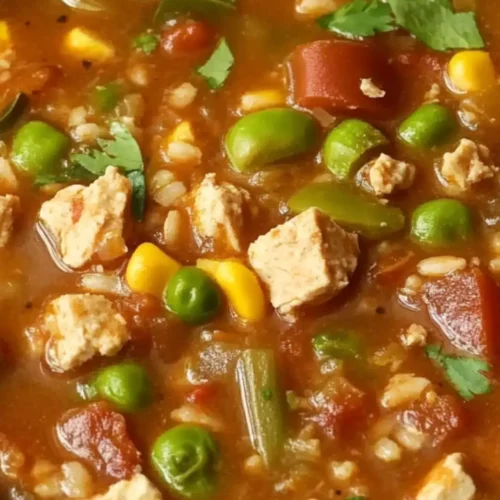
Qdoba Gumbo Soup is a flavorful twist on traditional gumbo. Loaded with chicken, tomatoes, beans, and spices, it has a zesty flair that sets it apart. This dish is not just a soup; it’s a celebration of ingredients woven together in delightful harmony.
You get protein from the chicken, fiber from the beans, and a burst of flavor from the spices. Plus, it’s perfect for cold nights or just about any occasion that calls for comfort food.
Why This Recipe Works
What makes Qdoba Gumbo Soup a hit? Here are a few compelling reasons:
1. It’s Packed with Flavor. The combination of smoked paprika, cumin, and chili powder creates a depth of flavor that keeps your taste buds engaged. You’ll experience layers of spices in each spoonful that bring a touch of warmth and excitement.
2. Easy to Make. This recipe breaks down into simple steps. You don’t need to be an expert chef to pull this off. Even if dinner is a last-minute idea, you can whip this soup up in no time.
3. Customizable to Your Preferences. Don’t like beans? Skip them. Want to add sausage or shrimp? Go for it! This soup adapts to your taste and pantry staples. You really can create a version that your family loves.
4. Healthy and Filling. Loaded with protein from chicken and beans, and fiber from the tomatoes and corn, this soup offers a nutritious option that can help keep you satisfied for hours. You can enjoy a delicious meal without the guilt.
Ingredients You’ll Need to Make This Dish
Here’s what you’ll need to gather for a delicious batch:
3 pounds tender cooked chicken, cubed (boiled or shredded)
1 large white onion, finely minced
3 to 4 cloves fresh garlic, finely chopped
2 tablespoons high-quality extra virgin olive oil
1 can savory chicken broth
1 carton rich chicken stock
2 cans petite diced tomatoes with their juices
2 cans black beans, drained and thoroughly rinsed
1 can fire-roasted green chilies, chopped
1 packet zesty ranch seasoning blend
1 teaspoon smoked paprika for a deep, smoky essence
1/2 teaspoon ground cumin to enhance warmth and depth
1 teaspoon chili powder for a mild
1/2 cup sweet corn kernels
3 cups fluffy cooked white rice
1 large lime or 2 small limes, freshly squeezed
Fresh cilantro, roughly chopped (for garnish)
Mexican crema or sour cream, for a creamy topping
Shredded Mexican-style cheese blend, for a melty, savory finish
Ripe avocado, sliced for garnish
Crispy tortilla strips or crushed corn chips
How to Make Qdoba Gumbo Soup
Step 1: Gather Your Ingredients
Get organized. Lay out all your ingredients. It always helps to have everything in front of you. You want to make the cooking process as smooth as possible.
Step 2: Sauté Your Aromatics
Start by heating your olive oil in a large pot over medium heat. Add the minced onion and garlic. Let them sweat for about 3-4 minutes until they become fragrant. This will form a lovely flavor base.
Step 3: Combine the Chicken and Liquids
Once your onion and garlic are golden, introduce the cubed chicken to the pot. Pour in the chicken broth and stock. Stir to combine. The broth is what gives body to your soup, creating that comforting texture.
Step 4: Add the Vegetables
Next, toss in the diced tomatoes, black beans, sweet corn, and green chilies. Stir well, letting the ingredients mingle. Each ingredient plays a role in building the final flavor.
Step 5: Season the Soup
Sprinkle in the ranch seasoning, smoked paprika, cumin, and chili powder. This is where the magic happens. Stir the soup to ensure every ingredient is coated with those delicious spices. Let it simmer for about 15 minutes, allowing all the flavors to meld.
Step 6: Serve it Up
Once your soup is ready, stir in the lime juice and check for seasoning. Serve in bowls and top with chopped cilantro, Mexican crema, shredded cheese, and avocado slices. Don’t forget those crispy tortilla strips—they add the final touch.
Tips & Tricks
Here are a few pointers to help you perfect your gumbo soup:
Prep Ahead: Chop your veggies and cook the chicken the day before to save time.
Use Leftover Chicken: Rotisserie chicken is a game-changer. It adds flavor and cuts down your prep time.
Adjust the Spice: If you prefer a milder soup, reduce the chili powder and smoked paprika. Start with half a teaspoon and taste as you go.
Add Other Proteins: Shrimp or sausage can elevate this dish. Just ensure that they’re cooked through before serving.
Freezing the Soup: Make a large batch, let it cool, and freeze leftovers in individual portions for easy meals later.
How Do You Store The Leftovers?
Leftover gumbo soup can last in the fridge for up to 4 days. Just make sure to store it in an airtight container. To reheat, gently warm it on the stove or in the microwave. If you’ve frozen it, let it thaw overnight in the refrigerator and warm it up before enjoying it again.
What Sides Would Complement Qdoba Gumbo Soup?
Now, let’s think about sides. Here are a few delightful options:
1. Cornbread. This warms the soul. The sweet, crumbly texture of cornbread pairs perfectly with the spiciness of the soup. You can serve it with a pat of butter for added richness.
2. A Fresh Garden Salad. A crisp, light salad balances the warm and hearty soup. Toss together some greens, cucumbers, and cherry tomatoes. A simple vinaigrette is all you need.
3. Quesadillas. Who doesn’t love a cheesy quesadilla? You can fill them with any ingredients you have on hand—chicken, cheese, or veggies. Serve them warm and let that gooey cheese melt alongside the soup.
What Alternatives Can You Use for the Ingredients?
With a little creativity, you can use substitutes if you’re missing an ingredient:
1. Chicken. If you don’t have chicken, turkey works great. You can even use tofu for a vegetarian option.
2. Beans. Pinto or kidney beans can replace black beans. Both have their unique flavor and texture.
3. Tomatoes. Fresh chopped tomatoes can stand in for canned ones. They may take a touch longer to cook down.
4. Corn. If you lack sweet corn, peas make for a sweet and satisfying substitute.
Qdoba Gumbo Soup Recipe
Joe Williams
I’ll never forget the first time I slurped down a bowl of Qdoba Gumbo Soup. It was a chilly evening, and that rich, warming flavor hit all the right notes.
3poundstender cooked chickencubed (boiled or shredded)
1large white onionfinely minced
3 to 4clovesfresh garlicfinely chopped
2tablespoonshigh-quality extra virgin olive oil
1can savory chicken broth
1carton rich chicken stock
2cans petite diced tomatoes with their juices
2cans black beansdrained and thoroughly rinsed
1can fire-roasted green chilieschopped
1packet zesty ranch seasoning blend
1teaspoonsmoked paprika for a deepsmoky essence
1/2teaspoonground cumin to enhance warmth and depth
1teaspoonchili powder for a mild
1/2cupsweet corn kernels
3cupsfluffy cooked white rice
1large lime or 2 small limesfreshly squeezed
Fresh cilantroroughly chopped (for garnish)
Mexican crema or sour creamfor a creamy topping
Shredded Mexican-style cheese blendfor a melty, savory finish
Ripe avocadosliced for garnish
Crispy tortilla strips or crushed corn chips
Instructions
Step 1: Gather Your Ingredients
Get organized. Lay out all your ingredients. It always helps to have everything in front of you. You want to make the cooking process as smooth as possible.
Step 2: Sauté Your Aromatics
Start by heating your olive oil in a large pot over medium heat. Add the minced onion and garlic. Let them sweat for about 3-4 minutes until they become fragrant. This will form a lovely flavor base.
Step 3: Combine the Chicken and Liquids
Once your onion and garlic are golden, introduce the cubed chicken to the pot. Pour in the chicken broth and stock. Stir to combine. The broth is what gives body to your soup, creating that comforting texture.
Step 4: Add the Vegetables
Next, toss in the diced tomatoes, black beans, sweet corn, and green chilies. Stir well, letting the ingredients mingle. Each ingredient plays a role in building the final flavor.
Step 5: Season the Soup
Sprinkle in the ranch seasoning, smoked paprika, cumin, and chili powder. This is where the magic happens. Stir the soup to ensure every ingredient is coated with those delicious spices. Let it simmer for about 15 minutes, allowing all the flavors to meld.
Step 6: Serve it Up
Once your soup is ready, stir in the lime juice and check for seasoning. Serve in bowls and top with chopped cilantro, Mexican crema, shredded cheese, and avocado slices. Don’t forget those crispy tortilla strips—they add the final touch.
Notes
Here are a few pointers to help you perfect your gumbo soup:
Prep Ahead: Chop your veggies and cook the chicken the day before to save time.
Use Leftover Chicken: Rotisserie chicken is a game-changer. It adds flavor and cuts down your prep time.
Adjust the Spice: If you prefer a milder soup, reduce the chili powder and smoked paprika. Start with half a teaspoon and taste as you go.
Add Other Proteins: Shrimp or sausage can elevate this dish. Just ensure that they’re cooked through before serving.
Freezing the Soup: Make a large batch, let it cool, and freeze leftovers in individual portions for easy meals later.
Absolutely! Just add all your ingredients to the slow cooker and set it on low for 6-8 hours or on high for 3-4 hours. This method will meld the flavors beautifully.
2. Is Qdoba Gumbo Soup spicy?
It has a mild spice level due to the chili powder and smoked paprika. You can adjust to your preference—less spice means a sweeter soup.
3. Can I make this soup vegetarian?
Yes! Simply omit the chicken and use vegetable broth instead. You can pack in more veggies to keep it hearty.
4. How long does it take to cook this soup?
With prep, you can have it ready in under 45 minutes. It’s quick, especially for those busy weeknights!
5. What do I do if I add too much seasoning?
If your soup tastes too salty or overpowering, adding more liquid (broth or water) can help dilute the flavors. You can also add more rice or beans to balance it out.
6. Can I freeze leftover soup?
Yes, you can freeze it! Store it in an airtight container for up to 3 months. Thaw it in the fridge before reheating.
Conclusion
Qdoba Gumbo Soup isn’t just food; it’s an experience. It brings everyone together, ignites conversations, and most importantly, warms your soul. With its burst of flavors and versatility, it’s like a cozy blanket on a chilly night.
Whether you’re serving it for a casual dinner or during a gathering, it’s bound to impress. As you dive into this culinary adventure, don’t forget to have fun with it. Experiment, savor, and enjoy every spoonful.
Trust me, once you try this soup, you might just find yourself making it a regular on your menu!
Summer days call for fun, easy meals that can wow your family and friends. One of my go-tos is the QDOBA Gladiator Taco. With fiery flavors and endless possibilities for pairings, you can’t go wrong! It’s a crowd-pleaser that stands out in a sea of …
A warm summer afternoon, and a vibrant plate of fresh salad awaits. To elevate your QDOBA salad experience, consider pairing it with roasted chicken or grilled shrimp. The smoky flavors of the proteins perfectly complement the tangy dressing. You could even add some corn tortillas …
Summer’s in full swing, and you know what that means—it’s time for outdoor gatherings, backyard barbecues, and vibrant pasta salad parties. Recently, I found myself at a picnic, ready to dive into a colorful display of Italian pasta salad.
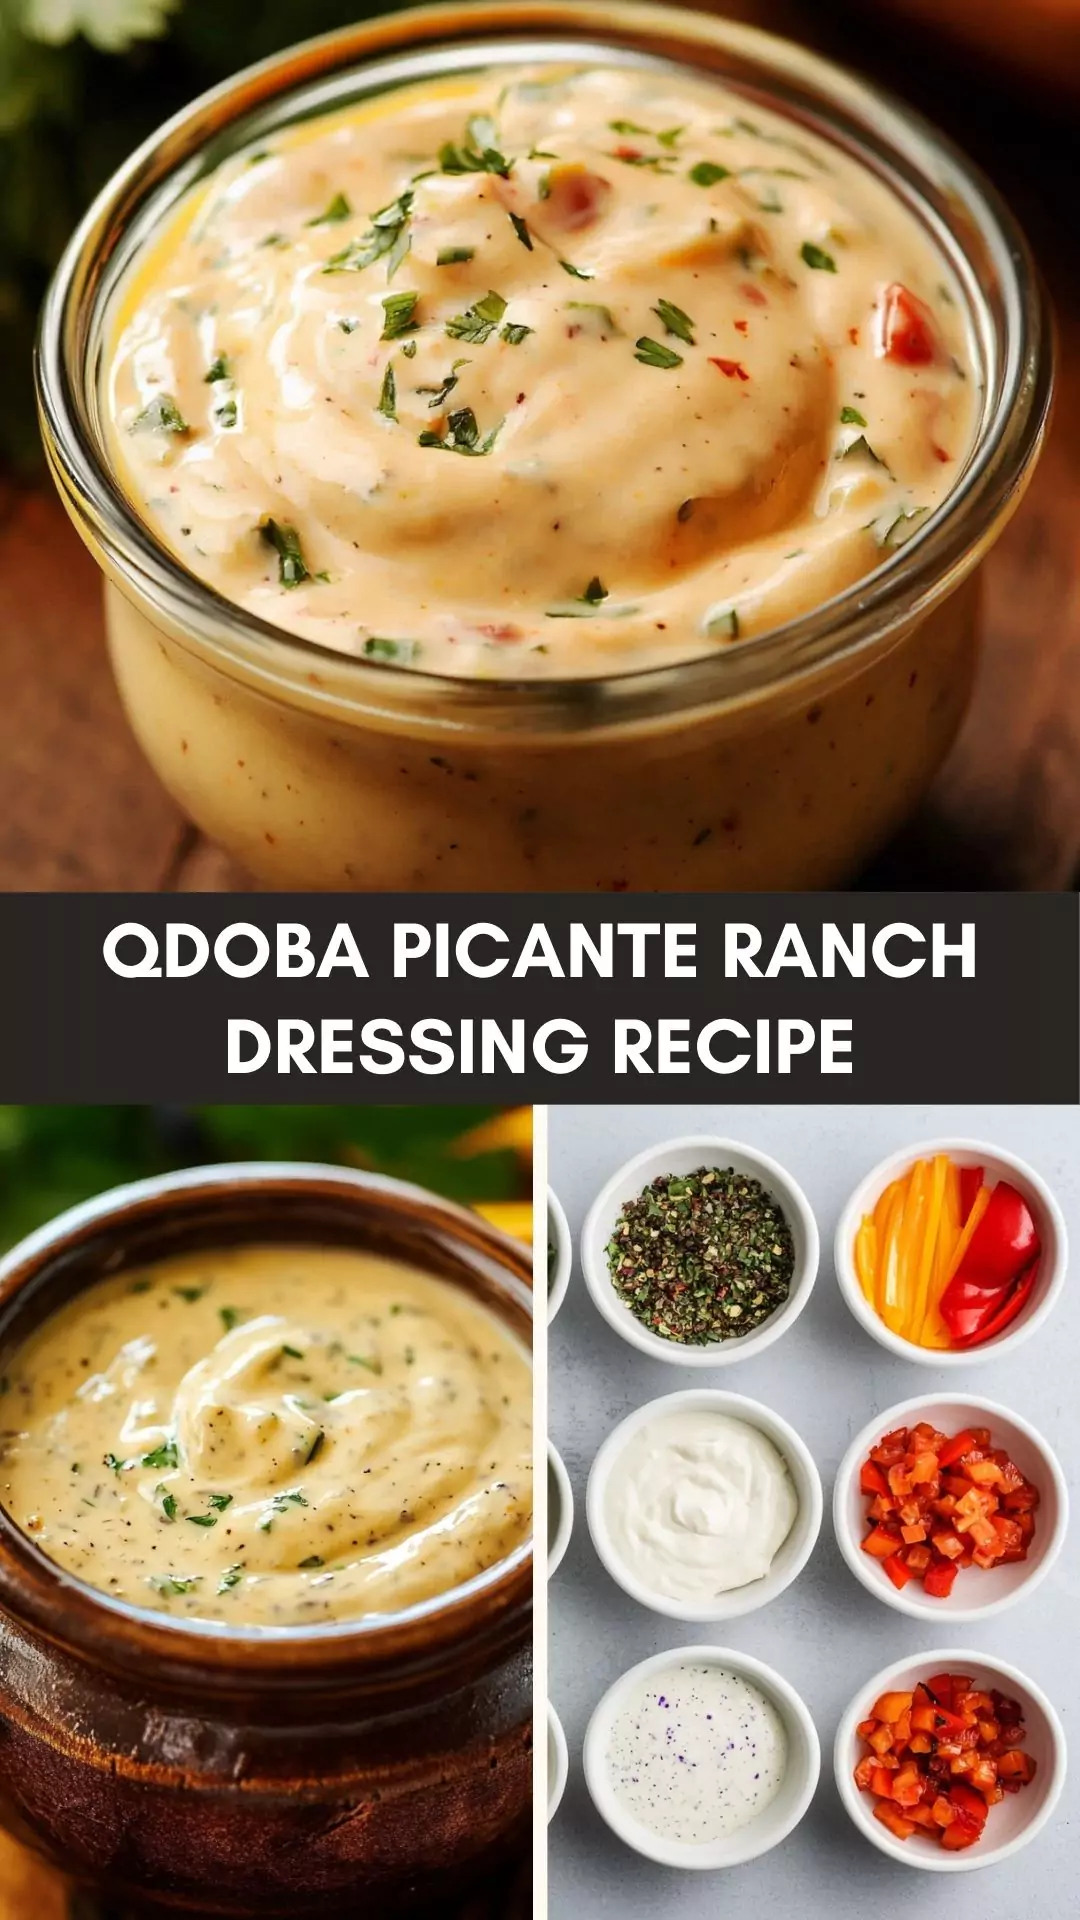
This delightful dish, filled with fusilli noodles, fresh veggies, and chickpeas, was already good, but it craved something special. Enter: Qdoba Picante Ranch Dressing. As a food enthusiast, I’ve learned that a truly good dressing can elevate any meal.
With its unique kick and creamy texture, I knew this ranch was the finishing touch my salad needed.
On the hunt for the perfect combination, I became intrigued. What exactly makes Qdoba Picante Ranch Dressing so special? Let’s dive deeper into this tantalizing condiment.
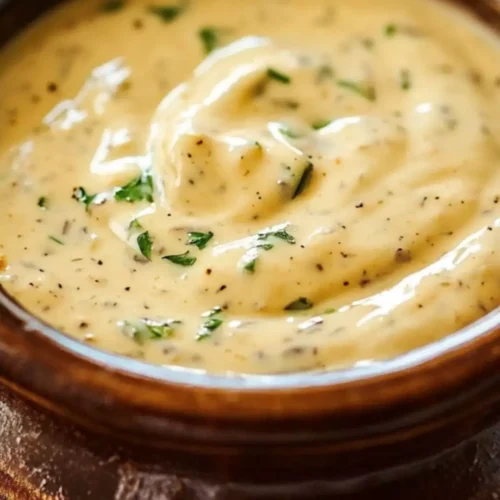
Qdoba Picante Ranch Dressing is a flavorful blend of ranch dressing’s creamy base mixed with a zesty kick of spices.
Originating from Qdoba, a popular fast-casual Mexican restaurant, this dressing is praised for its balance of creaminess and spice. Imagine a ranch dressing that does a little salsa dance on your taste buds. That’s exactly what we’re dealing with here.
This dressing is versatile. It pairs well with salads, nachos, burritos, or even as a dip for veggies. The combination of flavors creates a delightful experience that keeps you coming back for more.
The Ingredients
To create your own version of this beloved dressing, here’s what you’ll need:
1 teaspoon of dry mustard powder
1 teaspoon of ground cumin
1 teaspoon of chili powder
2 tablespoons of fresh lime juice
2 tablespoons of extra virgin olive oil
1 teaspoon of finely chopped garlic (about 2 small cloves)
1 teaspoon of honey
1 (8 oz) can of crushed tomato purée
1 cup of creamy mayonnaise
¼ teaspoon of freshly ground black pepper
⅛ teaspoon of kosher salt
⅛ teaspoon of red cayenne pepper
1 tablespoon of distilled white vinegar
½ teaspoon of ground turmeric
Gathering these ingredients will not just fill your pantry but also invite a world of flavor into your meals.
How to Make Qdoba Picante Ranch Dressing
Whipping up Qdoba Picante Ranch Dressing is as easy as pie—well, easier, actually! Here’s a brief overview before we get into all the juicy details.
Step-by-Step Directions
Step 1: Prepare Your Ingredients
Before you start cooking, gather all your ingredients. This will help you stay organized. You don’t want to be scrambling around mid-recipe.
Step 2: Mix the Creamy Base
In a medium-sized bowl, add 1 cup of creamy mayonnaise. This will serve as the base for your dressing and give it that smooth, creamy texture we all love.
Step 3: Add the Spices
To the mayonnaise, add the dry mustard powder, ground cumin, chili powder, cayenne pepper, and turmeric. These spices will create the dressing’s bold flavor profile. Use a whisk to combine everything thoroughly.
Step 4: Incorporate the Tomatoes
Open your can of crushed tomato purée and pour it into the spicy mayo mixture. The tomatoes add a fresh taste and luscious color to your dressing. Blend well until the mixture is uniform.
Step 5: Embrace the Zing
Next, pour in the fresh lime juice and distilled white vinegar. These ingredients will brighten up the flavor. Don’t forget about the honey, which will add a touch of sweetness to balance the tanginess.
Step 6: Add Garlic and Seasoning
Now, add the finely chopped garlic. It brings in a beautiful aroma and depth of flavor. Season with freshly ground black pepper and kosher salt to taste.
Step 7: Stir and Chill
Mix everything until smooth and creamy. Taste it—this is your moment to adjust the seasoning if needed. Once you’re satisfied, cover the dressing and refrigerate for at least half an hour. Chilling will allow the flavors to meld beautifully.
Notes
Creating the perfect dressing shouldn’t be stressful. Here are some tips that can help you elevate your Qdoba Picante Ranch:
Fresh Ingredients: Use fresh lime juice for better flavor. Bottled juice can be convenient but often lacks freshness.
Taste as You Go: Always taste your dressing before you store it. This way, you can adjust any flavors if needed.
Give it Time: Allow the dressing to chill for longer than 30 minutes—up to several hours—if you can. The flavors deepen with time.
Experiment: Don’t be afraid to play with the spice levels. Add more cayenne if you like it hot or tone it down for a milder version.
Make a Big Batch: This dressing can keep for about a week in the fridge, so feel free to double the recipe!
Storage Tips
Keeping your Qdoba Picante Ranch Dressing fresh is simple. Store it in an airtight container in the refrigerator. Make sure it’s sealed well to prevent any odors from your fridge affecting the taste.
Serving Suggestions
What’s great about Qdoba Picante Ranch is its versatility. Here are some fantastic ideas for serving:
Salad Dressing: Drizzle over a mixed greens salad. The creamy texture and spicy flavor bring everything together beautifully.
Wrap Filler: Slather some on a tortilla before adding your favorite fillings. It transforms a simple wrap into a taste sensation.
Veggie Dip: Pour it into a bowl as a dip for fresh veggies. Carrots, cucumbers, and bell peppers become irresistible.
Baked Potatoes: Top your baked potatoes with this dressing. It’ll add a punch to your traditional spud.
Nacho Topping: Drizzle it over a plate of nachos. Add cheese, guacamole, and jalapenos—it’s a fiesta on a plate!
What Other Substitutes Can I Use in Qdoba Picante Ranch Dressing?
If you’re looking to customize your dressing, you have options. Here are some alternatives:
Greek Yogurt: For a lighter version, substitute Greek yogurt for mayonnaise. It adds creaminess but keeps the calories lower.
Sour Cream: Swap out half of your mayo for sour cream. This will give your dressing a tangy flavor without losing the rich texture.
Avocado: Blend in mashed avocado instead of mayonnaise for a healthy fat alternative. Just make sure to use it right away to prevent browning.
Vegan Mayo: If you’re plant-based, use vegan mayonnaise. This keeps the dressing creamy while adhering to dietary preferences.
Spicy Salsa: Incorporating a spoonful of your favorite spicy salsa can turn up the heat without losing that ranch vibe.
Qdoba Picante Ranch Dressing Recipe
Joe Williams
Summer’s in full swing, and you know what that means—it’s time for outdoor gatherings, backyard barbecues, and vibrant pasta salad parties.
1teaspoonof finely chopped garlicabout 2 small cloves
1teaspoonof honey
18 oz can of crushed tomato purée
1cupof creamy mayonnaise
¼teaspoonof freshly ground black pepper
⅛teaspoonof kosher salt
⅛teaspoonof red cayenne pepper
1tablespoonof distilled white vinegar
½teaspoonof ground turmeric
Instructions
Step 1: Prepare Your Ingredients
Before you start cooking, gather all your ingredients. This will help you stay organized. You don’t want to be scrambling around mid-recipe.
Step 2: Mix the Creamy Base
In a medium-sized bowl, add 1 cup of creamy mayonnaise. This will serve as the base for your dressing and give it that smooth, creamy texture we all love.
Step 3: Add the Spices
To the mayonnaise, add the dry mustard powder, ground cumin, chili powder, cayenne pepper, and turmeric. These spices will create the dressing’s bold flavor profile. Use a whisk to combine everything thoroughly.
Step 4: Incorporate the Tomatoes
Open your can of crushed tomato purée and pour it into the spicy mayo mixture. The tomatoes add a fresh taste and luscious color to your dressing. Blend well until the mixture is uniform.
Step 5: Embrace the Zing
Next, pour in the fresh lime juice and distilled white vinegar. These ingredients will brighten up the flavor. Don’t forget about the honey, which will add a touch of sweetness to balance the tanginess.
Step 6: Add Garlic and Seasoning
Now, add the finely chopped garlic. It brings in a beautiful aroma and depth of flavor. Season with freshly ground black pepper and kosher salt to taste.
Step 7: Stir and Chill
Mix everything until smooth and creamy. Taste it—this is your moment to adjust the seasoning if needed. Once you’re satisfied, cover the dressing and refrigerate for at least half an hour. Chilling will allow the flavors to meld beautifully.
Notes
Creating the perfect dressing shouldn’t be stressful. Here are some tips that can help you elevate your Qdoba Picante Ranch:
Fresh Ingredients: Use fresh lime juice for better flavor. Bottled juice can be convenient but often lacks freshness.
Taste as You Go: Always taste your dressing before you store it. This way, you can adjust any flavors if needed.
Give it Time: Allow the dressing to chill for longer than 30 minutes—up to several hours—if you can. The flavors deepen with time.
Experiment: Don’t be afraid to play with the spice levels. Add more cayenne if you like it hot or tone it down for a milder version.
Make a Big Batch: This dressing can keep for about a week in the fridge, so feel free to double the recipe!
Absolutely! It pairs wonderfully with grilled chicken, giving it an extra burst of flavor. Just marinate the chicken in the dressing before grilling for a deeper taste.
2. How long does Qdoba Picante Ranch last in the fridge?
Stored properly in an airtight container, it can last up to a week. Just give it a good stir before using if it separates a bit.
3. Can I freeze the dressing?
While freezing is possible, it may change the texture. It’s best enjoyed fresh, so make small batches you can use within a week.
4. Is this dressing gluten-free?
Yes! All the ingredients listed are naturally gluten-free. Always double-check brands to ensure they meet gluten-free standards.
5. Can I spice it up even more?
For those who like it really spicy, add jalapeno or chopped pickled peppers into the mix. You can even throw in some diced chipotle for smoke.
Conclusion
Creating Qdoba Picante Ranch Dressing is not just a cooking task—it’s a flavorful adventure. The combination of spices, creaminess, and zest can completely change your meal. Through a simple series of steps, you can transform ordinary dishes into something extraordinary.
Whether it’s enhancing your summer salads, serving as a comforting dip, or elevating grilled meats, this dressing finds its way into your heart—and stomach!
So, the next time you’re at a picnic or barbeque, don’t forget your homemade Qdoba Picante Ranch Dressing.
It’ll be the magic touch that brings people back to the buffet line. Happy cooking, and may your meals always be zestful and delicious!
When you find yourself with a bottle of QDOBA’s Chipotle Barbecue Sauce, the possibilities are endless. For a smoky kick, drizzle the sauce over grilled chicken breasts—its bold flavor complements the juicy chicken perfectly. Pair it with slow-cooked pulled pork sandwiches for a sweet and …
Before diving into the visual treat that is the QDOBA brownie, let’s talk about what happily complements this indulgent dessert. These brownies are rich and chocolatey, making them an excellent fit with a few accompaniments. First, a scoop of vanilla ice cream can elevate your …
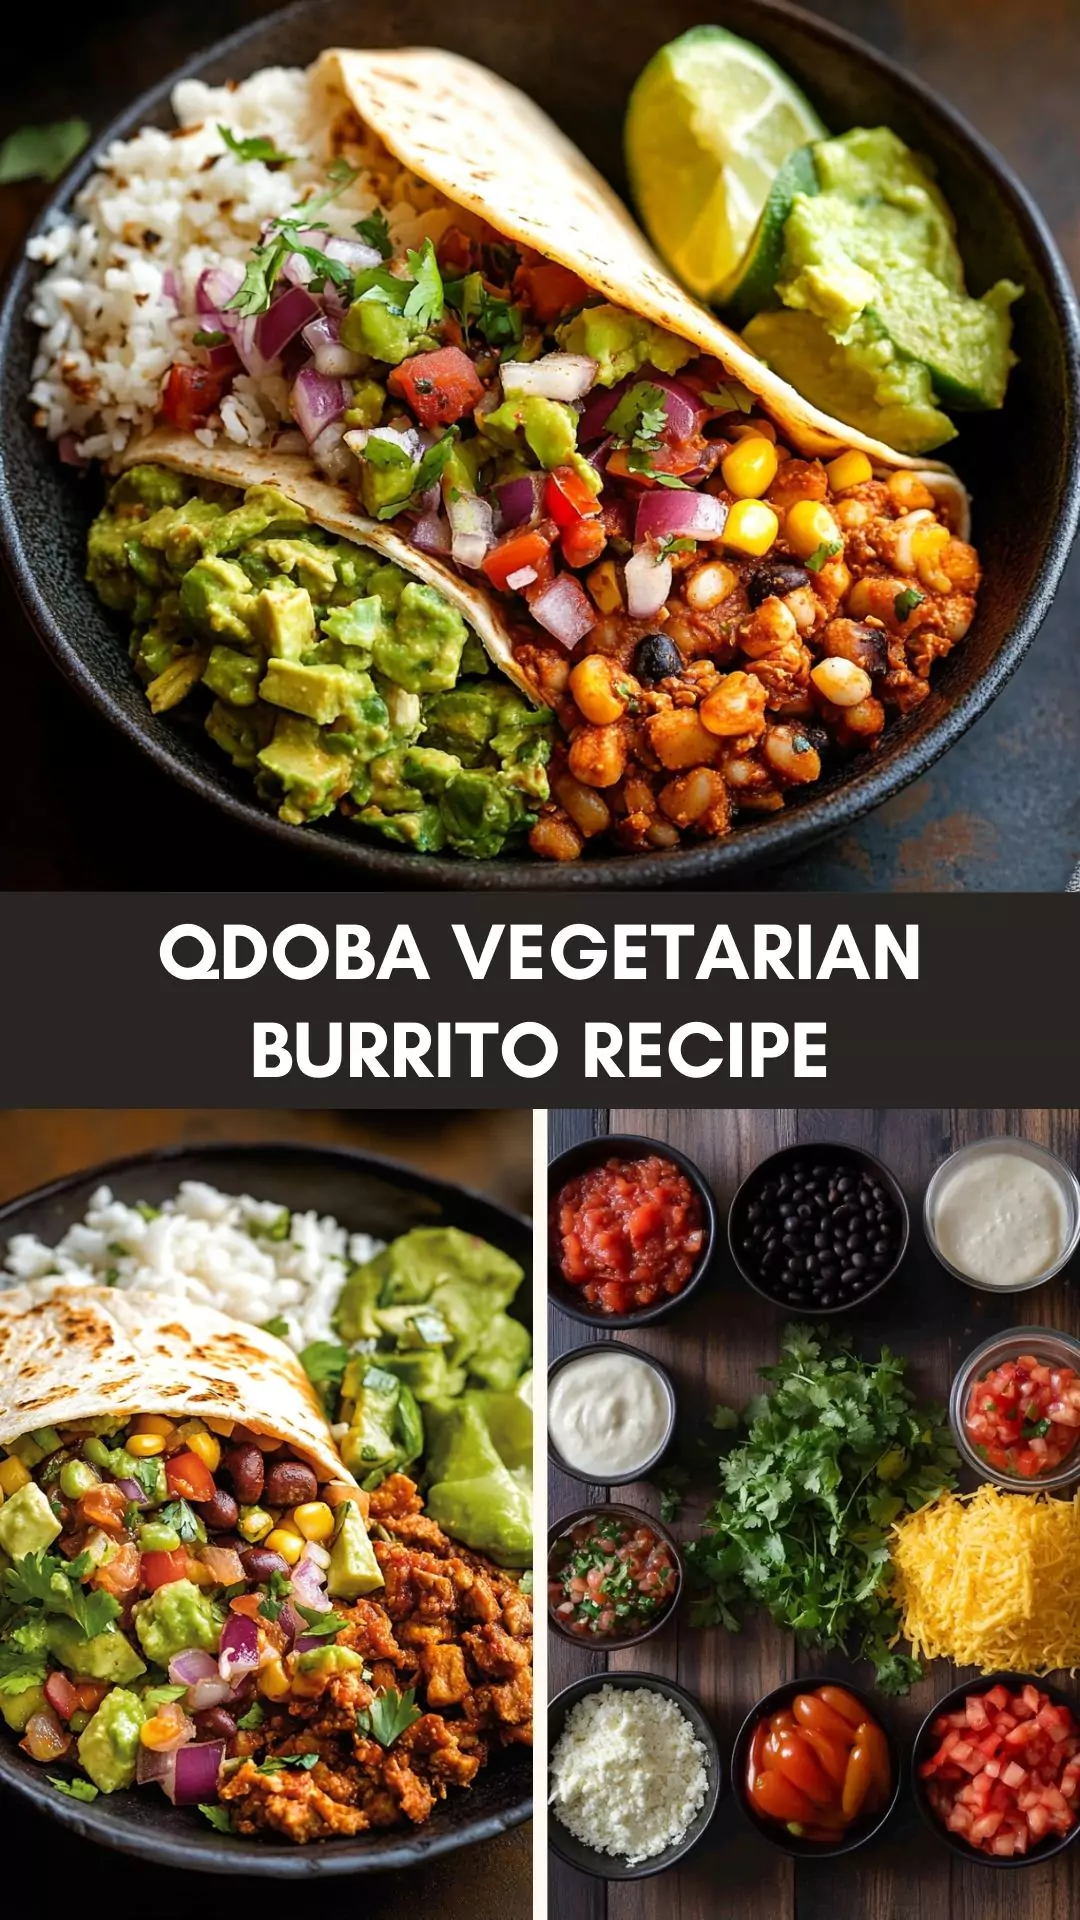
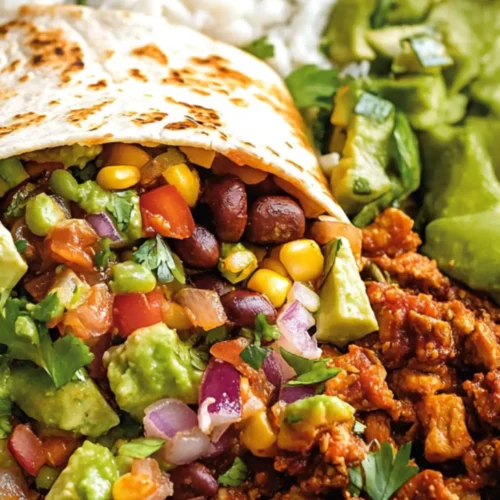
As a self-professed foodie, I’ve always enjoyed the thrill of exploring flavors in various dishes. Among the many delightful combinations I’ve sampled, the Qdoba Vegetarian Burrito typically leaves a lasting impression. It’s a dish that feels fresh and vibrant, perfect to brighten any table or occasion.
Pairing this burrito with a refreshing side of charred corn salad or perhaps a gluten-free pasta salad adds a nice touch, balancing the savory burrito’s heartiness.
Let’s dive into the world of the Qdoba Vegetarian Burrito, with a detail-oriented discussion of the recipe and its components.
The Qdoba Vegetarian Burrito showcases the interplay of flavors and textures. A burrito traditionally consists of a flour tortilla enveloping a delightful mix of ingredients. In this vegetarian version, we swap out meat for an array of tasty plant-based options.
It’s hearty enough to satiate just about anyone, with layers of rice, beans, and seasonal vegetables. This dish proves that vegetarian eating can be both satisfying and flavorful, often exceeding expectations.
The Ingredients
Before embarking on the journey of making Qdoba’s burrito at home, let’s break down the essential ingredients. The combination of protein, grains, and veggies will ensure every bite bursts with flavor.
Protein:
Sofritas and/or
Mexican Black Beans
Fajita Veggies:
1 ½ tablespoons avocado oil (or preferred cooking oil)
1 medium to large red onion, thinly sliced
1 large green bell pepper, sliced into strips
½ tablespoon fresh oregano, finely minced
½ teaspoon kosher salt
Freshly cracked black pepper
½ teaspoon smoked paprika
Cilantro-Lime Rice:
1 cup white Jasmine rice
1 bay leaf
1 ½ cups room temperature water
½ teaspoon kosher salt, or more to taste
2 teaspoons olive oil, split into two portions
1 medium lime, zested, plus 1 ½ tablespoons lime juice
½ tablespoon lemon juice
1 cup fresh cilantro leaves with tender stems, finely chopped
1 tablespoon toasted coconut flakes
Toppings (optional):
Charred Corn and Tomato Salsa
Lazy Guacamole
Chopped cilantro
Vegan sour cream
Shredded romaine lettuce
How to Make Qdoba Vegetarian Burrito?
Let’s get started on crafting this masterpiece. As I dive into the preparation, I can already smell the vibrant flavors blending together. Let’s break this down into actionable steps.
Step 1: Prepare the Cilantro-Lime Rice
Begin by rinsing the white Jasmine rice in cold water until the water runs clear. This helps remove excess starch for fluffier rice.
In a medium pot, combine the rinsed rice, a bay leaf, 1 ½ cups of water, and ½ teaspoon of kosher salt. Bring to a boil over high heat.
Once boiling, reduce the heat to low, cover, and allow the rice to simmer for 15-20 minutes or until all the water is absorbed.
Remove from the heat, discard the bay leaf, and let it sit covered for another 5 minutes. Fluff with a fork and mix in 1 tablespoon of olive oil, lime zest, lime juice, lemon juice, and chopped cilantro. Set aside.
Step 2: Cook the Fajita Veggies
In a large skillet, heat 1 ½ tablespoons of avocado oil over medium heat. Add the sliced red onion and green bell pepper.
Cook for about 5-7 minutes, stirring occasionally, until the veggies become tender. Season with fresh oregano, kosher salt, cracked black pepper, and smoked paprika. Allow these to caramelize slightly, releasing all those wonderful flavors.
Step 3: Prepare the Protein
If you’re going for Sofritas, crumble firm tofu into the skillet with the fajita mix and cook for an additional 5-6 minutes.
If you prefer Mexican Black Beans, simply warm them in a pot or microwave until hot. You can use either or even a combination based on your preference.
Step 4: Assemble the Burrito
Once your rice, fajita veggies, and protein are ready, it’s time to assemble. Take a large flour tortilla and begin layering. Start with a generous scoop of cilantro-lime rice, followed by fajita veggies, and then your choice of protein.
Add toppings such as charred corn salsa, chopped cilantro, and a dollop of lazy guacamole.
Step 5: Roll it Up
To wrap the burrito, fold in the sides, then roll from the bottom up, tucking the fillings in tightly. Practice makes perfect! Once rolled, you can toast it in a hot skillet for a couple of minutes on each side, creating a crispy exterior.
Notes
Prep Ahead: You can prepare everything ahead of time and assemble when ready to serve.
Taste Adjustments: Always taste and adjust seasoning based on your preference. Don’t be shy with spices!
Heat Level: If you like a kick, add jalapeños or a hot salsa to your burrito.
Be Adventurous: Experiment with different veggies. Zucchini, mushrooms, or roasted peppers would work great.
Vegan Options: Ensure any sour cream or cheese is plant-based for a fully vegan experience.
Storage Tips
The Qdoba Vegetarian Burrito can be stored for about 2-3 days in the fridge. Wrap individual burritos tightly in foil or plastic wrap before placing them in an airtight container.
If you want to freeze them, wrap the assembled burrito in plastic wrap and place it in a freezer-safe bag.
It can last for up to a month! Just remember to thaw overnight in the refrigerator and reheat in an oven or skillet for crispness.
Serving Suggestions
If you’re hosting or bringing these burritos to a gathering, consider these serving suggestions:
Salsa Bar: Set up a variety of salsas like pico de gallo, corn salsa, or mango salsa for guests to choose from.
Make Your Guacamole Station: Set out easy-to-slice avocados, lime, diced tomatoes, and seasonings so everyone can create their guacamole.
Crunch it Up: Serve with tortilla chips for added crunch, perhaps alongside a creamy ranch dip.
Fresh Side Salad: A simple side salad with mixed greens, a light vinaigrette, and fresh tomatoes complements the burrito perfectly.
Mocktails and Drinks: Whip together some refreshing mocktails like cucumber mint lemonade or watermelon slush to make your meal festive.
What Other Substitutes Can I Use in Qdoba Vegetarian Burrito?
Customization is part of the fun, so here are some other substitutes to consider:
Brown Rice: For a fiber boost, swap white Jasmine rice for brown rice. It adds a nutty flavor and is even more wholesome.
Quinoa: It’s high in protein and will give your burrito a unique flair. Plus, it’s gluten-free!
Sweet Potatoes: Roasted sweet potatoes add a sweet contrast to savory elements. Dice and roast until caramelized for a delightful touch.
Cauliflower Rice: For a low-carb option, consider using cauliflower rice. It’s a great way to sneak in more veggies.
Cheese Alternatives: If you’re not vegan but still want to reduce dairy, try mozzarella or pepper jack for a melty addition.
Qdoba Vegetarian Burrito Recipe
Joe Williams
As a self-professed foodie, I’ve always enjoyed the thrill of exploring flavors in various dishes. Among the many delightful combinations I’ve sampled, the Qdoba Vegetarian Burrito typically leaves a lasting impression.
1medium limezested, plus 1 ½ tablespoons lime juice
½tablespoonlemon juice
1cupfresh cilantro leaves with tender stemsfinely chopped
1tablespoontoasted coconut flakes
Toppings (optional):
Charred Corn and Tomato Salsa
Lazy Guacamole
Chopped cilantro
Vegan sour cream
Shredded romaine lettuce
Instructions
Let’s get started on crafting this masterpiece. As I dive into the preparation, I can already smell the vibrant flavors blending together. Let’s break this down into actionable steps.
Step 1: Prepare the Cilantro-Lime Rice
Begin by rinsing the white Jasmine rice in cold water until the water runs clear. This helps remove excess starch for fluffier rice.
In a medium pot, combine the rinsed rice, a bay leaf, 1 ½ cups of water, and ½ teaspoon of kosher salt. Bring to a boil over high heat.
Once boiling, reduce the heat to low, cover, and allow the rice to simmer for 15-20 minutes or until all the water is absorbed.
Remove from the heat, discard the bay leaf, and let it sit covered for another 5 minutes. Fluff with a fork and mix in 1 tablespoon of olive oil, lime zest, lime juice, lemon juice, and chopped cilantro. Set aside.
Step 2: Cook the Fajita Veggies
In a large skillet, heat 1 ½ tablespoons of avocado oil over medium heat. Add the sliced red onion and green bell pepper.
Cook for about 5-7 minutes, stirring occasionally, until the veggies become tender. Season with fresh oregano, kosher salt, cracked black pepper, and smoked paprika. Allow these to caramelize slightly, releasing all those wonderful flavors.
Step 3: Prepare the Protein
If you’re going for Sofritas, crumble firm tofu into the skillet with the fajita mix and cook for an additional 5-6 minutes.
If you prefer Mexican Black Beans, simply warm them in a pot or microwave until hot. You can use either or even a combination based on your preference.
Step 4: Assemble the Burrito
Once your rice, fajita veggies, and protein are ready, it’s time to assemble. Take a large flour tortilla and begin layering. Start with a generous scoop of cilantro-lime rice, followed by fajita veggies, and then your choice of protein.
Add toppings such as charred corn salsa, chopped cilantro, and a dollop of lazy guacamole.
Step 5: Roll it Up
To wrap the burrito, fold in the sides, then roll from the bottom up, tucking the fillings in tightly. Practice makes perfect! Once rolled, you can toast it in a hot skillet for a couple of minutes on each side, creating a crispy exterior.
Notes
Prep Ahead: You can prepare everything ahead of time and assemble when ready to serve.
Taste Adjustments: Always taste and adjust seasoning based on your preference. Don’t be shy with spices!
Heat Level: If you like a kick, add jalapeños or a hot salsa to your burrito.
Be Adventurous: Experiment with different veggies. Zucchini, mushrooms, or roasted peppers would work great.
Vegan Options: Ensure any sour cream or cheese is plant-based for a fully vegan experience.
1. Can I make the Qdoba Vegetarian Burrito gluten-free?
Absolutely! Simply substitute a gluten-free tortilla for the standard flour tortilla, and you’re good to go.
2. How can I spice things up?
For added heat, consider incorporating diced jalapeños into your fajita veggies or opting for a spicier salsa to drizzle on top.
3. Can I air fry the burrito?
Definitely! Preheat your air fryer to 375°F, place the assembled burrito inside, and cook for about 10-12 minutes until the tortilla is crispy.
4. What if I have leftovers?
Leftovers can be refrigerated for a good 2-3 days. Reheat it in a toaster oven or air fryer to maintain that crispy texture.
5. Is this dish kid-friendly?
Yes! The Qdoba Vegetarian Burrito is versatile, allowing you to tailor the fillings to suit picky eaters. You can substitute any ingredients based on your child’s preferences.
Conclusion
Crafting a Qdoba Vegetarian Burrito at home not only nourishes the body but also satisfies the soul. The bright flavors and textures create an explosion that I never tire of.
Whether you’re assembling burritos for a casual weekend meal or serving them at a gathering, they’re sure to be a hit.
Celebrating food is about simple joys, whether that’s through vibrant burritos or little moments shared around the table.
Embrace the adventure of cooking, find joy in experimenting with flavors, and enjoy the process. Happy cooking!
Before I dive deep into the delightful world of Qdoba chicken tacos, let’s talk about what goes well with them. Picture this: a chilled can of soda, or maybe a refreshing glass of iced tea. You can also add a side of tortilla chips with …